Categories
Geek / Technical

The Perils of the Sedentary Indie

A week before I fly to San Francisco for my first GDC, I visited my family back in Chicago for the weekend. My plan was to go back to Des Moines Sunday evening so I can spend the next week preparing for the conference.

It’s now Day 6 of that weekend due to a pulled back muscle, and I blame my niece.

More accurately, I blame myself for not taking care of my body better. I’ve been super focused on making progress on Stop That Hero! end game victory and defeat conditions, especially in the last few weeks. In terms of my health, though, I felt under the weather in the previous week, and sitting at my desk for many, many hours on end is punishing on your posture.

Driving for 7 hours to Chicago last Friday didn’t help.

Then I saw my niece, and while playing with her, I discovered that jumping up and down makes her giggle. If you have a niece, you know that her laugh is one of the best sounds in the world, and so you keep doing whatever it is that makes her laugh. So I kept jumping up and down for much longer than I’ve ever done in what is probably years.

And throughout the rest of that day, I went from feeling perfectly fine to feeling a light twinge in my back to being unable to move my arms, legs, and head easily.

I was in a lot of pain, and driving for another 7 hours was not going to happen until I could sit for longer than 5 minutes without feeling like I was being tortured.

The Difference Between Having a Job and Owning Your Business

Now, if I was still working at a Day Job, I’d most likely get paid time off, and here would be an excuse to actually take advantage of it! One of the benefits of a good job is that they pay you if you can’t work, bizarrely enough.

But since I’m an indie developer who isn’t finished creating his first game yet, let alone earning income from sales of said game, every day I’m unable to work equates to money lost. I’m burning through savings as it is, and the productivity hit from being sick or injured isn’t helpful.

When you’re sick, you feel miserable and unmotivated. Maybe you can do only half of a day’s work today? When you’re injured, it can either be no problem (I don’t need my ankle to type code), or it can be debilitating (if you’re in extreme pain when you lift your arm, you probably shouldn’t be mousing with it).

But either way, if you run your own business and are unable to be productive, it’s frustrating. It’s especially damaging if you don’t have an automatic selling system in place. Ideally, if I had games to sell, I could make money while I sleep, or while I’m on vacation, or even while I’m unable to work. Until then, it’s almost as if you are carrying the entire business on a tightrope, and you’re just trying to make it across to the other side before you fall. My savings are providing me with a safety net, but I’d rather the money go towards more productive uses.

While I haven’t been able to work on code this last week, I did take advantage of the downtime to catch up on an Internet business marketing audio course I’ve been meaning to finish. I brought my game development notebook with me, so I spent some time going through it and remembering how Stop That Hero! has progressed, as well as thinking about the future direction of the project.

In the end, I tried to make the most of my situation, so this last week wasn’t a total productivity loss, but it’s still frustrating that I couldn’t get back to work.

Taking Care of Your Indie Self

Days before I pulled my back muscle, I recall thinking, “Self, it’s been some time since you last did a good stretching session or even went for a walk. You should probably start getting your body moving again before you regret it.”

And I said, “Ok, Self, sure. I’ll get moving as soon as I finish working on the combat mechanics.”

There’s lots of excuses for not taking care of yourself. Gym memberships are too expensive to justify when you have no income. It’s too cold to go outside. Driving downtown to the excellent Des Moines skywalk system to walk indoors is too inconvenient. You woke up too late (again), blowing past your scheduled exercise time.

But in the end, they’re excuses, and eventually your body pays for your health debt.

If I was more strict about taking an hour every morning to do stretches and exercises, maybe my back muscles wouldn’t have been so shocked by all the sudden jumping and movement, and I wouldn’t have lost a week of productivity. Maybe if I didn’t care about feeling silly, I could have at least walked up and down the stairs within the building I live in.

And if nothing else, the mental clarity that exercise brings should be enough of an incentive if I insist on having workaholic tendencies.

Cliff Harris of Positech Games advocates archery as some fun physical exercise. David Michael, author of The Indie Game Development Survival Guide, lifts weights. A colleague of mine makes an effort to walk periodically throughout the week (and I should really take up his offer to join him once I recover).

Even with daily exercise, it might not be enough. Noel Llopis writes about his standing desk experiment and the news that sitting for prolonged periods of time can be deadly. I’ve been wanting a standing desk myself, if only for the change in posture.

How do you take care of your physical health as an indie game developer? How much of a priority do you give to exercise in your life?

Categories
Game Design Game Development Games Geek / Technical Linux Game Development

Stop That Hero! Is Apparently an RTS

At the end of the last progress update, I mentioned the realization that there could be a lot of code and logic in the player-facing parts of the game that aren’t part of the game. That is, when people talk about how complex the interface can be, they aren’t talking about particle physics, 3D culling, or fancy special effects. They’re talking about how the front end’s complexity can rival the back end’s.

And somehow I hadn’t realized it before. I knew that the interface should be separate from the game, but I didn’t know that the interface was responsible for more than merely displaying the game world and its objects. It’s a heavy-weight in its own right, handling menus, HUDs, and inputs that the simulation ultimately doesn’t even know is happening.

I used StarCraft‘s interface to illustrate the idea that the player interface is more than a mere window into the simulation. It can have complex logic that the game simulation doesn’t actually care about. As far as the simulation is concerned, it receives commands. Most of the actions you take in StarCraft do not result in commands to the simulation.

If you click on an SCV, and then click the Repair button, and then click a burning Bunker, the interface is responsible for figuring out what you’re trying to do. It isn’t until you click on that Bunker that the simulation receives a command along the lines of “SCV 1 REPAIR BUNKER 5”. Up until then, only the interface has to know you’re working with a particular SCV, what commands are available to an SCV in general, what buttons to display in the SCV menu, which SCV menu you’re looking at, etc.

Stop That Hero!’s interface

Now that I know that I can expect the interface to my game to be incredibly complex as opposed to a dumb and simple view, it actually made it much easier to realize how to proceed with my project. I don’t have to do everything within the simulation, and in fact, I can expect a huge part of the work to involve the player’s interface.

Stop That Hero!‘s interface isn’t like most games in that there is no avatar to control. You’re not directly moving an entity with the arrow keys or commanding it to jump with the spacebar. You simply create them at the appropriate towers in the world, and they’ll figure out where to go and what to do on their own.

But how do you create them at towers? The original prototype had a menu hardcoded at the top right of the screen. If you wanted to create a monster at a tower, you had to click the monster icon at the top right, then click on the tower. If you had enough resources, you summoned the monster you selected.

Stop That Hero! is finished

It was functional, but I didn’t like how it felt. Why is the selection of the monster to summon separate from the act of summoning? While it makes it easy to create a bunch of the same type of monster at once, it’s also easy to accidentally create a monster if you click on a tower without wanting to.

I wanted something more intuitive, and it turned out that pie menus are exactly what I want.

Except my GUI code is incredibly basic. I have menu screens and buttons, and everything assumes it is starting at the top left corner of the screen. In order to even simulate a pie menu, I needed a way to display menus at arbitrary locations, and it would help to be able to offset a menu from its center instead of the top left corner.

Which meant giving menus dimensions (how else can you know what the center is?) and having my IMGUI-ish system understand how to display and detect updates at arbitrary offsets.

In the end, after some research, questions, and determination, I do have this sequence working:

First, click on the tower you want to summon a monster at:
Summon Monster Menu: Step 1

The Monster Summoning Menu appears over that tower, which means it is right under your mouse cursor:
Summon Monster Menu: Step 2

Select the monster you want to summon by moving your mouse cursor to the appropriate icon. Right now, I only have a Slime, but others will be added later:
Summon Monster Menu: Step 3

Congratulations! You’ve summoned a Slime monster!
Summon Monster Menu: Step 4

Besides the infrastructure changes to support arbitrary menu placement, configuring the menu is easy, and each button fires off whatever event I want when it is clicked.

Tricky Aspects

One of the things I still need to figure out is what to do with a tower near the edges of the screen. Right now, the menu is always centered on a tower, which means clicking on a tower near the side of the map results in a menu with icons you can’t see. They’re being displayed off screen.

It’s not such a problem if I can display the menu outside of the screen the way a game like SimCity/Micropolis does, but since I’m not using Gtk to render the menus, they have to be rendered within the screen. I could add more screen real estate around the play area, but I’m trying to keep the game at a low resolution like 800×600 to accommodate players with older computers and netbooks. I could make the play area scroll, so even if you were at a corner of the map, it would be displayed in the center of the screen, but I want the players to see everything at once. I could reduce the play area so that I have a border to work with, but I’m not sure I like losing so much level data just because of the UI.

My best option if I want to keep the pie menu is to detect if the menu is being displayed offscreen and have it adjust automatically, but I’m not sure if the menu appearing away from where you expected it becomes too unintuitive, defeating the purpose. Otherwise, I might have to get rid of the pie menu altogether.

RTS development in a vacuum

In any case, I now have a player interface that I can easily change, but one thing I didn’t anticipate was how similar it is to a real-time strategy game’s interface. I didn’t really think of Stop That Hero! as an RTS, and yet I suppose Dungeon Keeper and Populous had RTS-like interfaces, too. Or, rather, the interface is composed of icons that let you influence the world.

I discovered that while FPS or platformer development articles and tips are a dime a dozen, RTS development seems to be something that everyone must reinvent themselves since there is a lack of information out there. I know of a couple of strategy game programming books that focus on DirectX, and either people found them lacking, or they focused heavily on DirectX as opposed to the game.

Even if there was a basic breakdown of every aspect of an RTS project, leaving the research of each item as an exercise for the reader, I’d find it more helpful than figuring out what those aspects might be as I stumble across them myself.

While most games probably have a hard-coded GUI baked into a game, some games are more expandable upon release. I remembered that Total Annihilation allows player-created units, and I figured that there had to be a way to provide access to the GUI so that new units can be created by the player in game. I checked out the game’s modding tools and discovered how it handled its GUI elements. I spent an entire day perusing technical references and modding tutorials, peaking at the game’s default data files, and generally immersing myself in the internals of the game. It is fascinating how GUI images are tied loosely with the name of the unit or command.

World of Warcraft isn’t an RTS, but its GUI is supposed to be highly configurable by players, and there are interesting references explaining how the XML ties in with Lua commands and functions within the game.

Looking at how other games do it with the limited access they provide is like trying to study a map by staring at the back side. It’s hard work, and I’m sometimes limited by the games I have access to for the most part, but it is sometimes the best guidance I can get when it comes to figuring out how to implement my own game.

Categories
Game Design Game Development Geek / Technical Linux Game Development

Stop That Hero!’s End of January Progress Update

Halfway through January I gave a progress update for Stop That Hero!, and in the two weeks since, I’ve accomplished a fair bit.

Recap

In the beginning of the month, I did work to create a command system, separated the game’s simulation from the rendering of it, and even added some game play related to the Hero conquering towers. There were other things accomplished, but they were slight changes compared to these major pieces.

Treasure Collection

Since then, one of the things I worked on was treasure collection. Items can be collected, which basically means running an arbitrary command. Since I don’t have much game play in, there isn’t much implemented in this regard. Right now, if the Hero comes across a treasure chest, it just disappears. Well, actually, it has its targetable component turned off so that the Hero ignores it, and it changes its renderable component so that it draws something other than the treasure chest sprite.

Why? Because I haven’t needed to delete game objects before, so there’s no way to do it. Also, I apparently never needed to hide sprites before, so there’s no way to do that, either. The “hacks” are functional for now, so I can move on to other things. I’ll come back to change these when I need to, and I may be surprised to find that I won’t need to. I already do enough unnecessary work as it is, so there is no need to add to my burden. B-)

Enemies

The next major thing I did was create a slime monster to chase after the hero. With the command system, it was as easy as creating a new command which populates the datastore with components that make up that monster. I simply took the CreateHero command, did some copy-and-paste magic, then modified its speed and the renderable component. Now I can create a slime as easily as a Hero!

Except I had no way to interact with the game yet. How did I test that the command worked? I changed the level loading code. Any treasure chests or towers defined in the level would create slimes instead. When I ran the level, the Hero had to find his way to the Castle past an entire army of slimes slowly approaching him like zombies!

Stop That Hero! - Slimes Everywhere!

Once I was satisfied that the new Slime would work within the game, I changed the level loading code back.

Front-end Architecture

The game simulation is well-defined and is easy to update. If I want to add a feature, it can be as simple as creating a new UpdateSystem, perhaps with associated components that entities can make use of.

As happy as I am with the internals of the game, I was getting frustrated with the user-facing parts. Getting from initialization to the menu to the level selection screen to the game session was poorly-defined and hard to change. I haven’t even provided a way to quit the game outside of clicking the application window’s X. When I wanted to work on providing menus for the player to click on in-game, I realized I had to do something about the front-end if I was going to make the UI work easier on me.

Here’s how my application’s architecture looked:

Old Game Architecture

As you can see, the game took up the lion’s share of the application. There was no concept of screen transitions or anything like that. You were either in a complex menu, or you were playing the game. I had no concept that a game application was anything other than a game.

I spent a few days figuring out the approach I should take. I didn’t realize that my game isn’t everything at first. It’s a tiny part of the full application. To flesh out that application, I settled on creating a state machine. I don’t know why I didn’t think to do it before. I’ve done it for Game in a Day back in 2005.

I spent a few days coding up an implementation of a state manager, and I spent a good chunk of my time at the Global Game Jam getting individual states implemented. My application is now run by a high level state machine, which looks close to what I designed on my white board.

Stop That Hero! state machine design

In fact, something like this has been scribbled down multiple times in notebooks and scrap pieces of paper every time I stopped to think about the high level, and it is only now that the state machine is actually implemented.

Also, note that there is one state I call “In-Game Session”. It’s in this state that the game runs. In terms of number of states, it only makes up about 10% of the application!

And additions and changes are easier now. If I wanted to add an Options screen, it would have been difficult to shoehorn it in my old architecture, but now I can simply create a new state. It’s kind of like programming tiny applications that work together.

Now the application’s front-end feels as good to work with as the game code, and since it makes adding and updating application states/modes so easy, I wish I had implemented the high level state machine in the first place.

User interaction

As great as all that rearchitecting is, I still didn’t have a way for the player to interact with the game simulation. Without interaction, it’s not a game.

So how do I add interaction?

Well, it’s the part that I don’t have working yet. Here’s how I approached it so far:

I have the game running as a LevelInstance, which has a collection of UpdateSystems and the database of game objects/components. I created a View that has a collection of RenderingSystems and access to the LeveInstance object.

I didn’t use Model-View-Controller because I didn’t feel it was a very good fit based on my understanding of how it would apply to a game.

If you’re familiar with MVC, the LevelInstance is the Model. So the V part of MVC is obvious, right? Not exactly.

My View is quite dumb. All it does is get information from the model and render it. The game simulation doesn’t care how it is being rendered, and in fact, I can have multiple views attached to a running game.

Ok, so far, so good. What about the Controller?

If you read about MVC, you don’t typically put business logic in the Controller. If I was making a game where you controlled an avatar with direction keys and a jump button, I think I could make things work fairly easily. The Controller would detect button presses and send commands to my game that make sense. For example, if I press the Spacebar, the Controller maps that to the Jump command, and the model knows that the player should jump, never caring that the Spacebar or another key was pressed.

But in Stop That Hero!, you’re not controlling an avatar directly. You are clicking UI elements. Here’s how I envision the player’s interface:

Stop That Hero! Pie Menu Demo

When the player clicks on a tower he/she controls, a pie menu appears around that tower. Each of the four items represent what monster can be created.

Here’s where I’ve been struggling.

If the View knows nothing but to render what’s in the model, and the Controller simply handles input and processes commands, who owns the in-game UI? Does the Model need to provide logic for the View to know what menus to display and how to display them? How does the knowledge that a mouse click (Controller) happened over a tower (View using Model data) get turned into a menu, and then who is in charge of that menu? These struggles were why I wasn’t happy with MVC as the way forward.

Until I had a discussion with Larry, that is. He is way more knowledgeable than I am when it comes to software architecture, and he pointed out that Web MVC is different from MVC.

In Web MVC, the View is simple and dumb.

In a regular MVC, however, the View might have so much logic and data that it rivals the complexity of the Model.

I’ve never thought about the View in this way before! And yet, it seems to make sense. Using StarCraft as an example, the actual game simulation is a complex RTS. Yet, there is a bunch of code to implement the interface that the simulation doesn’t ever care about.

For instance, if you’re playing as the Terran,what happens when you click on an SCV?
StarCraft SCV Unit

  • The SCV in question gets a little circle drawn around it to let you know what unit is selected.
  • The Status Display changes to reflect information about the SCV, such as health, armor strength, how many kills it has, etc.
  • The command buttons at the bottom right change to reflect actions the SCV can take.
  • The portrait changes to static before showing the face of the SCV’s driver.

StarCraft SCV

And until I had this discussion about heavy vs light Views, it never occurred to me that all of those things happen without the game simulation knowing.

If you tell the SCV to move to a specific location, the game cares. If you command the SCV to harvest minerals, the game cares. If you make an SCV repair a bunker, the game cares. Yet, all of the logic dealing with clicking on buttons and units is in the View. It’s only when the player actually does something that results in a command to a specific unit that the game model cares, and even then, it doesn’t know you clicked anything or hit a hotkey. It merely receives a command from somewhere saying “SCV 1 MOVE TO X, Y” or something like that.

Sometimes I struggle with knowing where code should live in my game’s architecture. With the restructuring of my application into a state machine and a good discussion about MVC, the way forward seems clearer. Stop That Hero!‘s player-facing code needs to be a lot more involved than I originally expected. While the game logic is where a lot of the simulation occurs, the interface has a lot of its own logic. It was logic that I knew needed to be implemented, but now I know where the code’s home is.

Categories
Game Design Game Development Geek / Technical

Global Game Jammin’

The theme is Extinction.

The keynote was given by Keita Takahashi, the creator of Katamari Damacy.

And the Jammers here in Ames, Iowa had some pizza to start our night.

Things got off to a late start, but people were throwing around ideas for the theme. Artists and programmers discussed projects, and soon people got to work.

Some people worked on their existing projects, while others dove head-first into the Jam. No matter what, it’s great to be in close proximity to other indie developers.

It’s the kind of experience where you don’t want to go to sleep just because you’re tired.

I took a two hour nap, and as I write this, I’m the only one awake now. It’s oddly peaceful to be jamming in a large room and seeing the sun brighten the sky through the windows.

I’ve found myself wishing I had more infrastructure code so I can get to making actual games faster, but it is especially frustrating during a timed competition. But there’s still 30+ hours to go. Time to make the most of it.

Categories
Game Design Game Development Geek / Technical

Participating in the Global Game Jam

Today I’ll be participating in my first Global Game Jam and meeting local indie game developers in person for the first time.

Assuming I have a network connection, I’ll be live-blogging the event. I’ll be at Game Jam Ames, hosted at the offices of Intuition Games.

I’ve participated in 24-hour and 48-hour game development competitions in the past, but they’ve always been solo events. The GGJ will be a chance for me meet and work with people I’ve only ever chatted with online. I think it is a great opportunity to make some connections and friendships with people I can actually talk shop with.

Unlike Ludum Dare, the Global Game Jam has a rolling start time. It means that last night New Zealand Jammers were already starting, and Europeans will have already been jamming for hours before we get to start here in Iowa this evening.

48-hours, working closely with other game developers, and generally having fun? Global Game Jam should be a blast.

Are you participating? Where will you be jamming?

Categories
Geek / Technical Personal Development

Measuring the Closure of Code

Michael Feathers recently wrote Measuring the Closure of Code, in which he described a way to use your version control history to measure how well your software conforms to the Open-Close Principle.

Summed up by its originator Bertrand Meyer, the Open-Close Principle says that code entities should be open for extension but closed for modification.

In practice, it means code that follows this principle shouldn’t need to be touched very often. If a change or added feature is needed, new code is written elsewhere.

For example, if you have code for a Car, and you later want to have a Solar-powered Car, you’d write new code related to the solar-powered-ness of the Car, but the old Car code shouldn’t need to change to accept a new power source. Interfaces are one way to make this possible. A Car can take an IEngine, and so long as the Solar-Powered Engine implements that interface, the Car code doesn’t need to change to accomodate it.

By and large, code that follows the Open-Close Principle is more modular, more cohesive, and less likely to change.

Feathers created a graph of a random open source project’s files and their relative number of changes. His analysis indicated that the high number of changes to a few files can indicate that there is some refactoring work to do.

So I decided to create my own chart for my current project Stop That Hero!. I used something similar to the following command in git:

git log --stat | grep "|" | awk '{print $1}' | sort | uniq -c| sort -n | awk '{print $1}'

and put the result in a spreadsheet in Google Docs. Out came this chart:

Measuring Closure of Code

At first blush, I’m pleased that the number of changes per file is pretty low. The huge spike on the right is my main.cpp file, and because I’m not loading data from config files, most configuration data is currently being recompiled in there. It looks like my code does fairly well in terms of the Open-Close Principle.

To be fair, my project isn’t very mature. According to sloccount, my entire project is 9,650 lines of C++ code. There are 5,420 lines of production code and 4,163 lines of test code. Some of the code was written before this project, so any churn in git would have happened in a previous project. It’s possible that things will look worse as the project continues.

Still, it looks like a lot of my code is written once and leveraged well; however, the code represented by the far right of the graph is definitely sensitive to change. Those files represent some large classes that experienced some redesign or tweaks almost every week.

I love it when I can get a good sense of some aspect of my project by compiling metrics! And that’s not all. As Feathers concludes:

Another thing that is nice about this view of code is that you can get a sense of what your payback will be for your refactoring. The area under the curve is the total number of commits for the project. If we inch backward from the right, we can calculate something like the 5% mark – the files which you are likely to touch in one out of every twenty modifications. This may not seem like much, but it is over the duration of a project, especially when you factor in the effort of continually trying to understand that code. I have no doubt that there is a decent formula that we can use to calculate the likely savings from refactoring based on the ratio of adds to modifications, and the commits in a code base.

Now, it’s easy for me to look at the chart, nod, and then go on with my day, but I like the idea that I can get some measurable payback for “closing” down more of the code represented by the right side of the chart.

I’d be curious to see how a really well-written piece of software measures up. Is the curve flatter? Are there very few steep climbs? Do changes clump in certain pieces of app-driving code which simply leverage all the other code in different configurations?

How does your code’s closure measurement look?

Categories
Game Development Games Geek / Technical Marketing/Business Personal Development

I’m Going to the GDC (FINALLY)!

I finally purchased a Game Developers Conference pass for the first time!

After years of having to hear about the conference and the summits and the talks and the panels and the awards and the parties after the fact, I am actually going to be a participant!

Now I’ll get to attend the Indie Games Festival!
Now I’ll be able to meet game developers and journalists in-person instead of merely through IRC, Twitter, or blogs!
Now I get to be snubbed by major game developers when they hear I’m an independent game developer!

There were always excuses not to go in the past, such as not being able to request enough time off from a day job or not having the money. And the cost for registering for the pass, booking a plane, and staying at a hotel for a week was a big obstacle.

And cost was still a major stumbling block for me. Until I can make some income on a regular basis, I’m trying to be very careful with how I spend my money.

So how did I justify the massive expense this time?

For one thing, I have a friend currently residing in San Francisco who said I can crash at his place. No need for a hotel now!

Now, the GDC pass was tricky. I could have saved a lot of money by getting an Expo pass, but I wouldn’t be able to participate the entire week. Getting an All Access pass was prohibitively expensive. I opted for the Summits & Tutorials Pass since it seemed to offer the right balance of access and cost. While I won’t be able to attend a number of events, I will be able to go to tutorials and the Independent Games Summit.

Still, it wasn’t chump change, and I still had to book a flight.

My decision to pay so much at this time was based on a few thoughts:

  • I can technically afford to go, and I might be too poor to go next year if my income level doesn’t change from $0.
  • I can finally meet people who are involved in the industry, whether peers or mentors. My involvement has almost always been virtual. At least in Chicago there was the IGDA chapter, but the local game developers tended to be inactive, and they seem to drop like flies.
  • I hear it is an experience.

So, bottom line, I’m going because it is a huge opportunity for me to be more involved in my industry and get to meet other participants.

I’m really excited. I’m actually going to be at GDC, and I’d love to meet you!

Who else is going to GDC?

Categories
Game Development Geek / Technical

State of the Art Game Objects

Years ago, I wrote about Component-based Game Design, in which I talked about the advantages of breaking down your game objects into components. Inspiration came from a number of places, including:

My Experience

Over four years ago, I even managed to implement a simple test program as part of my application for my last day job, and at the time I thought it was easy and fun to do. The hardest part was setting up all of the basic infrastructure to support registering components.

In four years, however, I never wrote code that resembled that test program.

Why not? Because it turned out that it wasn’t all that easy or fun, and I didn’t like the idea of making a full game with it because even a small test program was a bit painful to build up. My implementation of a board game was heavily based on Hannah’s concepts of States and Actions, so it might be a bit more complex than what is typically considered the state of the art. Actually, it’s probably more accurate to say that the implementation was based on my understanding of Hannah’s article, so I probably did things terribly wrong and made it more painful than it had to be.

Each Action typically interacted with multiple States, and so there was a lot of dynamic_cast calls. Practically speaking, adding a new State and its associated Action meant a lot more work than I would have liked. I might as well have stuck with the monolithic game object, and in the years following my original post on the topic, I pretty much did. Most of my projects were small in scope and had very specific designs that didn’t change much, and the code base was manageable enough that it wasn’t a problem when the designs did change.

The Motivation

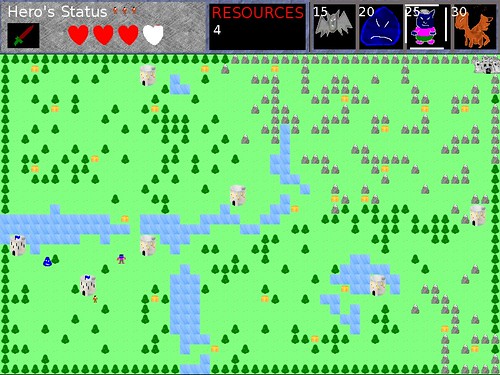
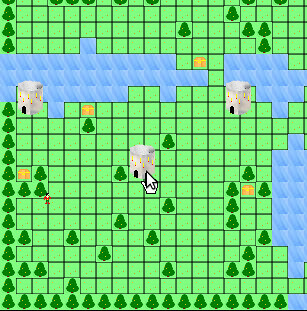
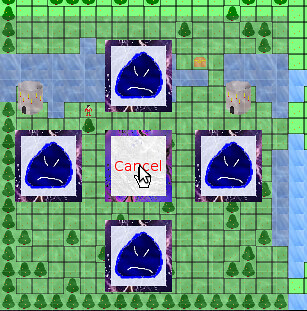
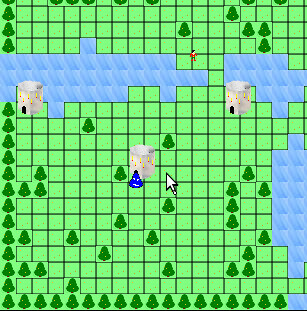
With Stop That Hero!, I wanted the flexibility to change the design of the game as it was being developed. That isn’t to say that I wanted the ability to make a first-person shooter halfway through the project, but I did want the option of experimenting with new monster types, different player actions, and objectives for a level. I want to be able to change the design of the game without requiring me to change the code drastically. I also wanted the ability to drive the game through the data, which would allow me to create custom scenarios and interesting game experiences, and it would allow players to create their own mods.

I already understood the basic concept of component-based game objects. Instead of monolithic, inheritance-based objects that are hard to change, objects should be identifiers with the components that make up an object being tied to that object identifier. If the design changes, the impact on the project might simply be the assigning or removing of components. For instance, I could have enemies that walk on land or fly in the air. I could introduce a new amphibious enemy by assigning it the ability to walk on land and create a new component related to swimming in water. The code involved is minimal and low-impact on the rest of the project.

What I didn’t understand was how to go about implementing a component-based game object system that wasn’t cumbersome and annoying to use. In my experience, having ready-made components was great for game design, but creating the components and the system to use them was a pain.

The Research

And so, once again, I find myself looking into component-based game design. I found quite a few more resources over the span of a few days as well as some that I have read in the last few years. I’ll quickly list them in case you’re interested in pursuing this topic yourself:

Terrance Cohen’s presentation led me to discover that Insomniac Games has a public-facing research and development page, which led me to his presentation Three Big Lies: Typical Design Failures in Game Programming, which introduced me to the concept of data-oriented design.

And from there, I realized I needed to clarify what it was that I was looking for.

I wanted to learn how to do data-driven, component-based game development in a relatively simple way. What I realized was that I was looking for three different things that had little to do with each other.

One, I wanted my game to be data-driven, which isn’t all that hard. So long as the game is pulling in data from somewhere and acting on that data, it’s data-driven. It’s possible to have the inheritance-based hierarchy of game objects and still run the game based on external data, and it’s possible to use that external data for component-based systems.

Two, I wanted my game design to be easy to change. A component-based system is superior to the inheritance-based one in this regard. With an inheritance-based system, any design change might impact the carefully-planned hierarchy. It can quickly be hard to manage, and changes become more and more painful. Components are easier to change. Add them or remove them, and an object’s behavior changes, and it works on the fly as well.

Three, I wanted to figure out how to write the code for such a system without the complexity I dealt with last time. Seriously, dynamic_cast everywhere a component needed to talk to another component made the creation of new components quite painful. There had to be a new way.

Data-driven games are much more powerful with a component-based system, but it’s outside of the scope of what I want to focus on here. What I was most interested in was the answer to the question “What is the best way for me to implement a game object in my game?”, and frankly, it wasn’t enough to know I wanted components aggregated together. I wanted to know how.

Which brings me back to data-oriented design. According to DOD, the only purpose of code is to transform data. That’s it. Traditionally, programming was focused on algorithms and code, modeling the problem in terms of classes and objects. The problem is that the models tend to add more complexity to the original problem of modifying data.

Now, data-oriented design isn’t the same thing as data-driven design. The former is about programming, while the latter is about game design. See Noel Llopis’ Data-Oriented Design (Or Why You Might Be Shooting Yourself in The Foot With OOP):

OOP is so ingrained in the current game development culture that it’s hard to think beyond objects when thinking about a game. After all, we’ve been creating classes representing vehicles, players, and state machines for many years. What are the alternatives? Procedural programming? Functional languages? Exotic programming languages?

Data-oriented design is a different way to approach program design that addresses all these problems. Procedural programming focuses on procedure calls as its main element, and OOP deals primarily with objects. Notice that the main focus of both approaches is code: plain procedures (or functions) in one case, and grouped code associated with some internal state in the other. Data-oriented design shifts the perspective of programming from objects to the data itself: The type of the data, how it is laid out in memory, and how it will be read and processed in the game.

One thing that wasn’t clear to me while doing all this research is that data-oriented design is not terribly compatible with object-oriented programming, and since most of us game developers know OOP as THE way to program, it’s difficult to see it any other way.

The thing is, it isn’t a normally a problem. OOP can still get you to a correct implementation, especially when performance isn’t your primary concern. The code will run the way it is expected. One of the major advantages touted by all of the data-oriented design articles I found was efficiency. As an indie game developer who doesn’t work on games that push the processor or memory requirements of my customers’ machines, I’m not usually worried about cache thrashing or performance issues. I’m not concerned about throughput on PS3 Cell processors or processing shaders quickly on the GPU. I’m not one of those people who thinks that processor speed is fast enough and memory is large enough for whatever horrible implementation I can come up with, but at the same time, I am not using the Crysis engine and gigabytes of data for my games. I don’t currently make games that take advantage of parallel processing and I most definitely wasn’t going to worry about the cost of calling virtual functions, so initially data-oriented design wasn’t very appealing.

But why I kept pursuing information on it was that it was supposed to be great for unit testing and modularity. Since I’m a big fan of unit tests, being able to write them more easily and with less dependencies would be a huge win. Being able to write simpler code would be another huge win because it can help in the creation of components.

So bottom line: data-oriented design looks like a fantastic way to help me develop a game object system. The code will be simpler and easier to test, and I get the extra benefits of having more efficient code! Nice!

Well, at least at a high level. I still need to figure out what it all means when I don’t have the benefit of an existing company’s proprietary engine. I figured that I needed to explore this data-oriented design thing a bit more.

EDIT: Here’s a talk by Andrew Kelley with practical ways to implement data-oriented design: Andrew Kelley – Practical DOD

The first three examples helped me understand how the actual code might be laid out, but it was that last one that really made me understand where OOP is causing problems. It focuses mainly on performance problems related to caching, but the idea of performing a bunch of unrelated actions on a single object at a time versus doing one action for lots of objects at once was really made clear, especially after seeing images 12 and 30-32.

The Frustration

Unless you’re one of the mainstream game developers who have used or implemented a component-based system as part of your job, it seems getting started is the hard part. Game development forums have a number of threads in which people are convinced of the benefits but don’t know how to get a system built.

The article in Game Programming Gems 5 by Bjarne Rene has sample code on the book’s CD, and the good news is that it is a complete solution, but it seems that the complexity of inter-component communication can be a problem. Plus, is it still relevant? It seems as if game developers have moved away from components that perform actions, at least according to what I’ve read.

I haven’t had a chance to look at Game Programming Gems 6, but apparently there is an article on game objects there as well, although it sounds like there is no example code so I’m not sure how hard it would be to follow. The blog T=Machine argues that there is a difference between Entity Systems and component-based systems. Fine, but your entity system is still aggregating components, so regardless of the differences, I need to know how to create a component system.

It seems that anytime there is code in any article or presentation, it’s incomplete or hard to follow. The article might say that you should use IDs and not create an actual object class, and yet the example code has a class. It might show a class deriving from some base that was never introduced or create a function signature without an explanation for why it is there. I almost wish the articles would unit test their way through their sample code just so I could follow along with the author’s intent. Also, it seems that there is no shortage of article series on the subject that never get finished. Some examples are MMO-specific, some are concerned about performance, and none seem straightforward. One article will suggest doing something that another says you shouldn’t do.

And so I felt like pulling my hair out when I sat down to try to implement my own system. At a high, conceptual level, it makes sense to me that an object is nothing but an ID, and it’s the components aggregated together that make up a game object. I understand that I should be able to create an object by creating components, associating them with the object ID, and adding those components to some manager. What was difficult was implementation, and part of the difficulty was about ownership of the data.

I had written an entity manager with a couple of components, only to throw it away after becoming frustrated with how limited it was. I apologize if you’ve read this far and were hoping for more insight into a component-based system. It was too much for me at this time, and I had to stop if I wanted to make progress on my game.

Ultimately, it seems that the component-based system isn’t going to happen, but I need to figure out how to make progress on the game itself. Somehow, in learning a lot more about components, entity systems, and data-oriented design, I feel frustrated and incompetent. Every time I want to write code, I have a dozen different alarms going off in my head warning me that what I want to do isn’t what this author suggests or is against what that author says. My existing code, which I was happy with before, is now feeling too constricting. Whenever I try to make progress, I feel like I have game developer’s block. I can’t see the next step, and even when I think I have, I don’t know how to start. It’s a bizarre feeling.

This post came off more whiny than I would have liked, but I’m not blaming anyone or feeling entitled. I’m just frustrated, and I’m trying to figure out why.

Categories
Game Design Game Development Geek / Technical

Stop That Hero! Sprite Rendering Questions

In the previous post, I reported that levels could be loaded and rendered. So why isn’t it drawing the towers and chests? The short answer is that I didn’t get to them yet, but in all seriousness, it took a little thinking before I could start.

In the original implementation, almost everything was done in a single file of code. The code to draw a tower was:

pHardwareLayer->renderSprite(towerSpriteName, m_towerLocations.at(towerIndex).first * TILE_WIDTH + WORLD_X_START, m_towerLocations.at(towerIndex).second * TILE_HEIGHT + WORLD_Y_START);

TILE_WIDTH and TILE_HEIGHT were each 16, since each tile was 16×16. WORLD_X_START was 0 since it started drawing from the left side of the screen, and WORLD_Y_START was 87 since the UI was drawn at the top.

So depending on which tower I was drawing, I would get the x and y world map offsets, then multiply them by the tile dimensions, and offset by the top left corner of where the world was being rendered.

Why can’t I do the same thing now? Because I didn’t want to hack out everything in one file. A tower is no longer represented by data strewn across different data structures in the game code. A tower is now its own class. A Tower class has these members:

Point m_position;
std::string m_sprite;
int m_type;
int m_status;

There are more variables associated with monster creation and ownership status, but these are the variables relevant to this post.

The Problem

To draw a Tower, I could use the sprite specified by the name in m_sprite and the coordinates in m_position. The problem is that m_position isn’t screen coordinates. It’s map coordinates.

No problem. I’ll change m_position so that it specifies the screen coordinates.

Except m_position is being used in pathfinding, and it is important that it represents a specific tile in the world.

No problem. I’ll just multiply m_position by the tile dimensions, just like in the original implementation.

Er, but, why should the Tower know anything about the tile dimensions? It should only know about towers. Maybe it knows how large it is in terms of tiles, but why should it know how large a tile is? It doesn’t need to, except when it renders a sprite.

No problem. I’ll provide a second Point variable called m_spritePosition which represents its screen coordinates.

That would probably work for stationary towers, but what happens when I need to render moving entities such as Slimes? Unless the on-screen position is mathematically tied to the entity’s position, I can see those two numbers diverging. I could update both pieces of data each time I update one, but what a pain that would be!

The Solution

Create a Sprite class to encapsulate all of it, and let the Sprite class worry about where to render.

Since towers are now encapsulated in their own class, it makes sense that the way I render them (and almost everything else in the game!) should be encapsulated somewhere. The Tower class no longer has its data members polluted with a bunch of members related to sprite drawing, and it doesn’t need to worry about what to do with that data, making its interface and internals a bit cleaner. Also, Sprite classes can be reused for other objects, such as monsters and treasure chests, in a standard way.

To handle the rendering of images, I created a SpriteImage class with the following members and commented explanation:

Point m_position; // The sprite's position
std::string m_imageName; // Name of the sprite in the sprite collection which stores this particular image.
Rectangle m_imageRect; // What rectangular area in that sprite that holds this particular image
IViewPort * m_viewPort; // Explanation to follow.

At first, this solution doesn’t seem to solve the major problem identified above. It looks like the last problem in that the tower’s position and the tower sprite’s position are stored in two different areas.

The trick is that a Sprite defaults to a 1 to 1 mapping between its position and the screen coordinates, but it’s possible to scale it between arbitrary mappings, too! The secret is in m_viewPort.

If a SpriteImage is given a view port, it will scale its position based on what the view port says the scale should be.

How is this useful? Imagine having an 800×600 screen resolution, and you wanted to render a UI button near the bottom right corner. You could make a SpriteImage of a button at position (700, 500), and it would probably work fine.

But then what if you change the screen resolution to 400×300? It’s possible that you’ll port your game to a mobile device with such a resolution. The button would render off of the viewable screen. You’d have to change the button location manually in order to see it at the bottom right corner again. This goes for every image in the game. It could be tedious and error-prone.

Alternatively, you could use a view port that knows the screen resolution is 800×600, and it could be configured to scale based on a percentage. Now, instead of placing a button at (700, 500), you’d set its position at (87.5%, 83.3%). Then, if the screen resolution changes, you simply change the view port, and any sprites associated with it would know the correct scale to use! It’s very powerful and easy to move elements of the screen by horizontal and vertical percentages.

That’s great for rendering sprites anywhere on the screen, but what about my example above? How does a Tower draw on an arbitrarily-sized and arbitrarily-positioned area of the screen, and how does it know where to do so if its position is based on tile position?

As I said, the view port can do arbitrary mappings. In my case, if the world is made up of 50 tiles x 33 tiles, and the area to render everything is 800×528, and it is offset from the top of the screen by (0,87), how would a sprite use this information? Offsetting is easy so I’ll address it first. Wherever a sprite ends up wanting to render itself after scaling, the view port will tell it to move down the screen 87 pixels. As I said before, I use this offset to give room for the UI at the top.

Scaling is almost exactly as it was at the top of the screen. Mapping 50 tiles to 800 pixels requires multiplying by 16, which is the size of each tile. Similarly, 33 maps to 528 with a factor of 16. So if a Tower is set at (50, 33), its going to render at the bottom of the viewable area, whereas a Tower at (25, 0) would be centered at the top just under the UI. Below is a quick example of how I load level data from tiny PNGs.

Level Data To World Map Rendering

If you click on the image above, you should be able to get a better idea. The level is described in the small PNG that consists of almost all green pixels and a single white pixel in the middle. When this level data gets loaded, what you see on the screen is a lot of grass tiles and a single tower where the white pixel corresponds. While the PNG is 50×33 pixels, the tower renders in the correct location on the 800×528 view port, even though the tower’s location is in terms of the 50×33 level.

And does it work for moving objects? Absolutely! Let’s say I have a Slime monster located at (2, 3) on the world map, which corresponds to (32, 48) on the screen. When a slime moves to the right, I can’t simply change its position to (3, 3). It would jump the entire width of a tile to get there! Slimes are slow. So why not move it in fractional increments? The scaling still works. A slime moved to (2.1, 3) would correspond with the sprite rendering at (33, 48), which is one pixel over. Technically, it would render at (33.6, 48), but fractional pixels don’t make sense, so for purposes of rendering, we can truncate or round it to the nearest integer.

Again, this view port mapping allows me to do spatial logic at an arbitrary level and not worry about the screen resolution. The only thing I would have to worry about is loading a set of sprites that make sense at lower and higher resolutions. Otherwise, sprites would either overlap or have space in between them. This functionality could also be used to render minimaps and allow zooming and panning.

I like this implementation because the sprites don’t need to have any special logic about what they represent. They just need to know what scale and offsets they’re being rendered at. The object that owns the towers knows where it wants them to go, so it can be in charge of the view port. Tower positions can still be used in pathfinding, and the sprites can still render correctly. The only tricky part might be knowing when I’m loading a sprite at the default scale of the screen resolution and when I’m loading one based on a view port’s scale. To render an image centered at the far right of an 800×600 screen, a sprite at (700, 300) makes sense, but it wouldn’t work if the scale settings assume that positions will be specified in percentages. It would be rendered far off to the right by 700 screen lengths! To specify it in percentages using pixels, (700/800, 300/600) would work.

Also, I’m really happy to have a higher-level sprite class. How did I survive so long without one?

Categories
Game Design Game Development Games Geek / Technical Linux Game Development Personal Development Post-mortem

LD18: Stop That Hero! Post-Mortem

Ludum Dare 18 was over a month ago. While I didn’t get the game finished in time for the main compo, the Ludum Dare Jam was running simultaneously and offered an extra day to let me finish and submit it.

Stop That Hero! was my most ambitious game yet. It was partially inspired by a book I was reading about artificial intelligence in games and what ended up becoming the winning theme: Enemies as Weapons. I liked the idea of a hero controlled by the computer while you sent enemies to try to stop him. My initial vision was more like Super Mario Bros. That is, the game was going to be a platformer with multiple levels, and you were going to send enemies such as Goombas and Koopa Troopas at the hero. I realized right away that learning how to implement a platformer was not going to be an efficient use of my time, especially since implementing new AI techniques was already going to be a challenge. So I switched from a “reverse Super Mario Bros.” to a “reverse Legend of Zelda” game. The hero would be trying to conquer your towers and ultimately your home castle, and you would use a variety of minions to kill him first.

What Went Right

  1. Early Prototyping Saved Time.

    More prototyping

    During the Ludum Dare #15, I was able to leverage my newly learned rapid prototyping knowledge to good effect, as I explain in the Mineral Miner post-mortem. Even though I had an idea of what I wanted to do before this latest competition started, I still spent some time fleshing it out on paper. Doing so helped me realize requirements I didn’t know I had, such as the need for AI visibility. I also got a feel for the game play, including how the player should spawn enemies and what they’ll do. Prototypes still work well!

  2. Simple Controls Forced Creativity. I wanted the player to do everything with the mouse for a few reasons. One, it would make the game more accessible and easier to play. Two, it would force me to make a simpler game. If the player can’t do too much, then there shouldn’t be a lot of complexity for me to implement. Since I knew that I was going to have enough difficulty implementing AI more advanced than any I’ve ever implemented before, I didn’t want to let the rest of the project’s scope get too large. With simple controls, I would have to figure out other ways to make the game compelling. While simple controls still left me with a lot of design choices and directions to go in, I was able to focus my efforts, and I think the game turned out much better for it.
  3. A Focus on Artificial Intelligence Was Smart. Right away, I knew that most of my time would be spent working on the AI. The game depended on it. I had just finished reading AI for Game Developers shortly before the compo started, and I realized that I never did so in all the time it was on my shelf! I learned some really cool and basic techniques, and I learned that sometimes simple AI tech is better than more complex AI tech. I was also glad I had Artificial Intelligence for Games, Second Edition to act as a more in-depth, up-to-date resource. Between these two books, I was able to create a decent bit of AI. My game’s AI needs related to behavior and pathfinding. Behavior was easily handled by a state machine, but the biggest dependency was on pathfinding. My implementation of A* was somewhat flawed from the start due to the fact that my AI agents didn’t necessarily have a single target at any given time and it was possible they didn’t see anything near them in the first place, but I was pleased with the results considered how much time I had to work within. Seeing a bunch of AI monsters moving about the screen on their own, avoiding each other, and otherwise looking like they had agendas of their own was a proud moment for me.
  4. Agile Planning Kept Me Focused and Aware of Priorities.

    Agile backlog First iteration

    Since I had a good sense of what the game was going to involve, I was able to plan quite a bit up front. It’s fairly common knowledge that the waterfall model doesn’t work in software development, but I wasn’t planning down to every detail. With Agile story cards, I knew what features to implement, but the implementation details were dealt with when I assigned a story card to myself. The problem with working alone is that no one is there to act as a check against my estimates for how difficult any particular story should be, but for the most part, things worked out well enough. I got two big benefits from using an Agile process to manage my project. One was that I always had a task in front of me. I never floundered, wondering what I should work on next, so my time in front of the computer was highly focused and productive. The other big benefit was knowing what features to focus on and what to cut as the deadline loomed. I originally wanted to have animations and special effects, but as the weekend went on, I knew these tasks weren’t nearly as important as getting working AI. Out they went, and I felt good about the decision.

What Went Wrong

  1. I Spent Too Much Time On The UI and Menus. I took time to prototype and come up with Agile story cards early in the process, but where I went wrong was not giving myself deadlines for those story cards. Ludum Dare was almost halfway through when I finally had an implementation of a window that I could close by clicking a menu item. Granted, clicking was an important aspect of the game, but I probably could have done so without worrying about how the menus would work.
  2. I Broke My Rule About Keeping the Art Simple. In past LDs, I realized that I would spend way too much time trying to create decent-looking art. Mineral Miner benefited from low-quality art because I was able to spend my time finishing it. For this LD, I thought keeping the graphics tiny would help, and it did, but I still found myself trying to draw a decent looking dragon when it wasn’t that important to make it look good. It simply had to be functional. Again, implementing AI was supposed to be my biggest challenge, but trying to create monsters that looked somewhat like what they were supposed to be was where I spent a lot of my time.
  3. I Missed the 48 Hour Deadline. Ludum Dare is normally a 48-hour competition, but LD 18 was a combination 48-hour compo and 72-hour game jam. I normally try to get a good night’s sleep, but I stayed up late this time around. While I was able to get a lot of work done, I found myself making mistakes and having difficulty keeping the code structure in my head. By the end of the second day, I was disappointed that I didn’t have a finished game, so I went to bed. That third day was when everything came together for me, but missing out on the 48-hour deadline meant that I missed out on feedback from other entrants. The compo has rated entries while the jam did not, so entering a compo game would guarantee some feedback in the form of ratings and comments. As I was only able to enter the Jam, my game was ignored by and large. This is the first time that the Jam format was tried for Ludum Dare, and next time there might be some changes to address these concerns, so hopefully entering a game in the Jam won’t feel like second-class LD.
  4. The Game’s Balance Is Off. On the last day of the Ludum Dare Jam, I found I had time to actually play the game. I tried to change values such as the Hero’s strength and speed and the amount of resources you obtain. I didn’t want the player to be able to create a dragon or two right away, so I lowered the starting resources, and then I didn’t want the dragons to come out soon after the game started, so I slowed down the resource increase. While I was able to make such a dominant strategy hard to do in the beginning of the game, it can still work well for the player so long as he/she has patience. Also, it had the side-effect of slowing down the pace of the game. You can only create a handful of minions in any game session, which isn’t nearly as fun as having an entire army swarming on the map. I would have liked more time to balance the game so that it was harder to pull off dominant strategies AND was fun to play.

What I Learned

  1. Simple AI Can Do Wonders! The AI in my game didn’t turn out nearly as complex as I originally thought it needed to be, but maybe it’s good that it didn’t. The AI boiled down to a few pathfinding algorithms and the selection of a target to move to, which isn’t very different from a game such as Pac-man. Once I fixed a number of bugs with the pathfinding, Stop That Hero! came alive. It really did feel like you were creating minions to do your bidding.
  2. Agile Project Planning Is Quick and Useful. Creating a prioritized requirements list and a schedule estimate helped me keep tabs on my progress throughout the weekend. I always knew what task to focus on, and I was able to change my plans when I realized that things were going too slowly for me to get it all done. I received advice that I should have deadlines for my tasks since a schedule doesn’t mean much without them, and I’m inclined to agree. With deadlines/milestones, I probably would have realized how slow my progress was earlier on.
  3. I Need Sleep. Working through the night and into the morning, I learned that my most productive spurts were soon after waking up and having breakfast. Otherwise, even if it felt like I was making progress, I was actually creating problems by inserting bugs and implementing badly thought-out designs. I was able to recover, but in general, I think getting regular sleep is still more beneficial to my project’s health (and my own!) than not.

As in previous Ludum Dare compos, I’ve found my biggest problem is deciding where to spend my time and for how long. Creating a simple menu infrastructure and twiddling with image editors to try to make good looking art took away time from implementing AI and fixing the game’s balance. Project management suffered since I didn’t give myself deadlines, but it did keep me focused. In the end, I had a complete game, with sound, and I’ve decided I liked this project so much that I’ll be updating it and polishing it up for PoV’s inspiring challenge to sell a game by the end of October.

For future projects, I’ll need to give myself milestone deadlines to ensure that I don’t spend too much time on tasks, and I’ll also need to make sure that any art assets I create are primarily functional. Alternatively, I need to dedicate the time to learn how to create quality art and how to use the Gimp.