In Habitually Living on Purpose, I mentioned how I am focusing on habits this year in an attempt to live according to my Life on Purpose statement: My Life on Purpose is a joyful life of freedom, continuous learning, encouraged and supported creativity, insatiable curiosity, and prolific creation, driven by passion and a desire for excellence, powered by a healthy body and soul.
Previous articles in this series include: “powered by a healthy body”, “continuous learning”, “insatiable curiosity”, “a joyful life of freedom”, and “encouraged and supported creativity”. Today’s post is about “prolific creation”.

In one of my favorite audiobooks, 100 Ways to Motivate Yourself by Steve Chandler, there’s a section about Anthony Burgess. At one point, he discovered he had a deadly brain tumor, and at the time, he had nothing to leave behind to his wife.
Burgess had never been a professional novelist in the past, but he always knew the potential was inside him to be a writer. So, for the purpose of leaving royalties behind for his wife, he put a piece of paper into a typewriter and began writing. He had no certainty that he would even be published, but he couldn’t think of anything else to do.
In that final year, he wrote a handful of novels. But then his cancer went into remission and never came back.
“In his long and full life as a novelist, he wrote more than 70 books, but without the death sentence from cancer, he may not have written at all.”
The Power of Creative Habits
Now, part of the point of that section is the idea of giving yourself a sense of urgency to get important things done, but I liked the idea that Burgess was so prolific once he got started.
In an interview with John Cullinan of The Paris Review, he explained how he could be: “I’ve always written with great care and even some slowness. I’ve just put in rather more hours a day at the task than some writers seem able to.”
It makes sense that to be a prolific creator, you need to put in a lot of time creating. Burgess mentions that he does a lot of his work in the afternoon. Other writers have different habits, such as writing for an hour each morning, or writing until at least 500 words have been placed onto the page, or writing from 9AM to 1PM. Stephen King writes 10 pages a day without fail, for instance. Every prolific writer has his/her own set of habits, but the commonality is that they have habits.
When I first started my blog, I had a goal of publishing at least three posts a week: Monday, Wednesday, and Friday. I wasn’t always successful, but there were good periods of time when my blog had regular new updates. Oddly enough, this was during a time when I was working a full-time job and trying to do game development on the side.
When I went full-time, I was able to dedicate a lot more of my time to game development, and so I didn’t publish blog posts nearly as often. I was less focused on updating three times a week, especially because I was so focused on my work. I didn’t spend a lot of time finding interesting, relevant links to write about.
In my various attempts at creating a schedule for myself, I have tried to set aside time to writing. Currently, I have a writing hour on Wednesday, Thursday, and Friday. I used to have it daily, but I decided to use those Monday and Tuesday hours for organizing.
Getting Out of a Routine
The trick has been to follow the schedule. By default, the schedule is followed, but when other priorities come up, I allow them to take over my day. The problem I’ve had recently is that I haven’t gotten back to the regularly scheduled program. For instance, when I was about to get married and go on a honeymoon, I had a large number of tasks I wanted to complete. I had articles to write for ASPects. I wanted to send out a newsletter to my Stop That Hero! customers and to GBGames Insider Info subscribers. I wanted to write a few blog posts, especially those in this Life on Purpose series that I started in May. I wanted to have the next version of my game out the door.
And in the end, I got a lot less done than I intended. There was just too much to do. I was spending quite a bit of my time working on the marketing for ISVCon, and while I wrote for ASPects, it felt a lot more rushed than I would have liked, which probably impacted the quality of my output. But I had a wedding to prepare for.
During that time, I didn’t work on Stop That Hero! except at the very beginning of the month. Getting back from my honeymoon, I had more conference preparations, and so I didn’t do any game development during June. If this game project was a novel, I’d be the exact opposite of someone like Stephen King.
And I should also add that when I started working full-time, my expectation would be that I’d have a few games published at the end of a year. My first project was for the MiniLD I hosted in 2010, which I completed late and never published. Then Ludum Dare #18 started, and I submitted “Stop That Hero!” for the LD Jam by the end of the third day.
And then I started working on a full, commercial version of the game in October 2010, and I’ve been working on it ever since, even though I never intended to work on a multi-year project when I started. The only other game I’ve worked on is for Ludum Dare #20, Hot Potato, and the only real positive I can say about that one was that it was finished by the deadline.
This isn’t being prolific.
Getting Back Into a Routine
So what habits can I adopt to become more prolific?
I could start by following my schedule more strictly. Sometimes that means saying no to new commitments or requests for my time, something I’ve been very bad about protecting recently.
That means writing at a set time each day, according to my schedule. It means not allowing other tasks to take up that time scheduled. I can set everything else aside and write for that hour.
When it comes to game development, one thing I’ve found really helpful is using a timer to block out chunks of time for me to work within. I set the timer for 45 minutes, work on game development until the timer goes off, then take a break for a few minutes before repeating. I’ve tried with 25 minutes, ala the Pomodoro Technique, but I found that the first 20 minutes is sometimes needed for me to figure out what I want to do in the first place, so using 45 minutes means I have more time to implement the solution I’ve figured out.
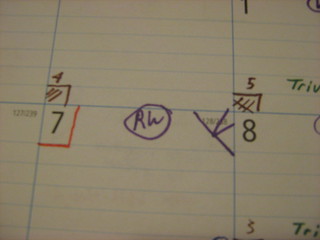
I keep track of each 45 minute session and mark it on my calendar for the day. I’ve found that doing more than four sessions is starting to push it, even though it only adds up to a total of three hours. Andy Schatz claims he works about 60 hours a week, although I don’t recall if he said it was all game development or if it included marketing efforts as well.
Whether I’m working all day or only for a few hours, the point is that I have a daily game development habit.
Finishing versus Doing
Does prolific creation imply finishing? There’s a lot out there about the writing habits of novelists, but not a lot about how they translate that writing into finished, published works.
Writing a blog post is relatively easy, since they are usually quite short, and publishing is even easier.
But I would count writing in my journal as part of my writing time, and it isn’t a public medium at all. Still, I could say that my journal entries are complete and whole.
Finishing “Stop That Hero!” is a lot of work, but I’ve clearly demonstrated to myself that dedicating a lot of game development sessions doesn’t necessarily translate into a finished product. I can make progress, but towards what? It’s easy to lose sight of the core of the game, what’s really important to the game play, especially from the customer’s perspective. It’s especially easy to get busy without actually doing work that adds real value.
I’m willing to bet that Stephen King doesn’t write 10 random pages of words that eventually fall into a bunch of different novels. He’s probably writing 10 pages of his current novel, and every 10 pages of work translates into understanding what he’s writing about and how to best put it all together.
Creating prolifically implies completion. Finishing is an important skill that needs to be developed as much as any skill involved in the act of creation.
So while the doing is important, it definitely helps to have a goal for that doing. A good quote: “What does done look like?”