Categories
Game Design Game Development Geek / Technical

Freshly Squeezed Progress Report: Finally Rendering Floors and Ceilings

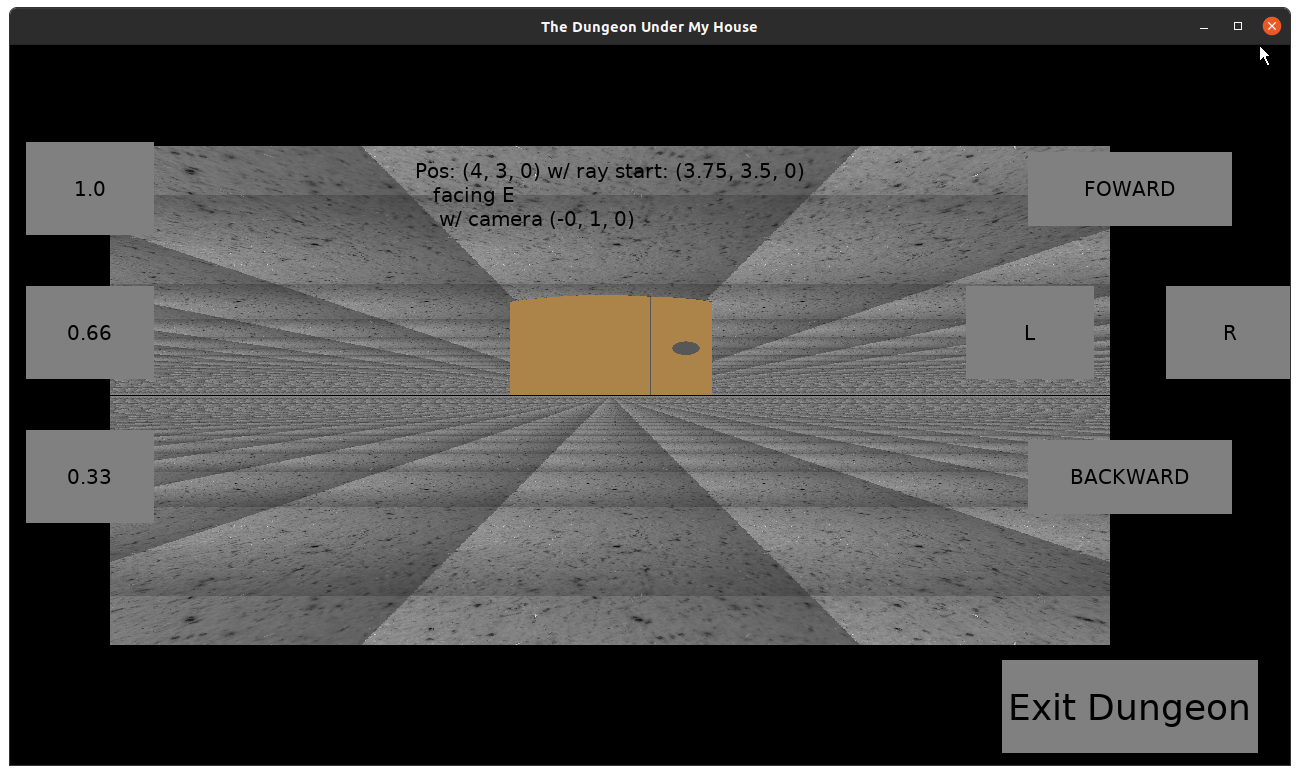
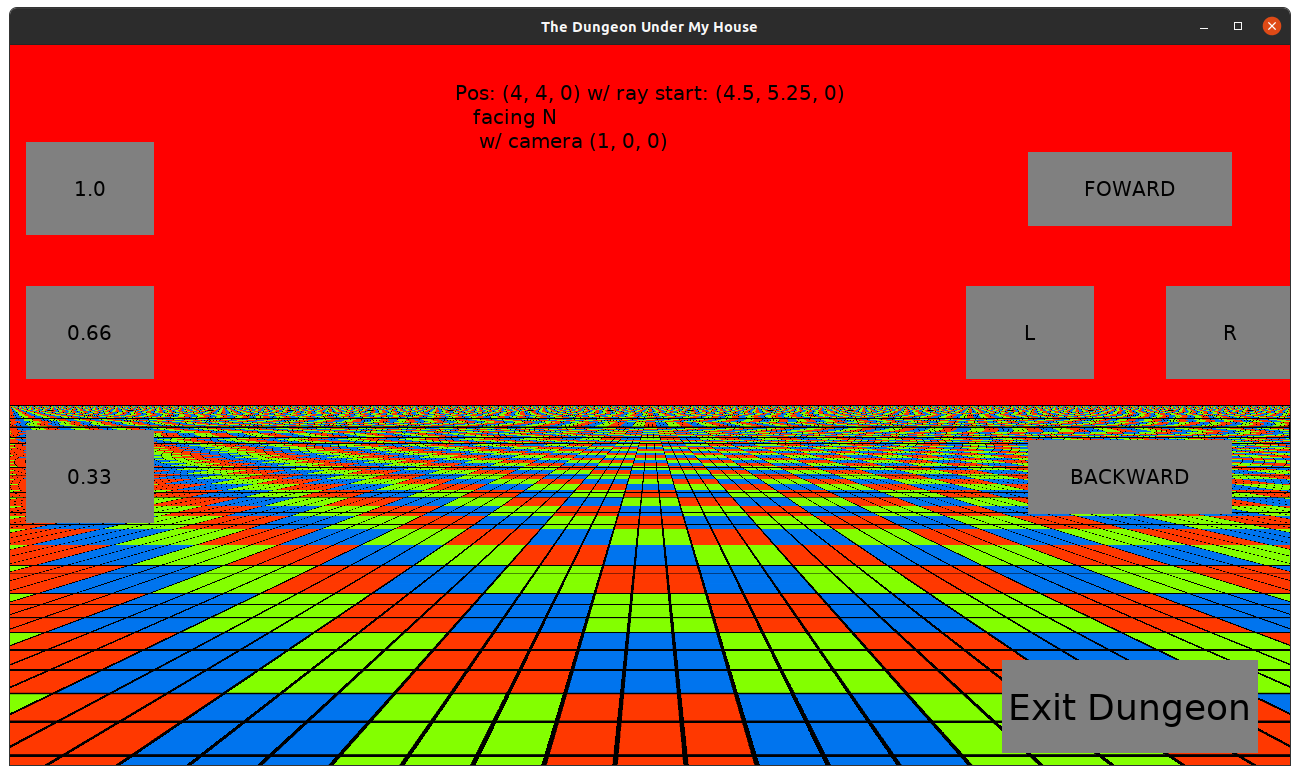
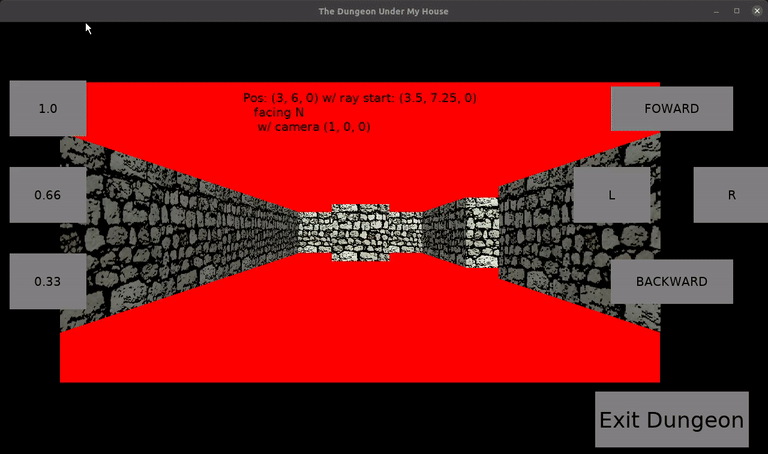
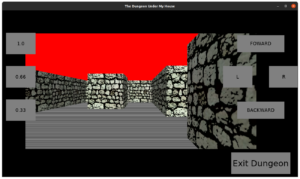
In my previous report, I had started working on raycasting the floor.

Sprints 15 & 16: Pre-production and initialization

Planned and complete:

  • Move player in dungeon view

Unplanned and complete:

  • Walls block movement

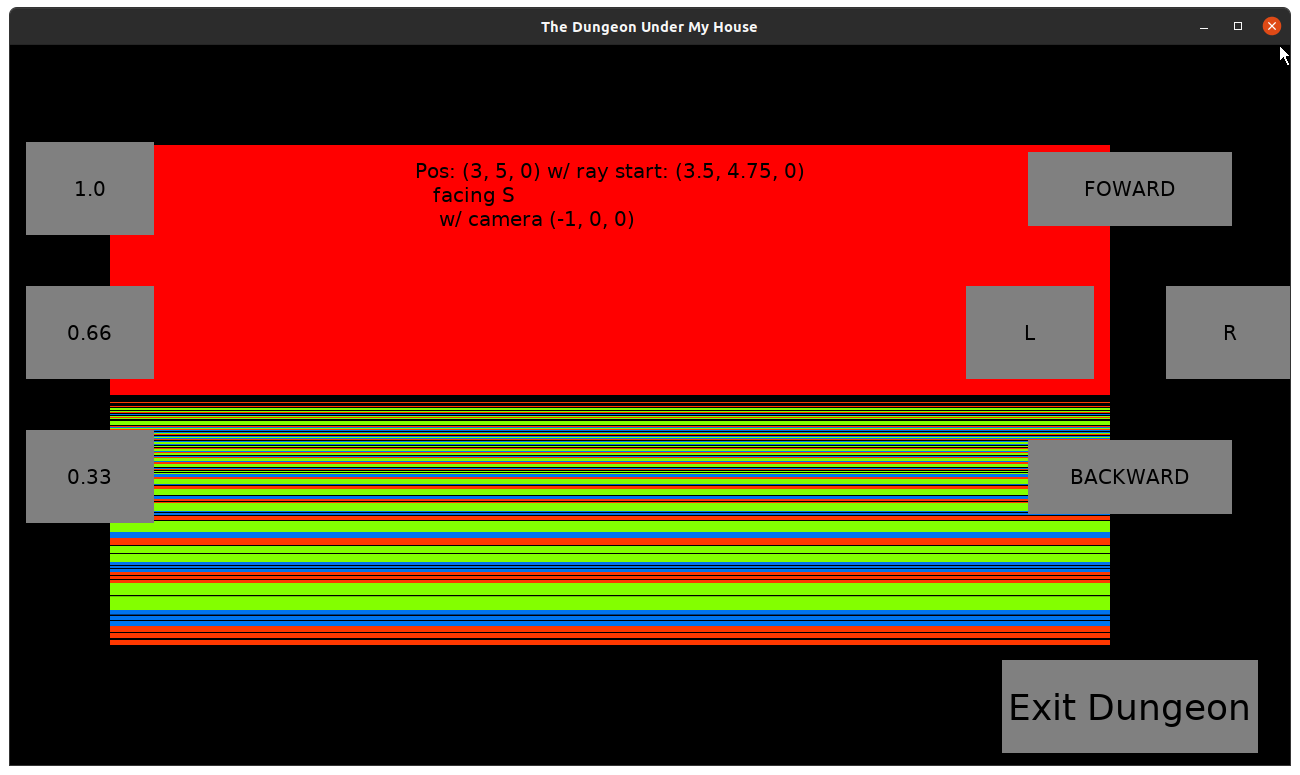
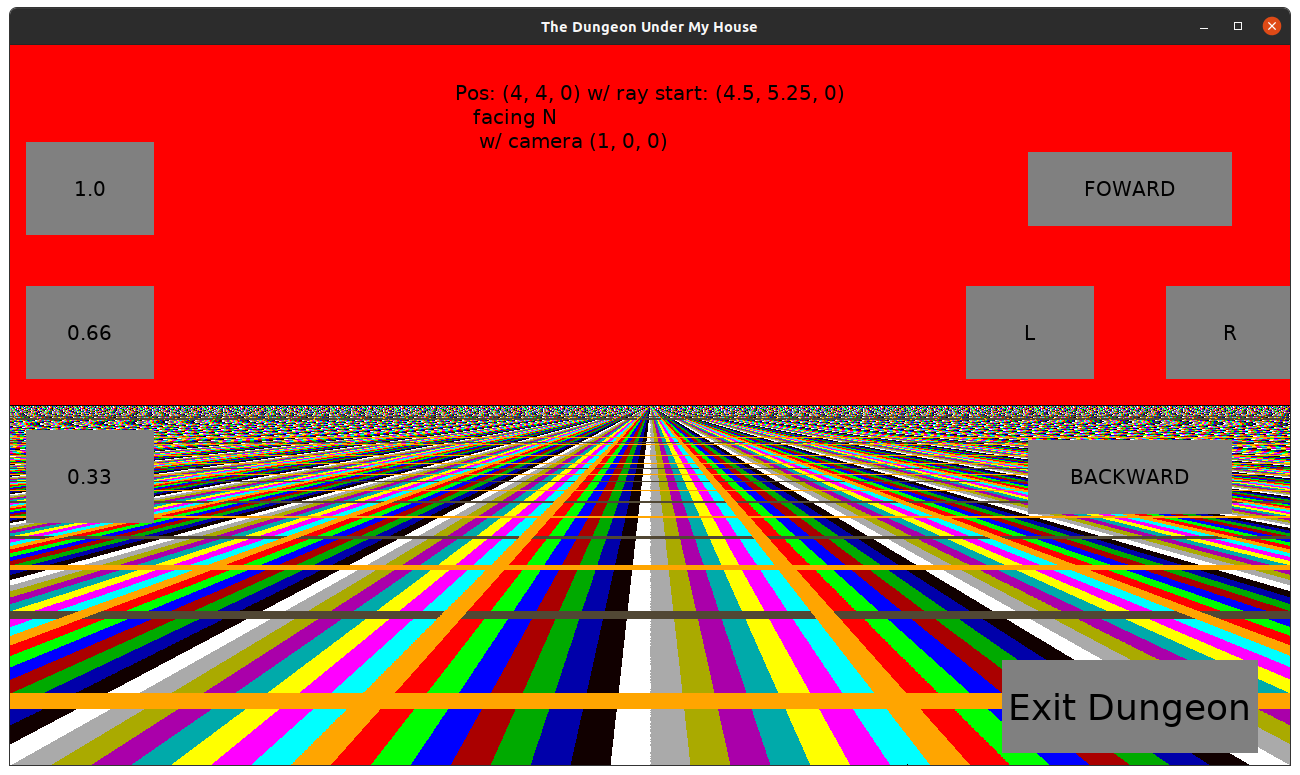
I was out of town last week and so I didn’t have a report for last Monday, but it would have just been me saying that I was running into trouble rendering floors correctly.

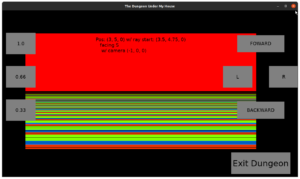
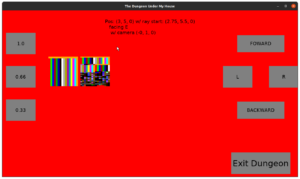
I was surprised because I was combing through my rendering code backwards and forwards, but I couldn’t find anything wrong, yet clearly something was wrong since the floors kept showing up as horizontal lines.

The Dungeon Under My House - in-dungeon floor rendering with horizontal lines

The Dungeon Under My House - in-dungeon floor rendering with horizontal lines

Basically, I suspected three things could potentially be wrong:

  • I was calculating the location of the source pixels incorrectly
  • I was putting the color of the source into the wrong target pixel buffer
  • I was updating the target image with the buffer incorrectly

I spent a lot of time looking at how SDL_Surface and its pixel formats could work.

I did find out that my source image was somehow the only one of my images that was loading as RGB and not RGBA, so I fixed that, and I found out that my original texture was not a perfect square of 1024×1024, so I fixed that, too.

I made sure that the pixel formats between the source and target textures were the same.

I tried to experiment with the pitch values to see when and if I should use them.

I tried to figure out if I was using the wrong byte size, or using the wrong values as an index through my pixel buffer when it should represent the bytes.

At the suggestion of the fantastically helpful Joel Davis, I tried smaller test images that were easier to work with. So instead of a 1024×1024 image that I was trying to map to the bottom half of my rendering target, I used a 16×16 test image and tried to map it to a different 16×16 target, then a 32×32 target.

The Dungeon Under My House - trying to copy pixels from a test image to an arbitrary image

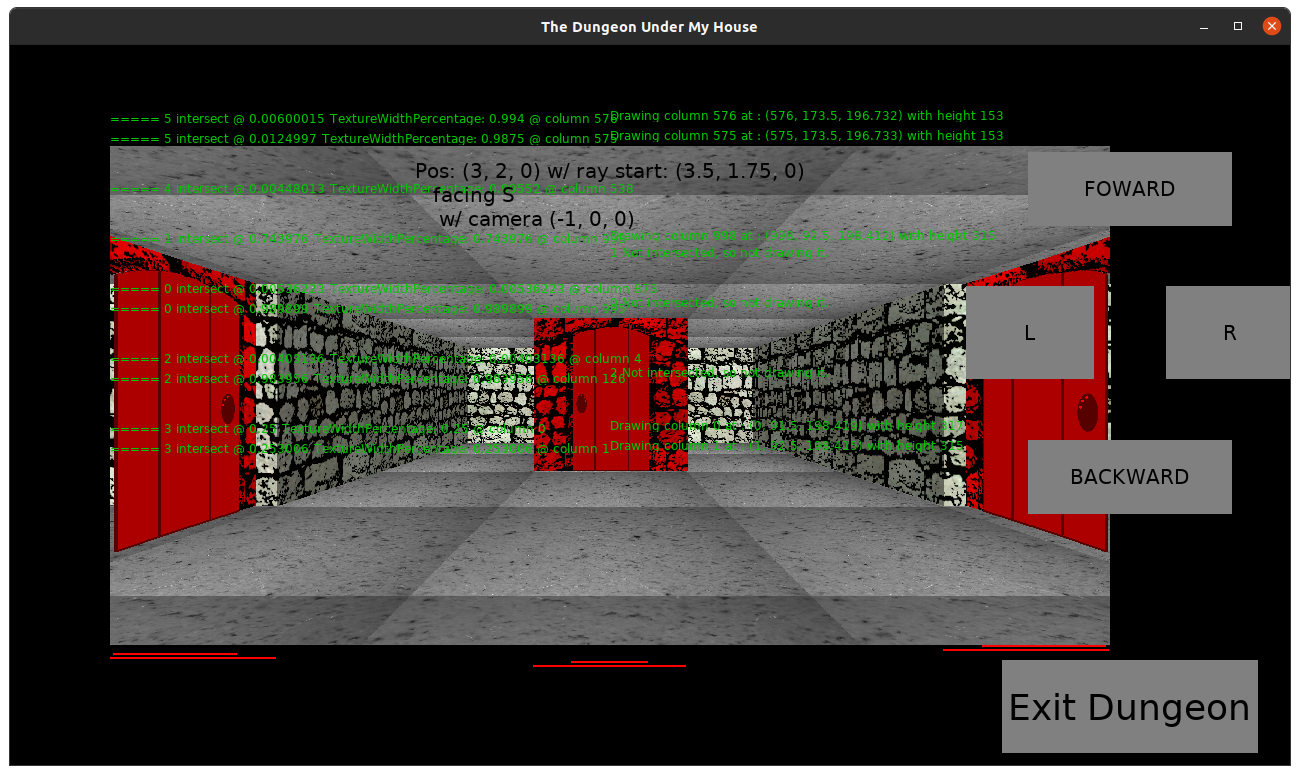
So after a bunch of experiments and tests, I was able to determine that the code that updates my texture’s pixel buffer using the texture’s pitch is most likely fine.

And I was able to determine that my target pixel calculations were straightforward and easy. For a pixel buffer that is a one-dimensional array, the current target pixel index = current row * width of target + current column.

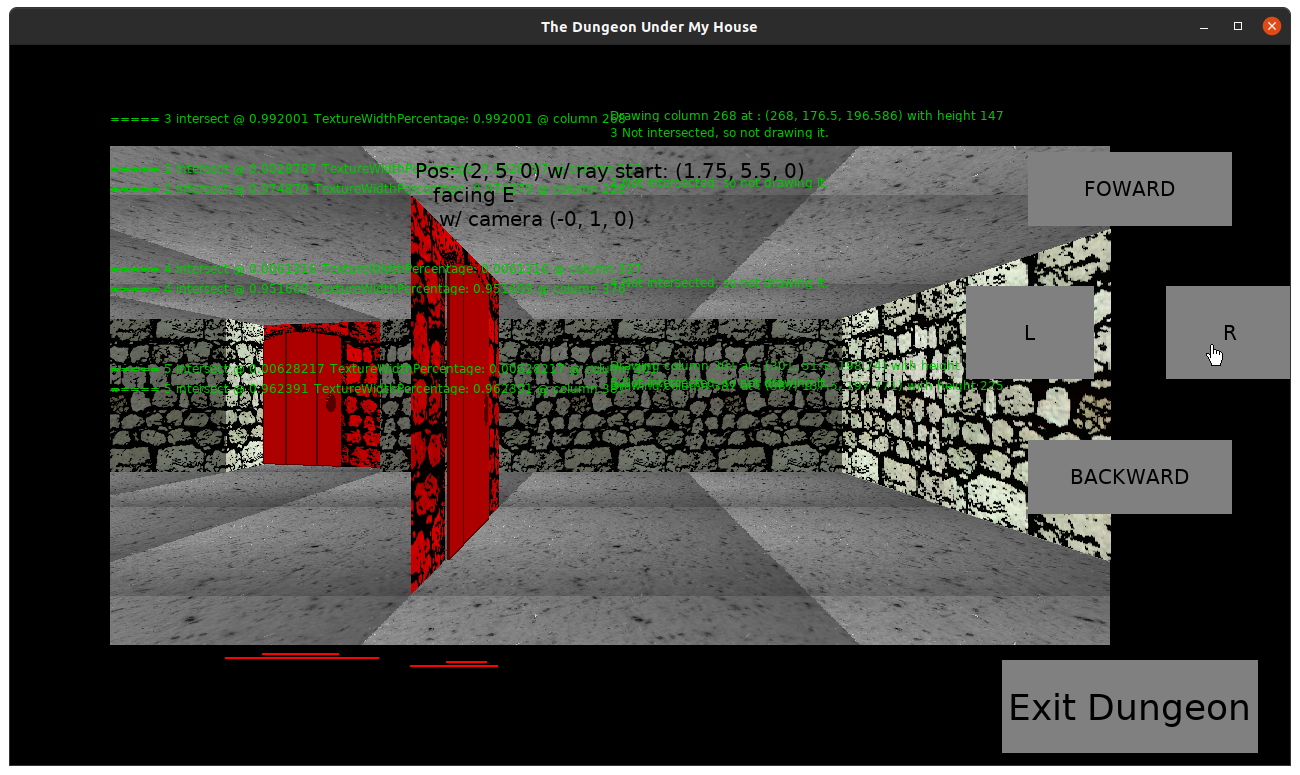
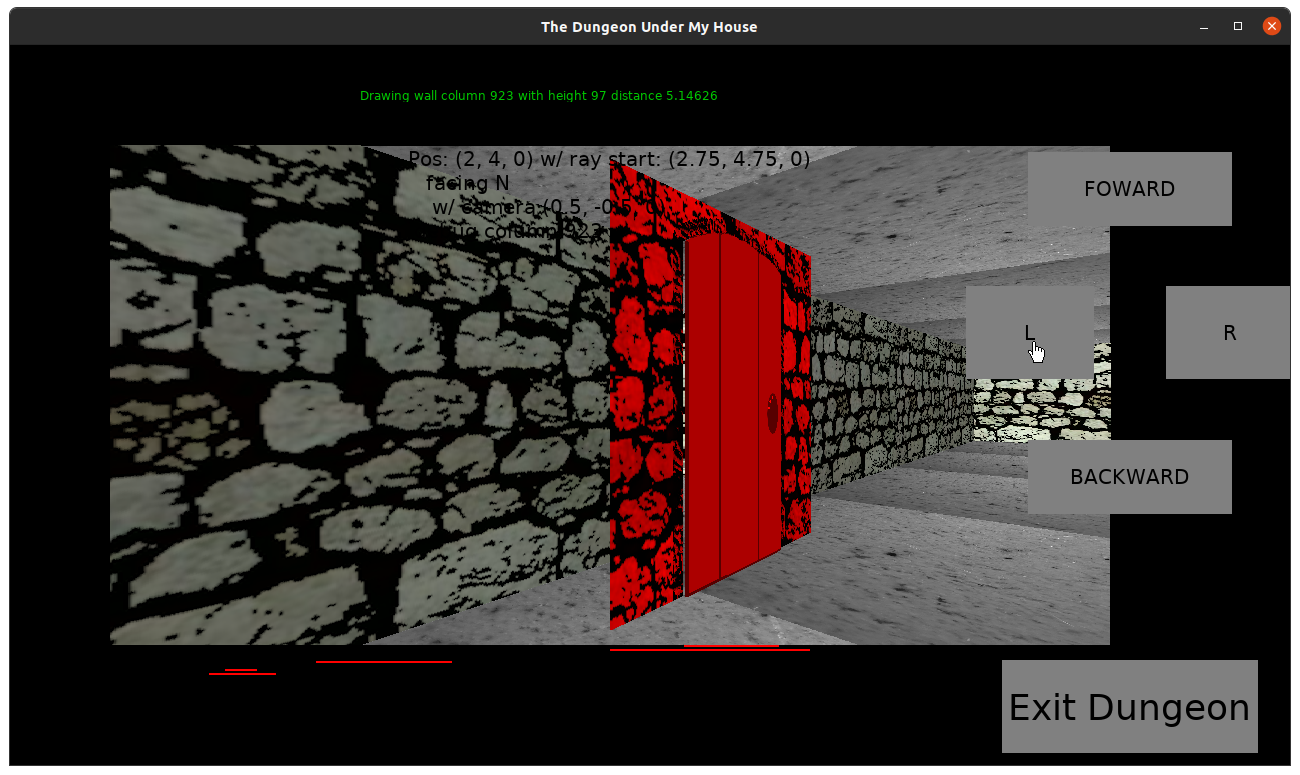
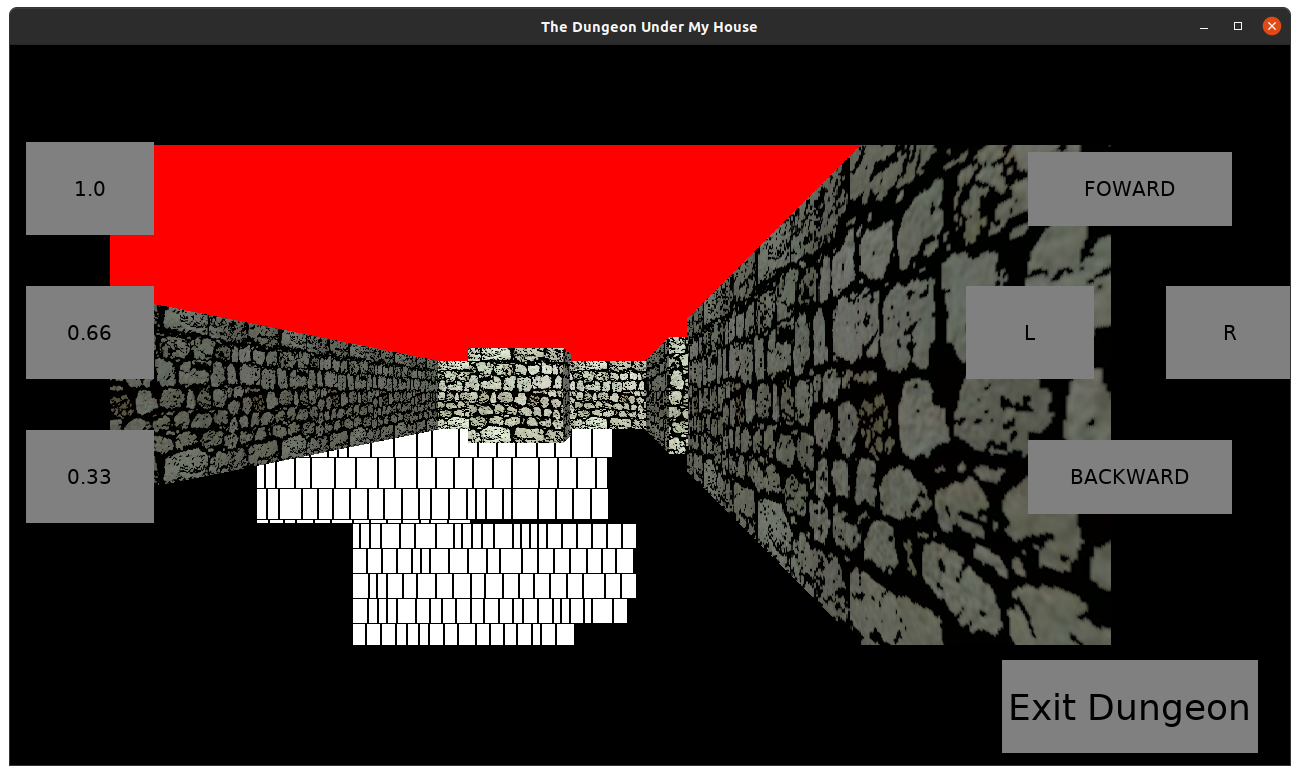
But I was seeing strangeness with my calculated source pixel index. It looked like only a subset of the source pixels were being checked.

And after rechecking and rechecking my rendering code, I found a line that wasn’t doing anything.

See, I recently changed a very basic data structure in my code base so that it was easier to work with.

GBLib::Point is represented as three floating point values: x, y, and z.

And if I wanted to make a new point that represented an offset of an existing point, I used to have to do something like this:

Point newPoint(oldPoint);
newPoint.moveBy(x, y, z);

Early in this project, I decided to finally change Point so that it worked more like this:

Point newPoint = oldPoint.moveBy(x, y, z);

So oldPoint stays the same, and moveBy() returns a new Point object with the values.

Joel Davis says that it is a confusing name, and I think I agree, because I completely missed a line of code that was doing nothing:

theFloor.moveBy(floorStep);

Basically, theFloor represented which part of the floor a ray was hitting, and this line was supposed to change it so that each column pointed at a different part. But it was not changing things at all, which explains why I was always getting horizontal lines rendered.

The code should have been:

theFloor = theFloor.moveBy(floorStep);

The Dungeon Under My House - in-dungeon floor rendering

The Dungeon Under My House - in-dungeon floor rendering

The Dungeon Under My House - in-dungeon floor rendering

The Dungeon Under My House - in-dungeon floor rendering

After banging my head against this for so long, I was worried I was going to need to give up on this raycasting experiment and either switch to a true 3D engine (and probably use Godot instead of trying to write my own from scratch) or give up on a 1st-person perspective altogether.

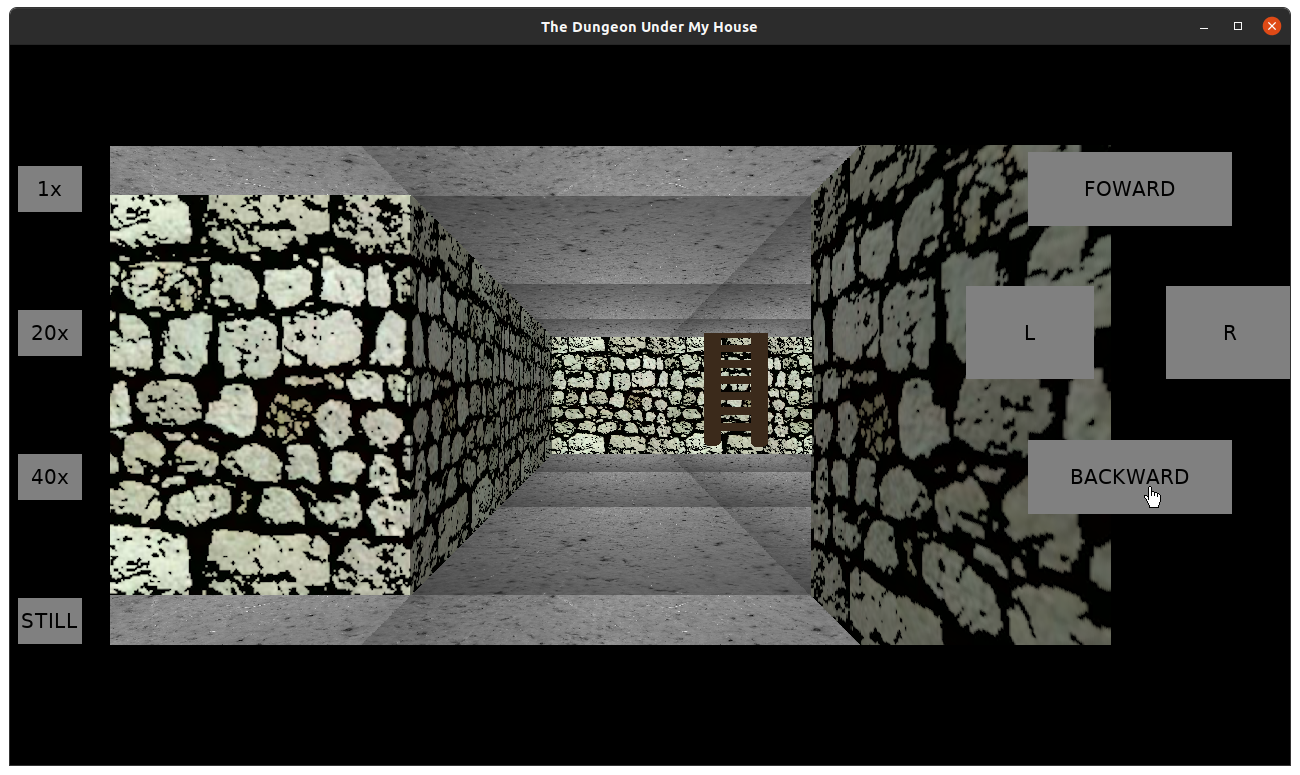
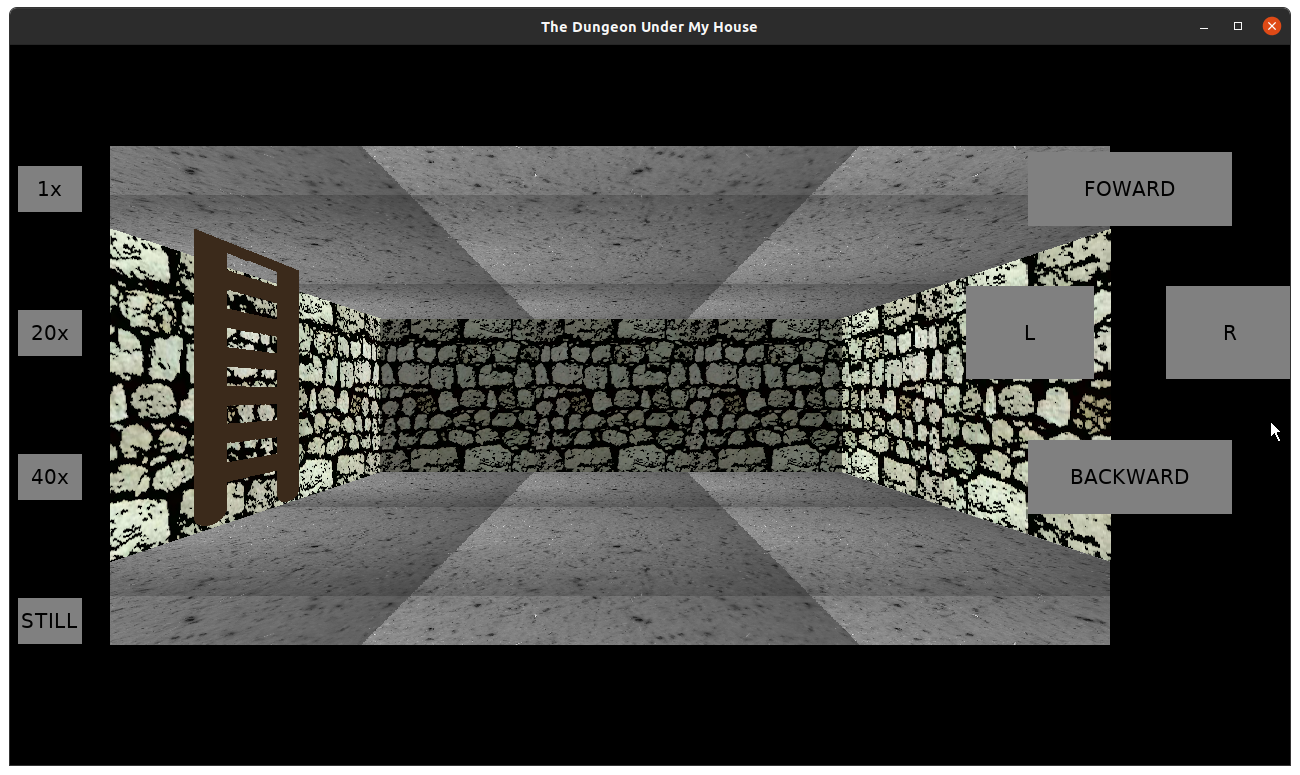
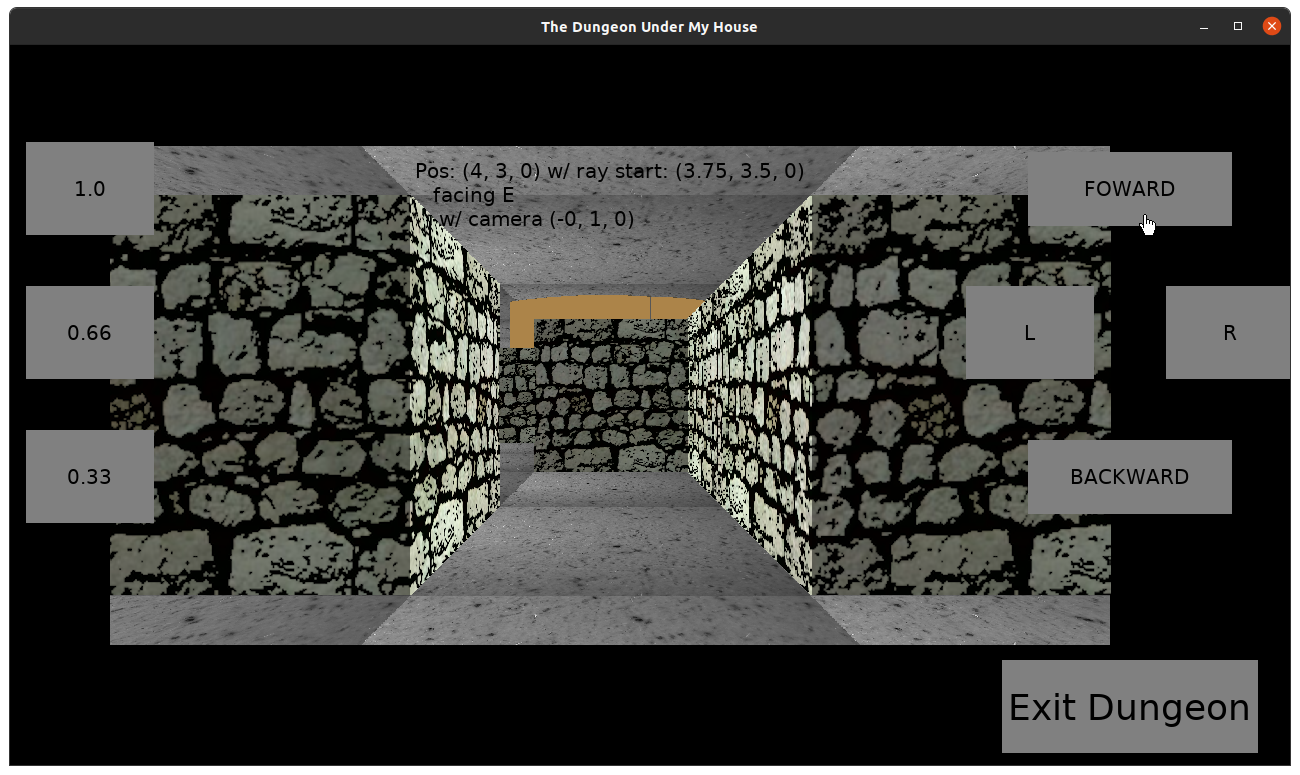
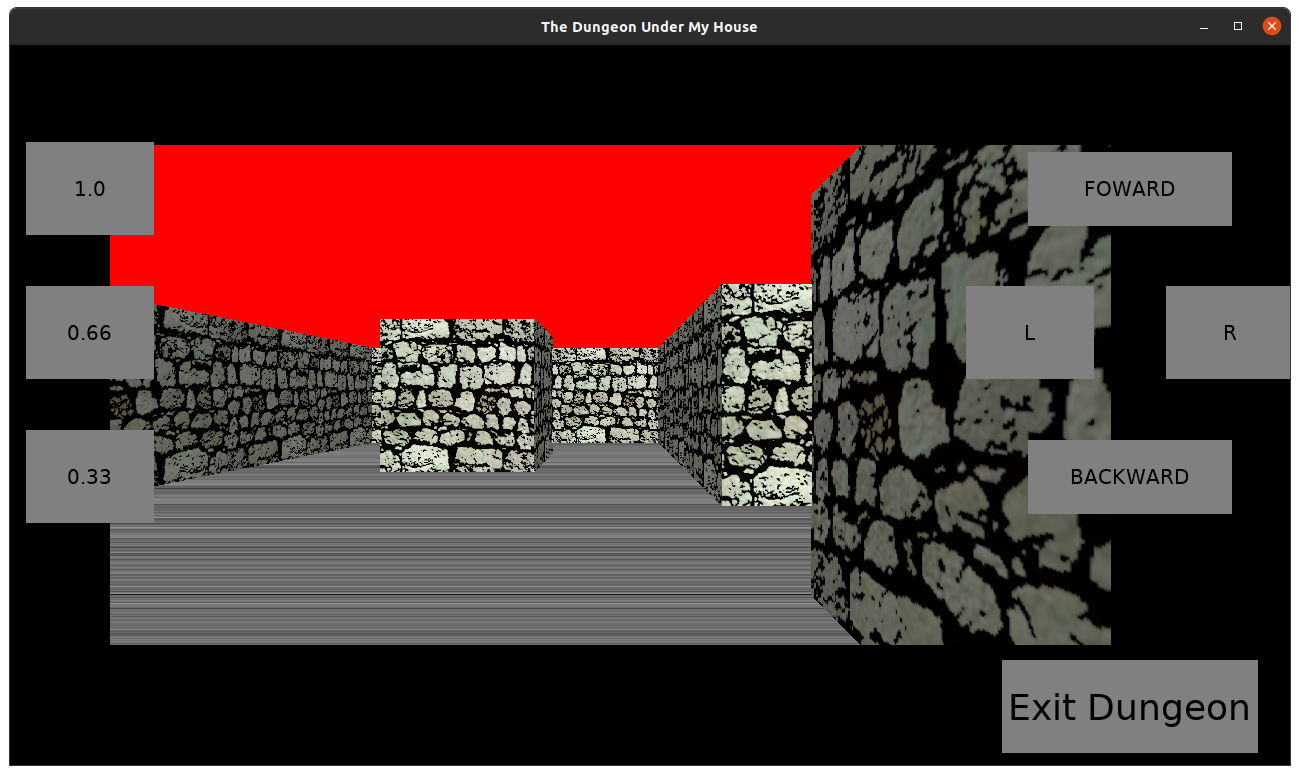
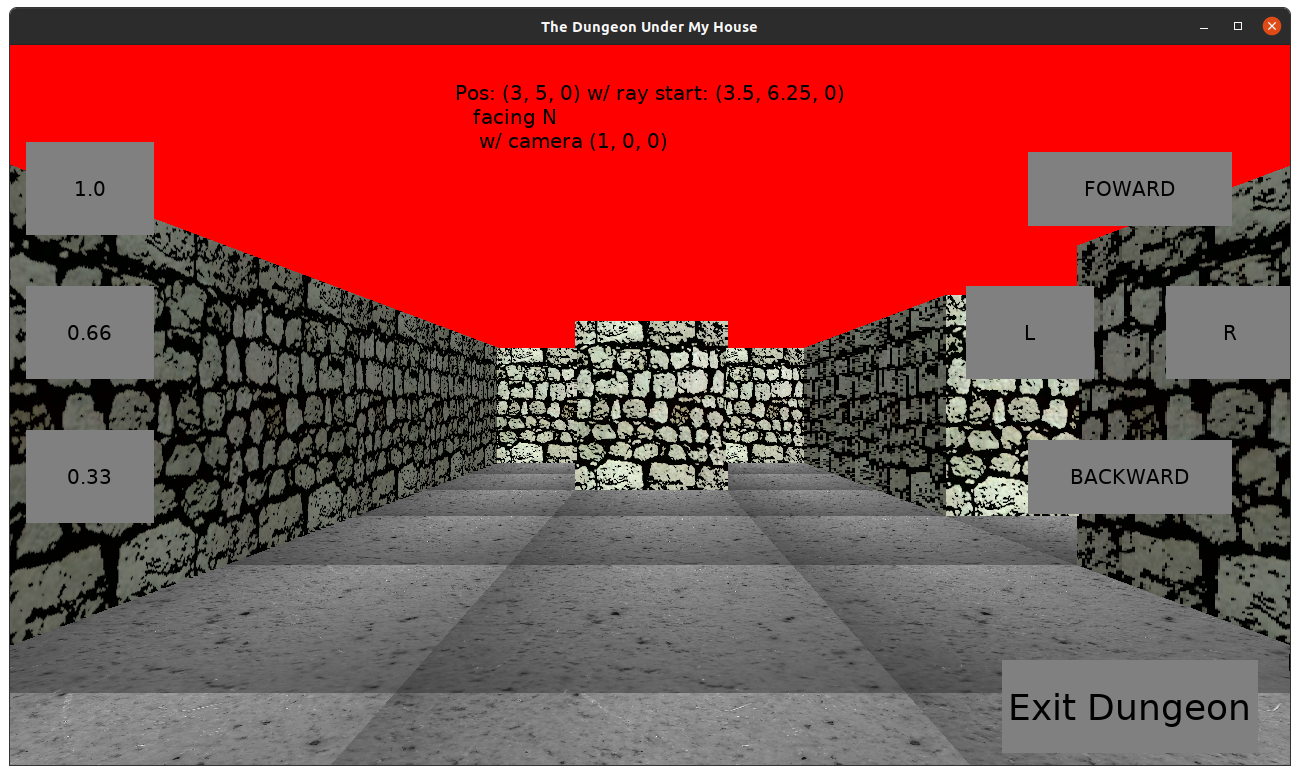
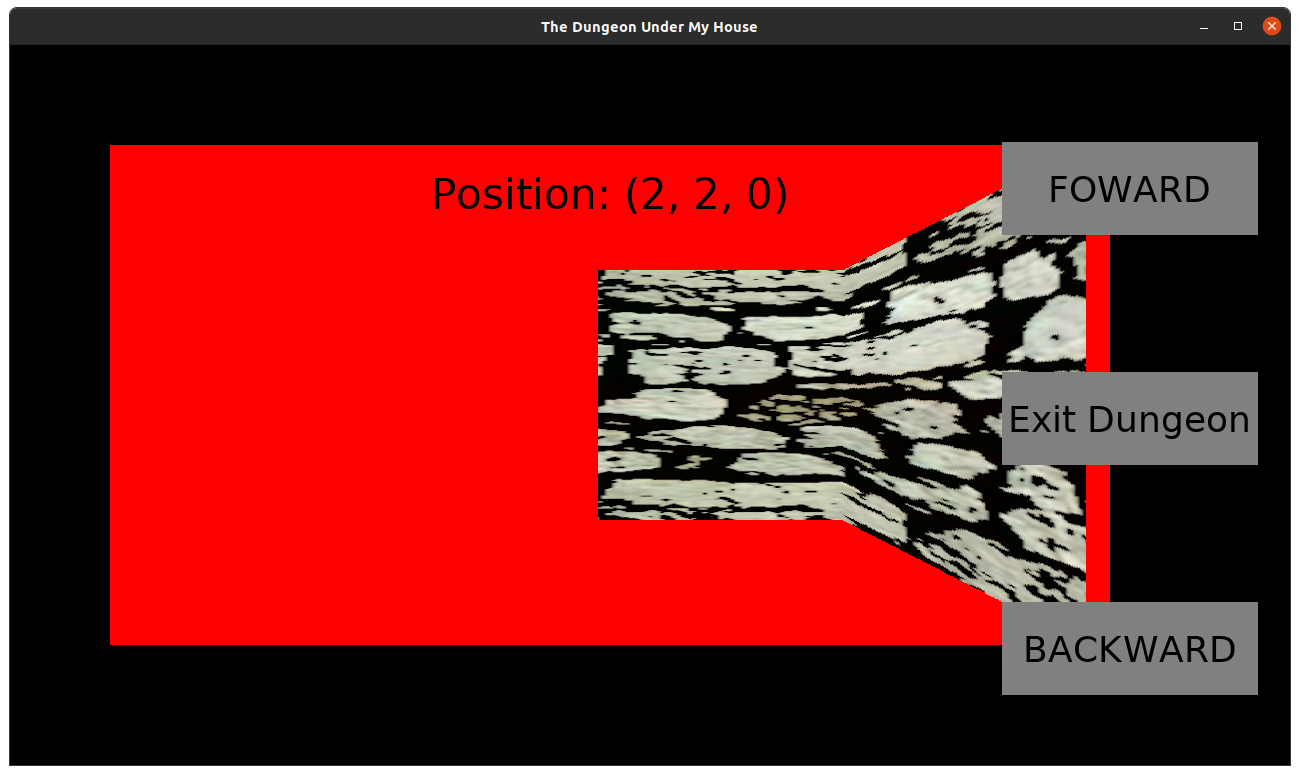
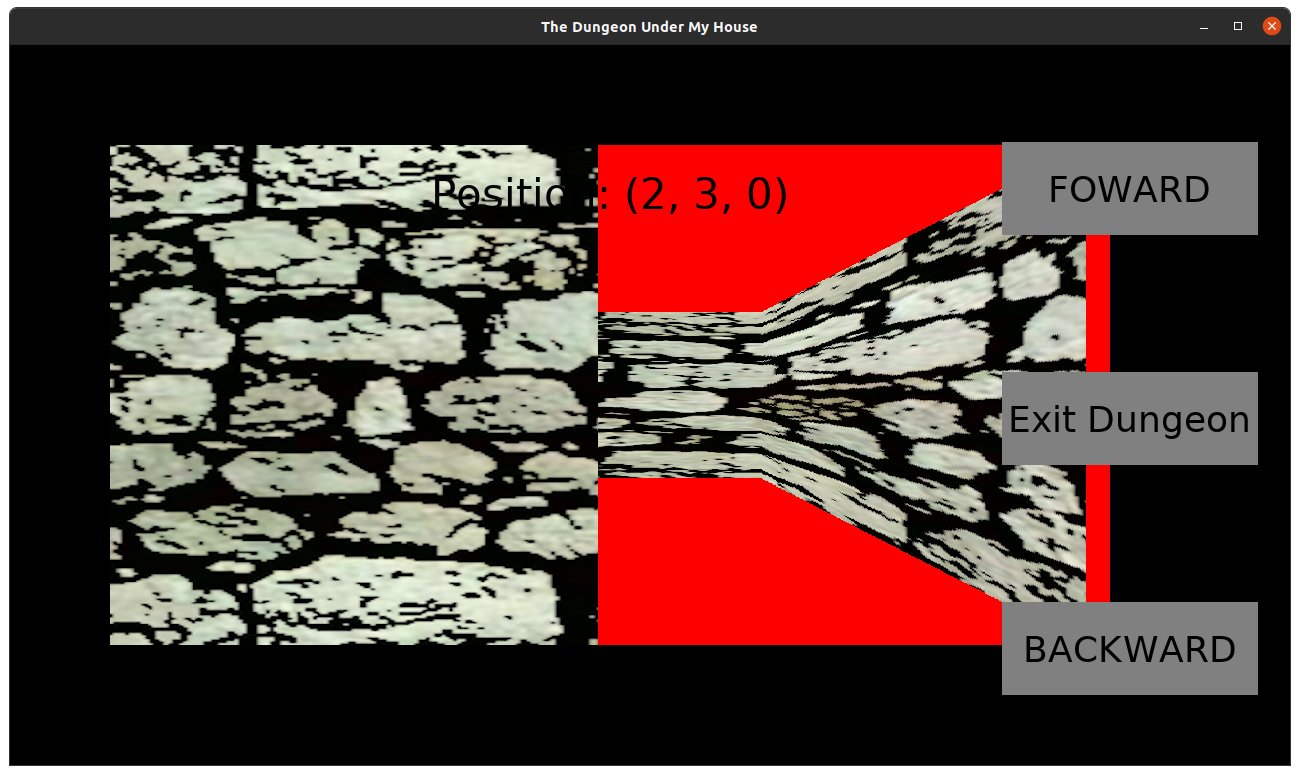
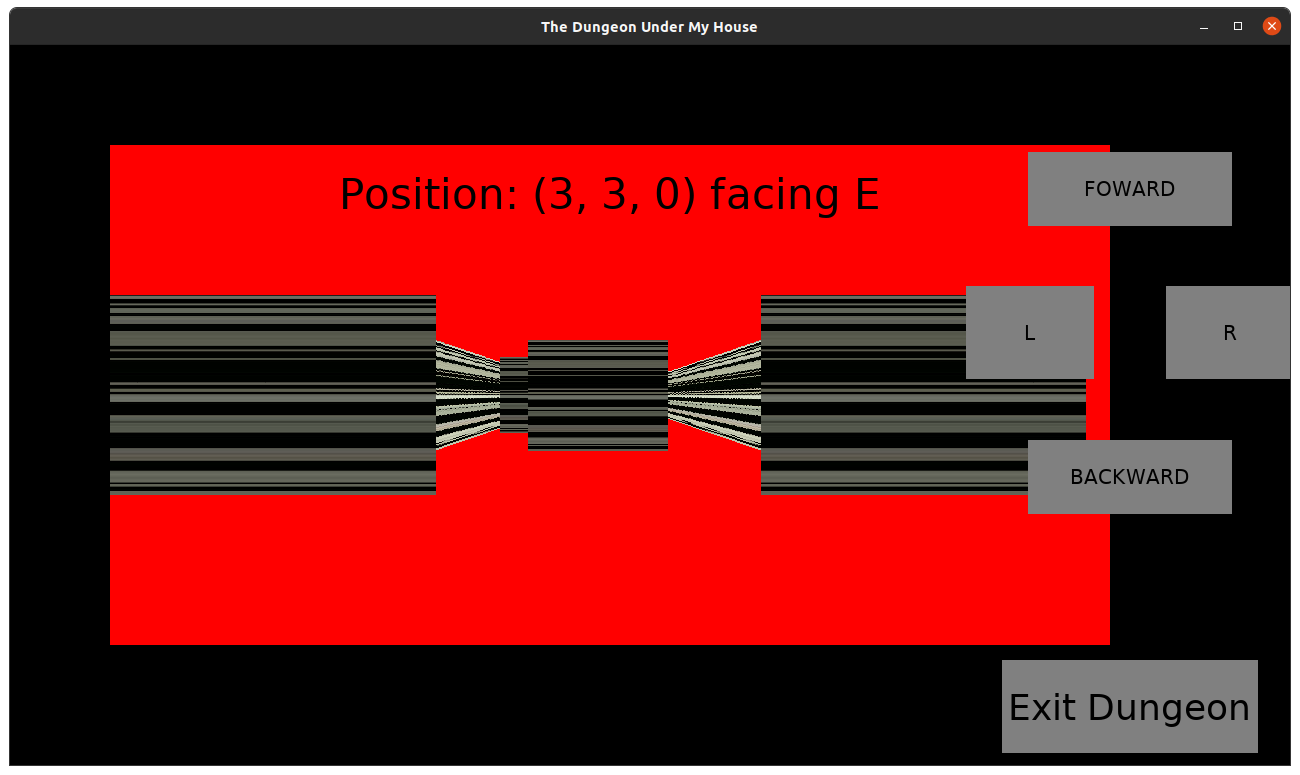
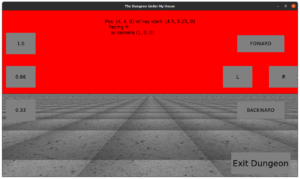
But I quickly got the ceiling rendering in, which required both flipping the perspective upside down so that it projected backwards instead of looking like a second floor AND making sure that it rotates correctly. I had a trippy experience in which the ceiling rotated the wrong way initially, and I really should write down how these bugs make cool effects because doing it on purpose might come in handy some day.

The Dungeon Under My House - in-dungeon floor and ceiling rendering

In the end, I spent much longer on this raycasting rendering code than I would have liked, and I now feel like I need to defend myself for continuing to use my own GBLib codebase instead of switching to something like Godot. If I’m going to be struggling with idiosyncratic code, why not something more established with better documentation and lots of other developers who can help each other?

And, yes, if I was starting out, or more specifically if I was giving advice to someone who was starting out, I would say without hesitation, “Learn Godot.” In fact, if you are someone I am giving advice to, go here: https://godotengine.org/

But why don’t I take my own advice? Because I’m not the target audience of that advice.

I’ve been working with my code base for a very long time. I’m excited about this raycasting code because it does not require more than merely USING my existing code, give or take the effort to access SDL2’s functionality that I need. I don’t need to implement an entire 3D engine, and if I needed a true 3D engine, I think I would in fact use an existing game engine rather than roll my own (unless…no…I mean, if I went for a simple, retro look…no…).

Anyway, call me stubborn or silly, but I’m sticking with GBLib.

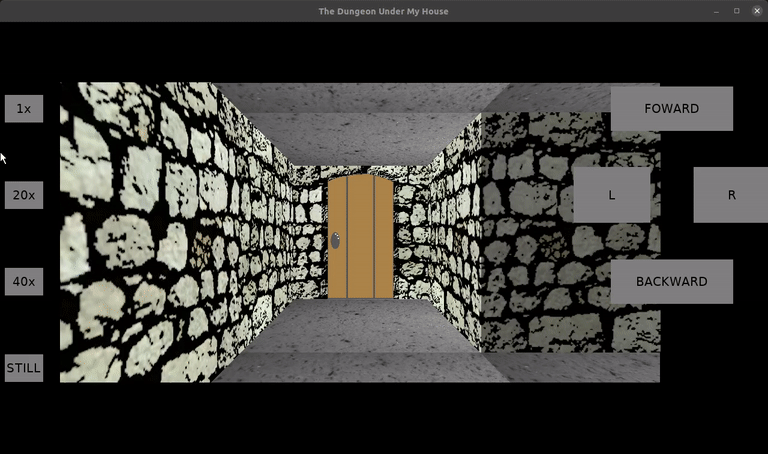
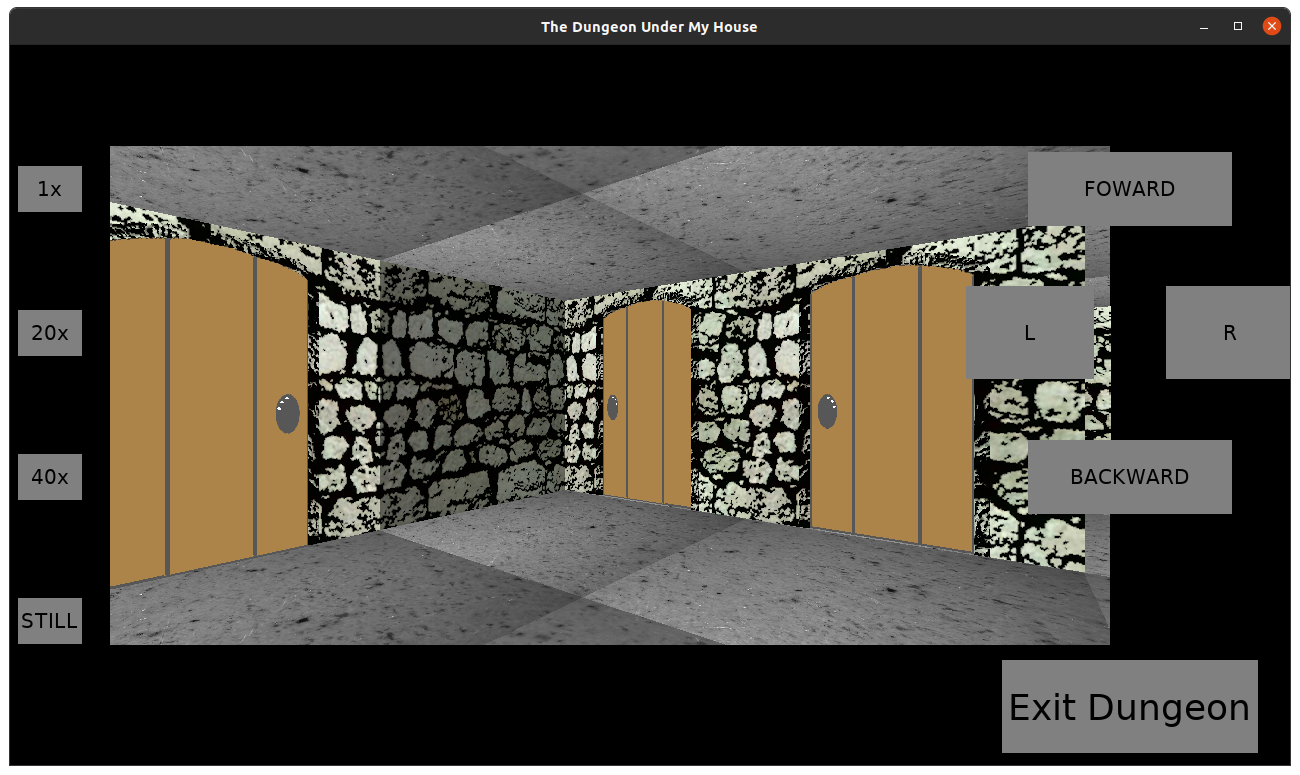
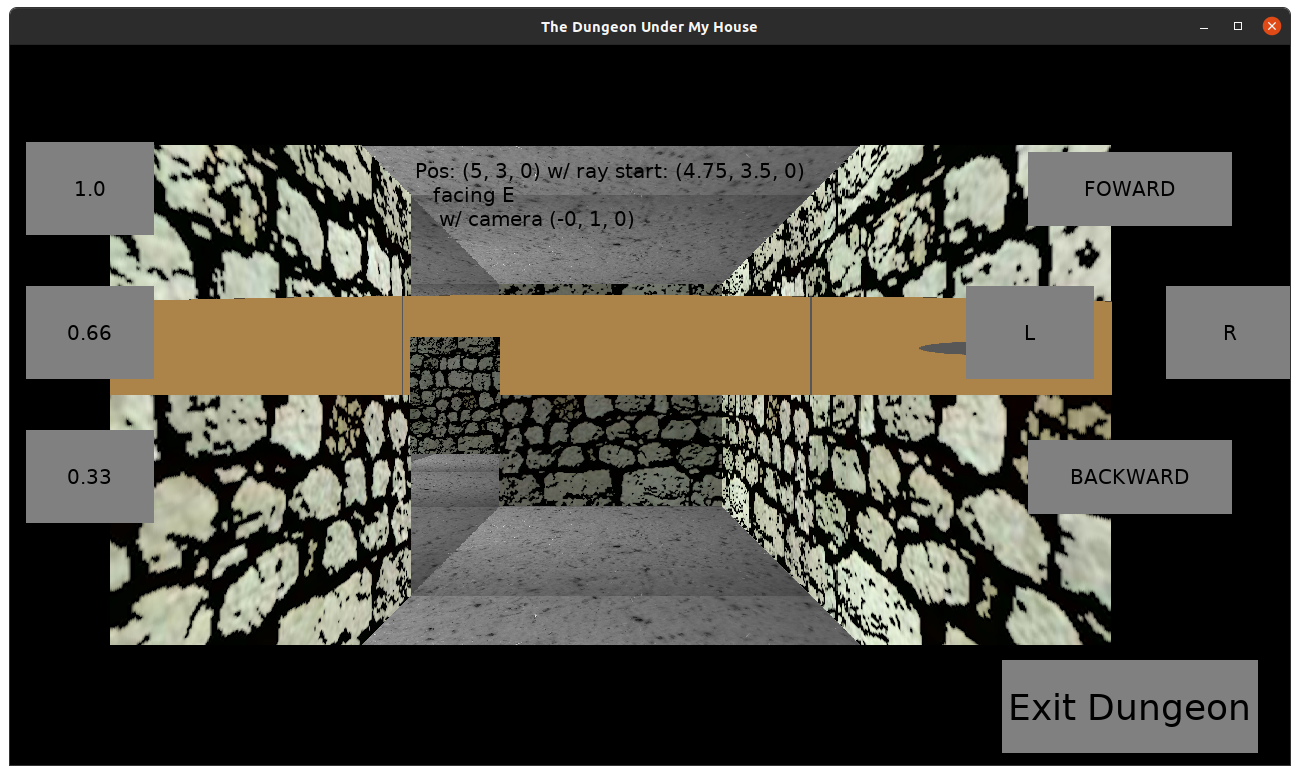
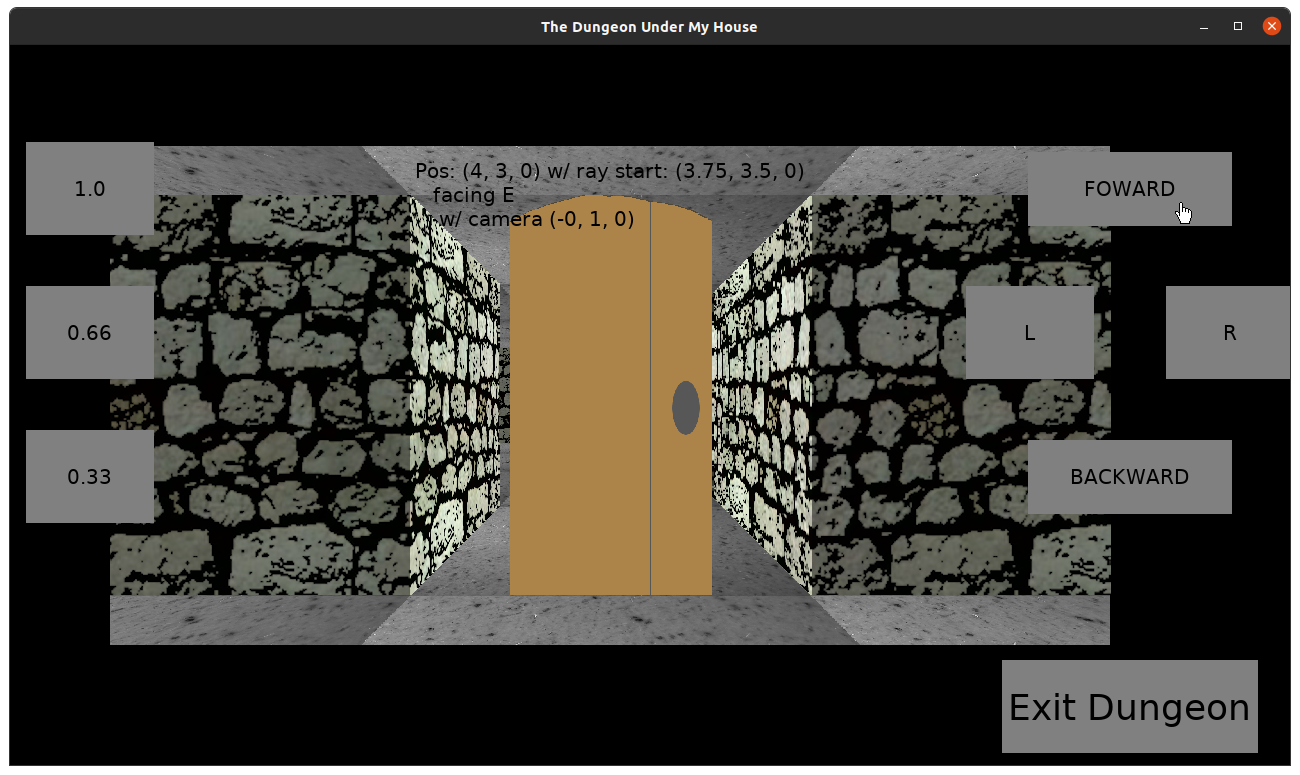
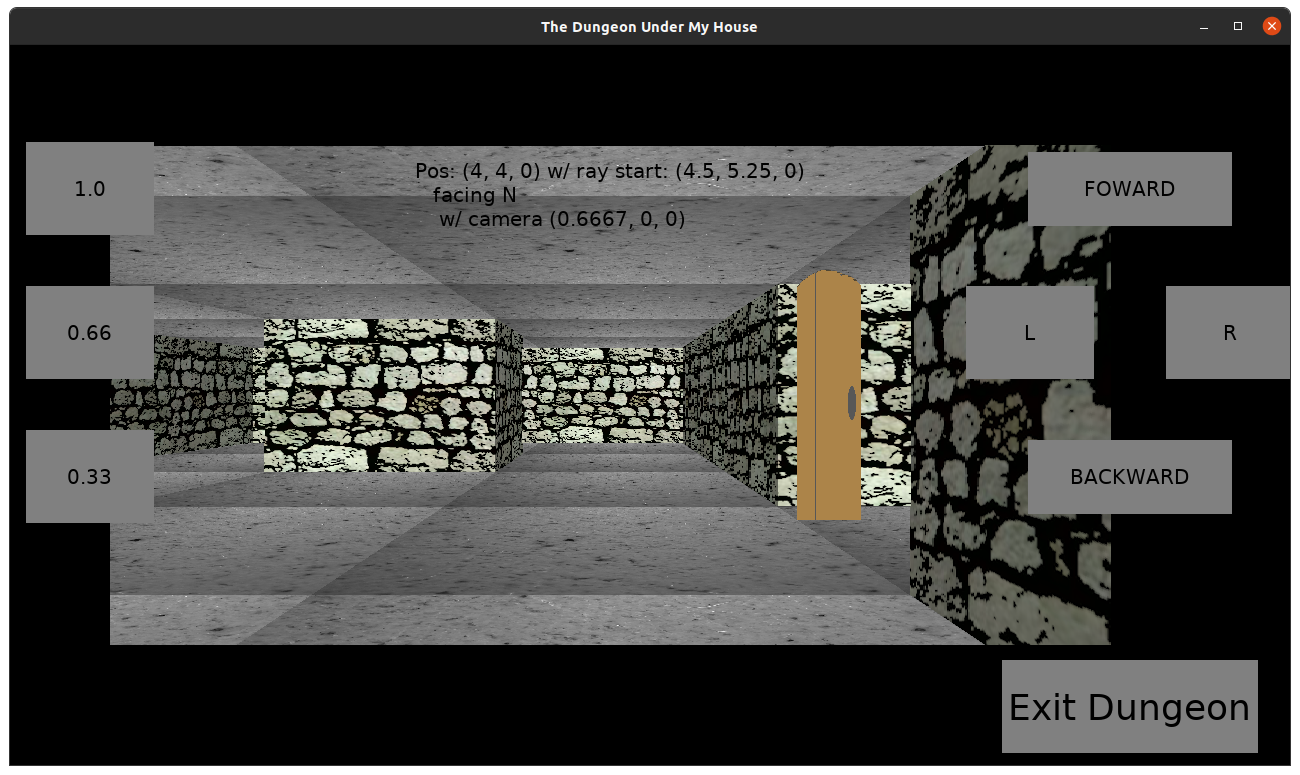
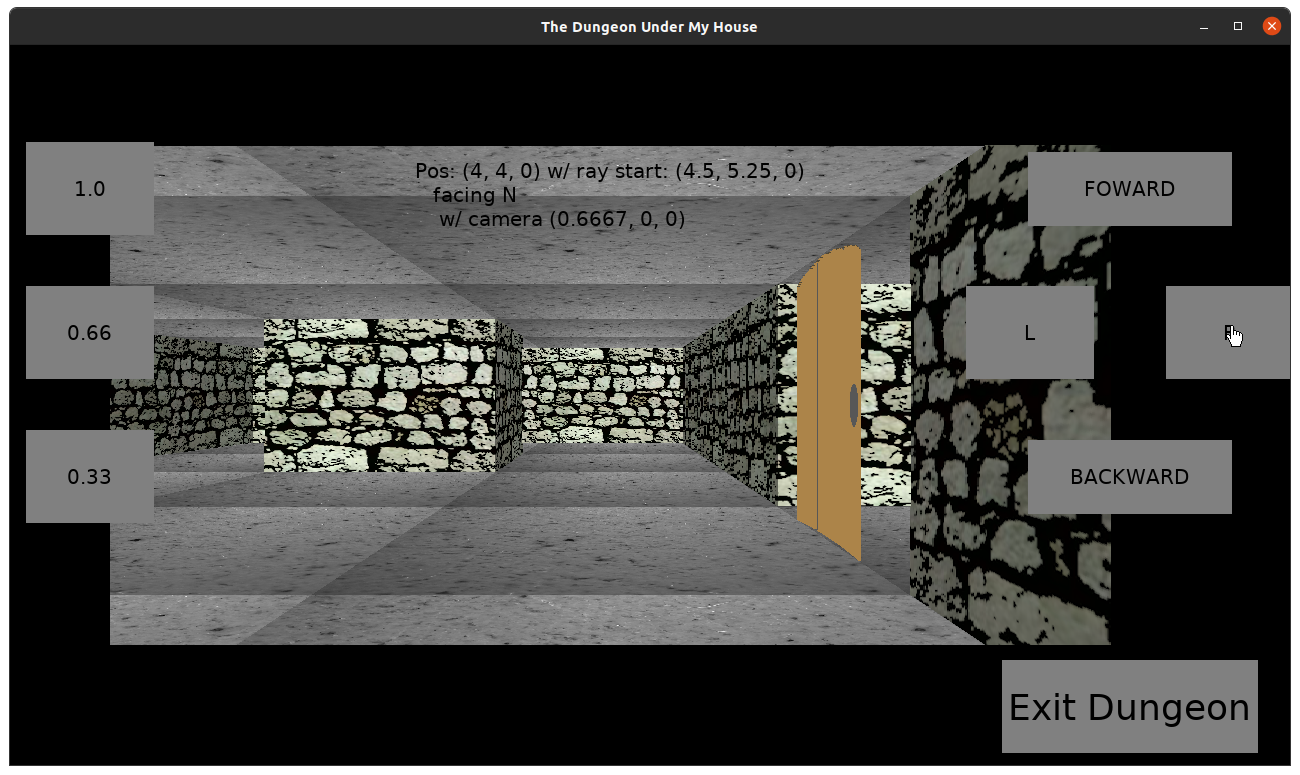
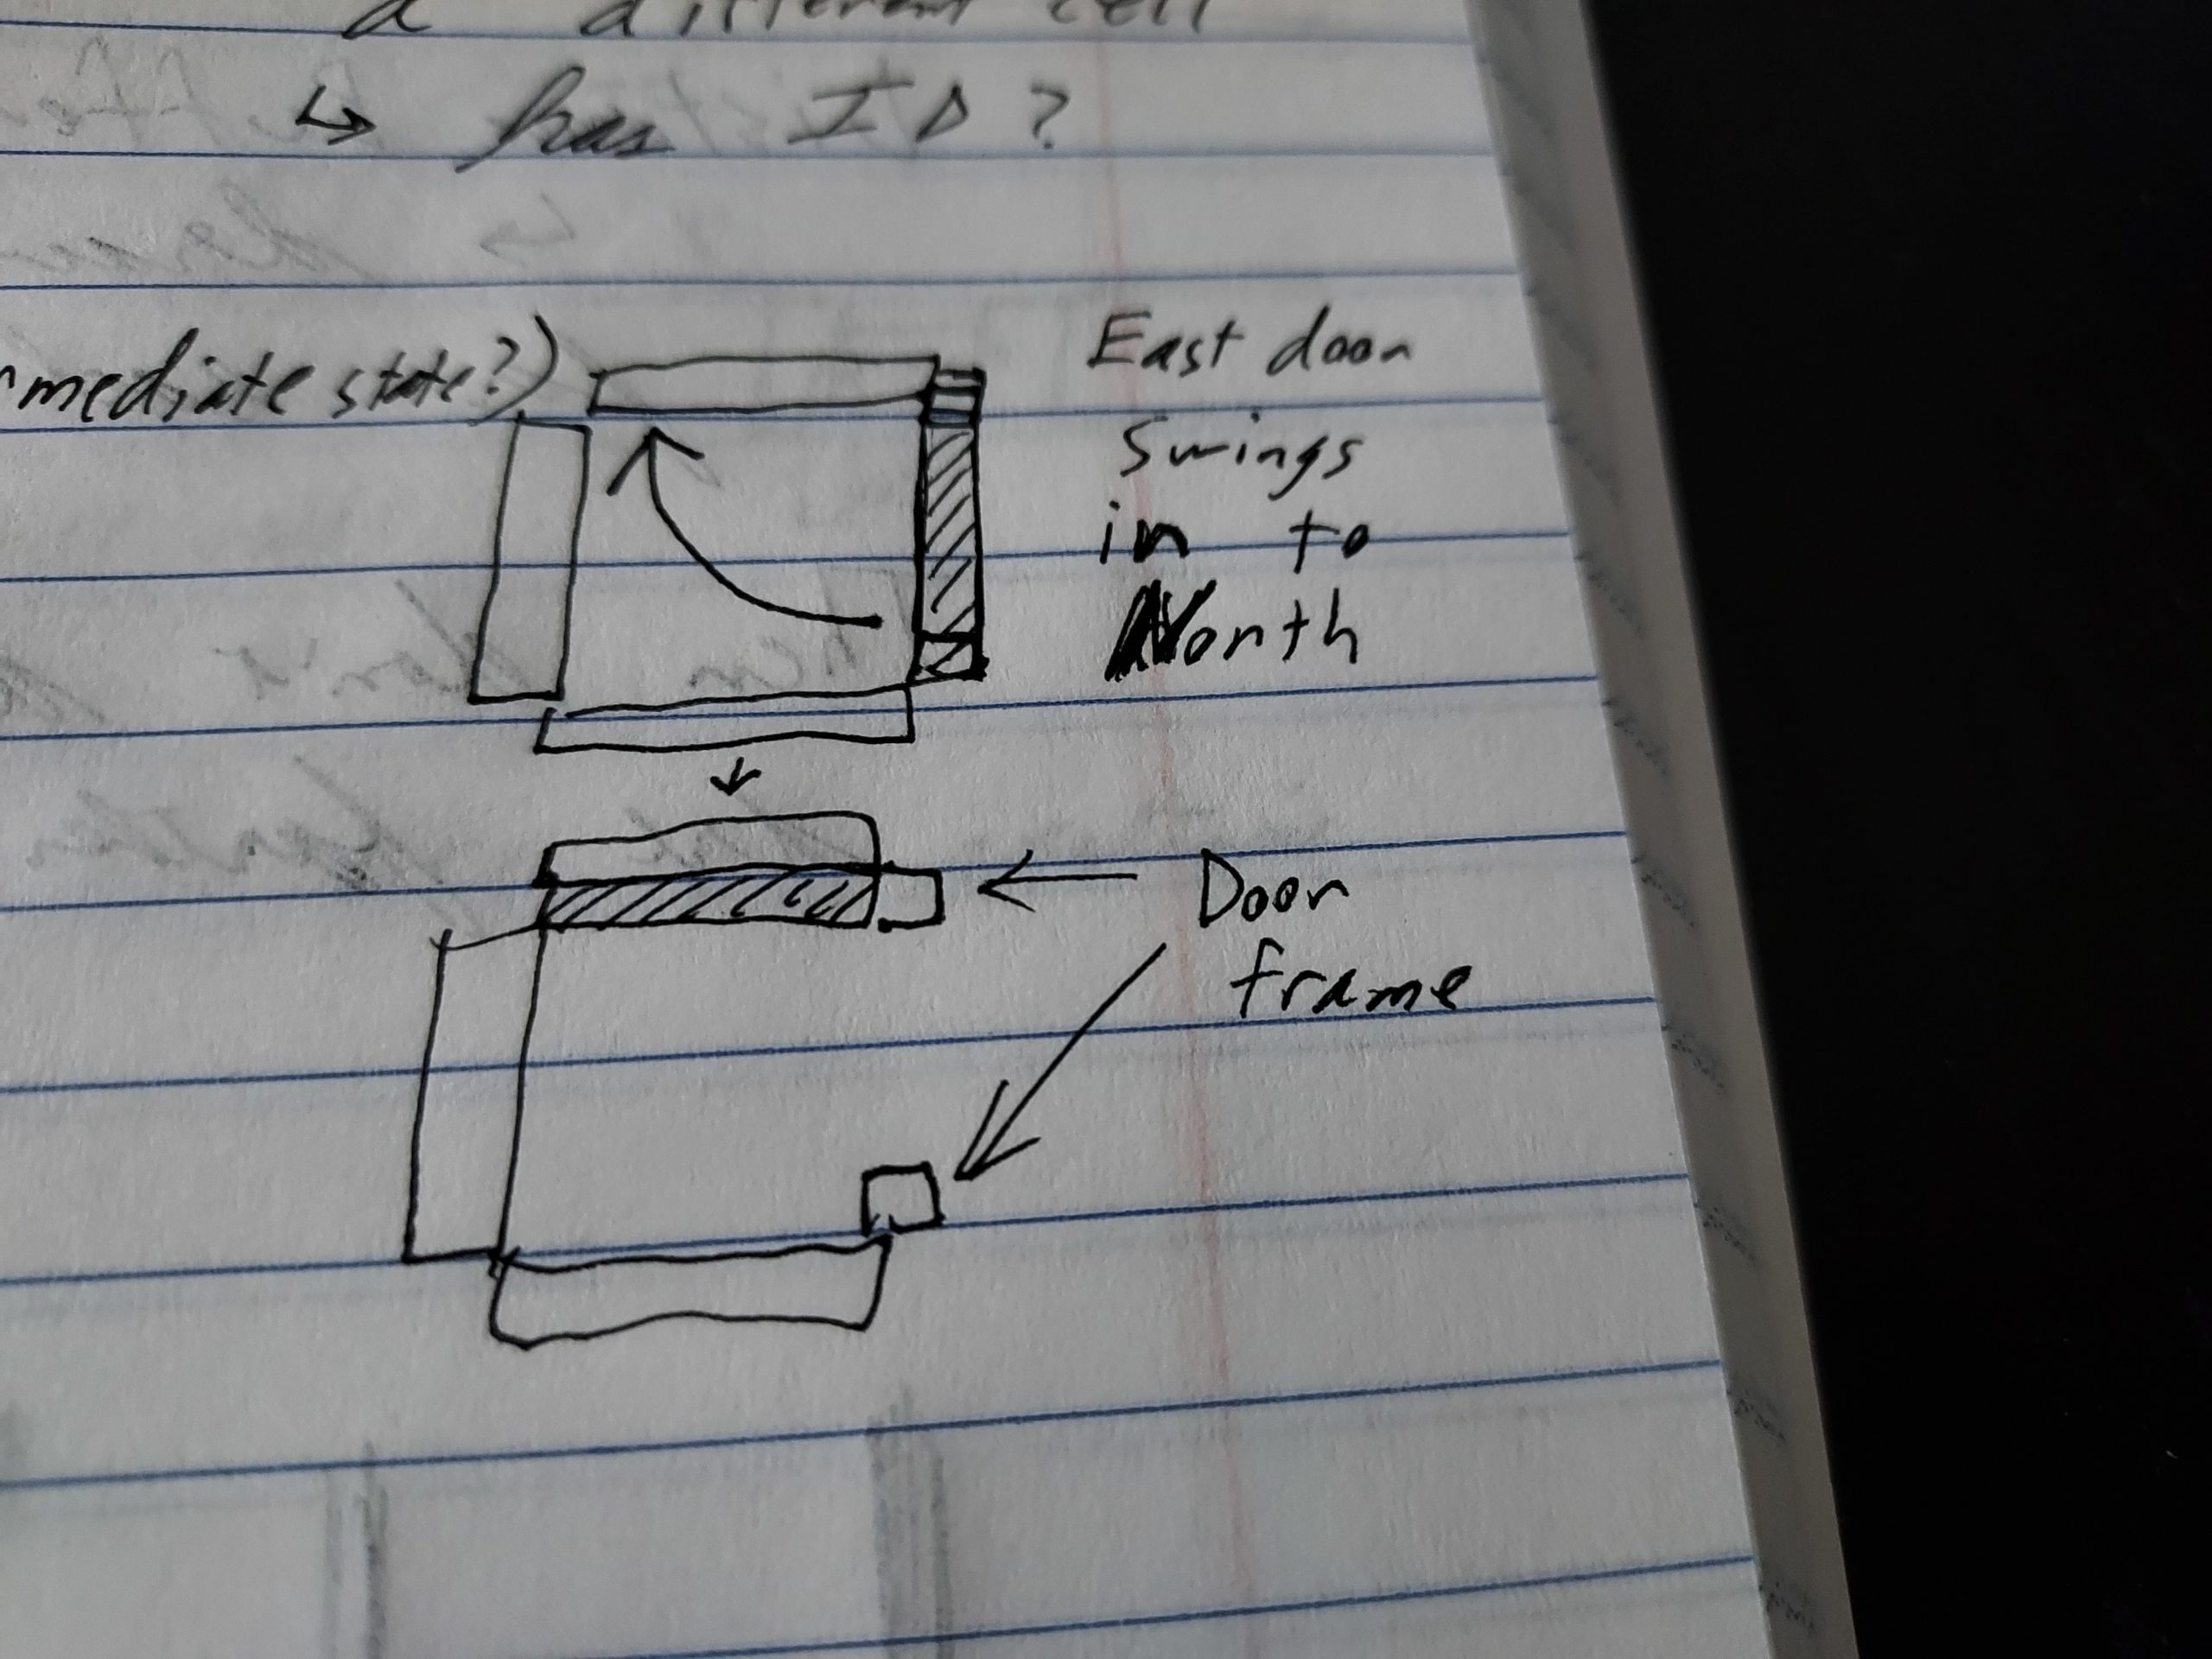
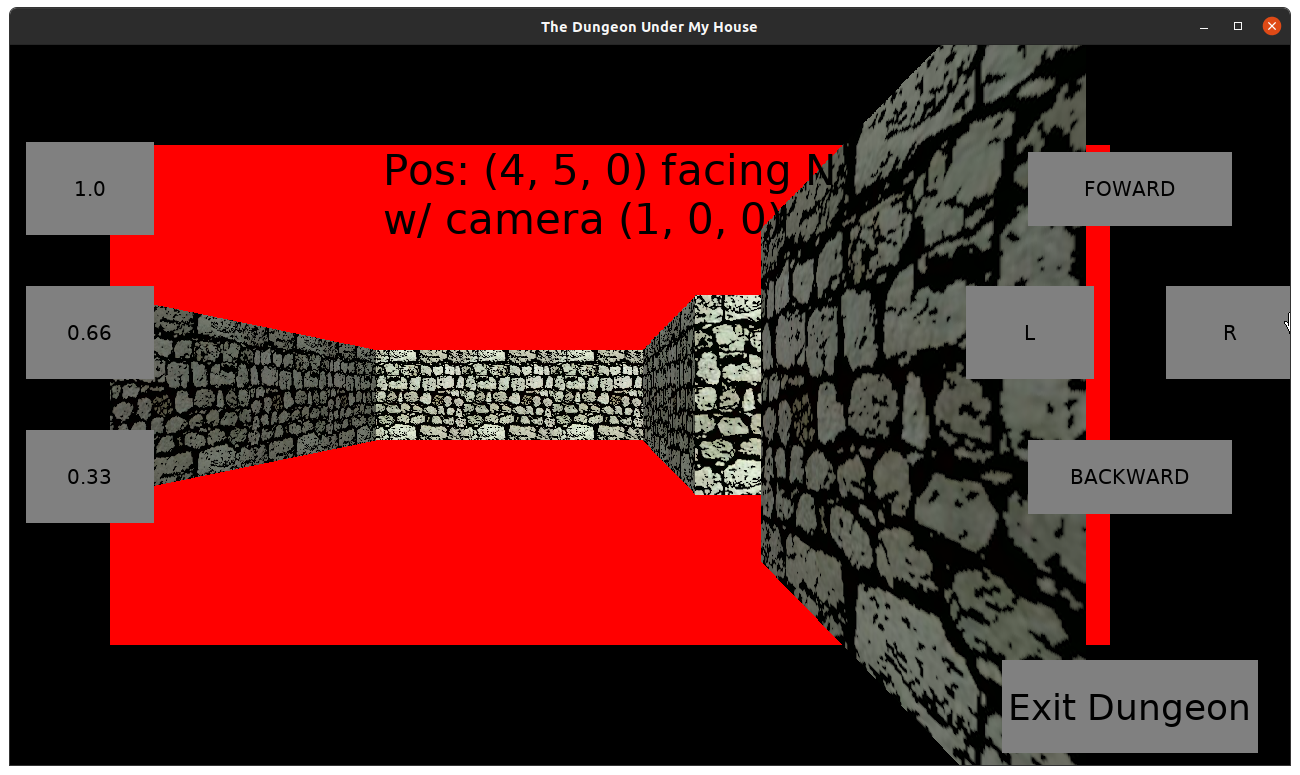
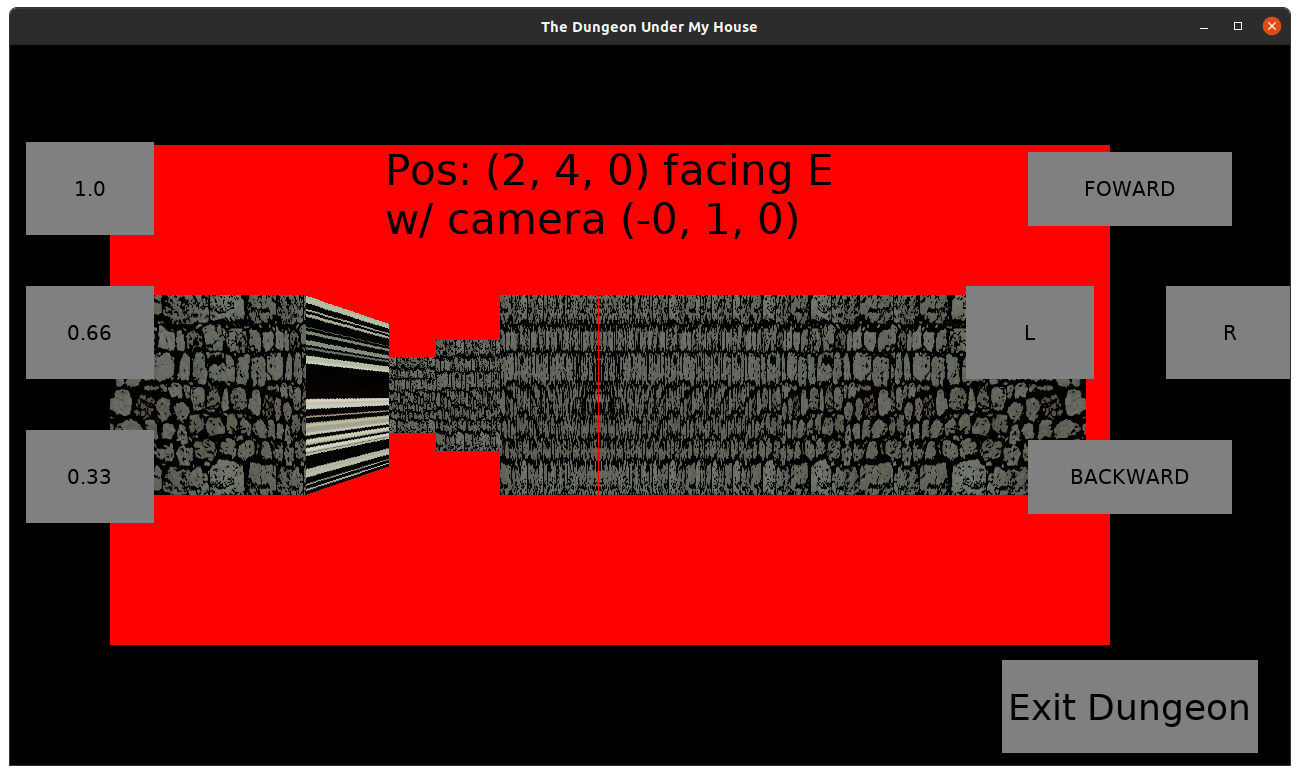
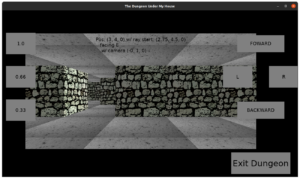
Once I got walls, floors, and ceilings rendering correctly, my next task was to make sure that movement in the dungeon respected walls. That is, instead of allowing movement through walls as if they weren’t there, I needed to prevent movement if there was a wall.

If you recall from a previous update, I opted to represent the dungeon grid cells in a way that allows for more flexibility. Most tutorials have a cell as either empty or solid, which makes rendering and obstacle avoidance easy: if cellType == SOLID, then doSomething().

My code needed to determine that a wall was an obstacle only if the movement would go through that wall in particular. That is, if I am in a cell facing east and attempted to move forward into a target cell, an eastern wall of the original cell should prevent that movement, but a western wall in the original cell wouldn’t.

That seemed simple enough. But I also then tried to think ahead to what else counts as an obstacle. Walls are internal to a given cell, but what if there was a large object or entity blocking the way? Those kinds of obstacles would be in the target cell, since if they were in the original cell, the player wouldn’t be occupying it. So checking for obstacles would first check for walls preventing movement out of an origin cell and then check for things blocking the way in the target cell.

Before I thought too hard about how to make such an obstacle check elegant, I reminded myself that there are no objects or entities in the game yet, so I only checked for walls for now.

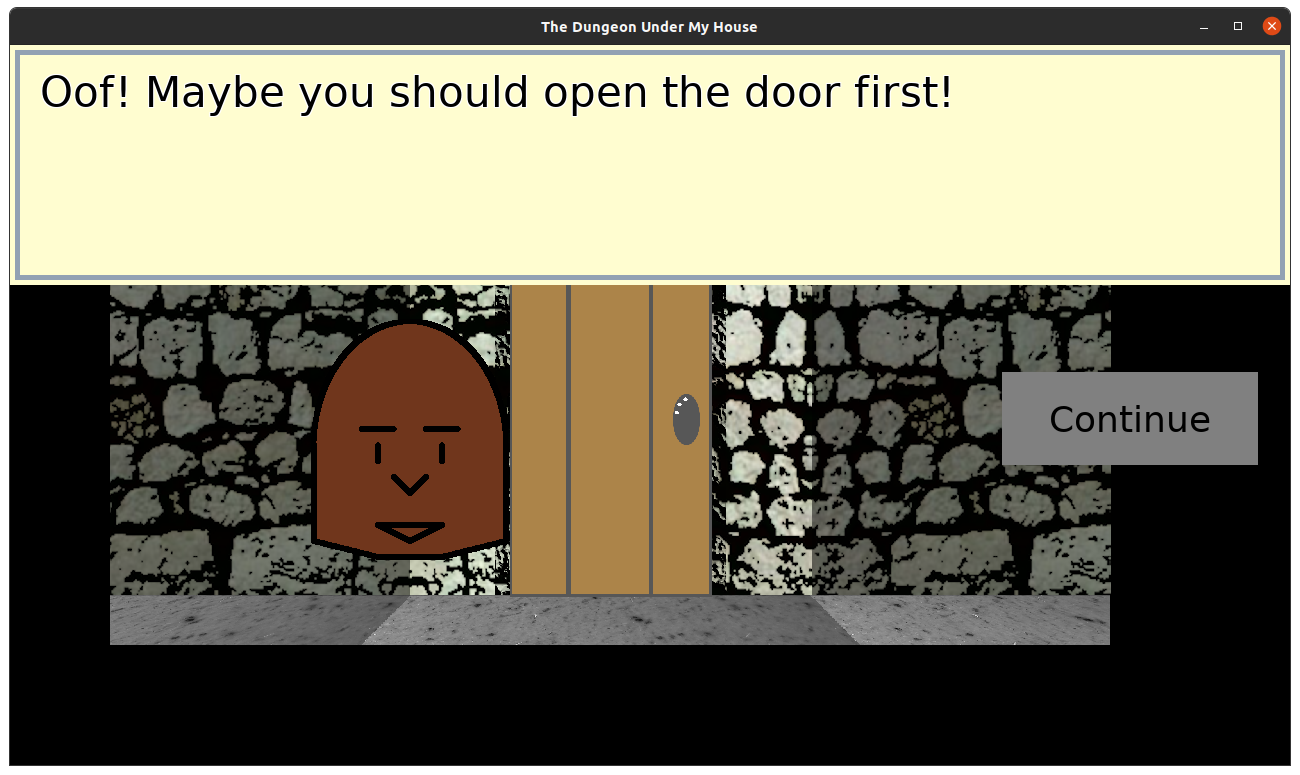
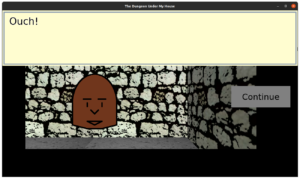
But I liked the idea of knowing what type of obstacle was preventing movement. I wanted to give the player feedback based on the type of obstacle, and so I added the first dialogue script in-game based on whether or not you tried to walk through a wall:

The Dungeon Under My House - dialogue when trying to walk into a wall

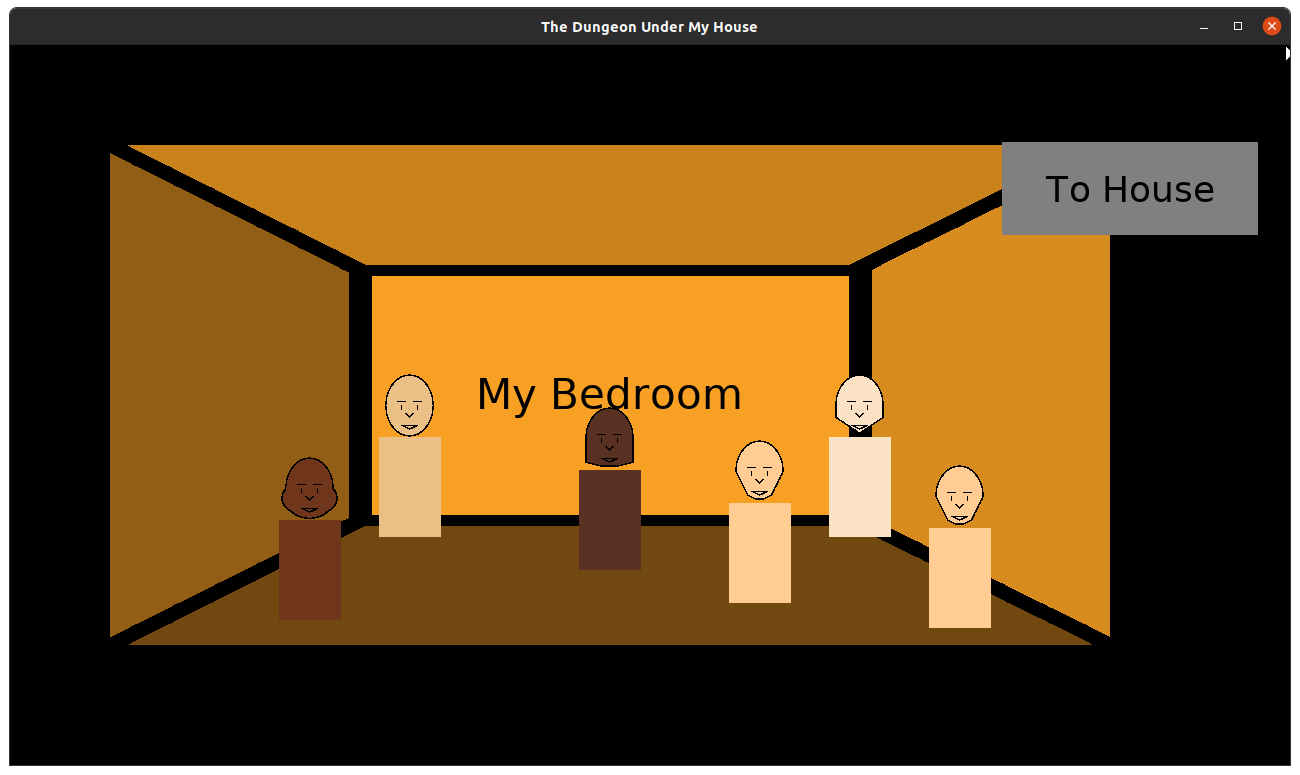
Which reminded me that I wanted to replace the art for the party members in the game.

Also, the dialogue/script code is very much hardcoded at the moment, and I eventually want to make it less so.

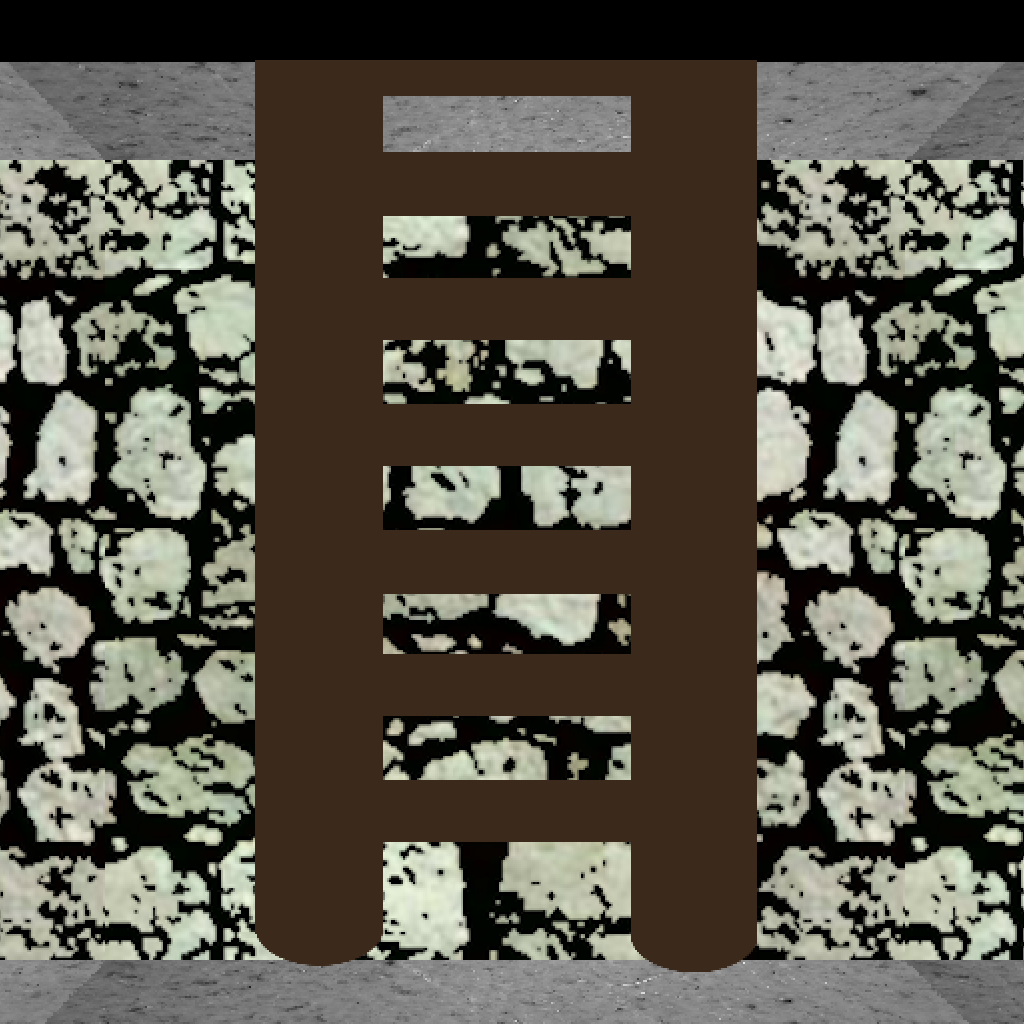
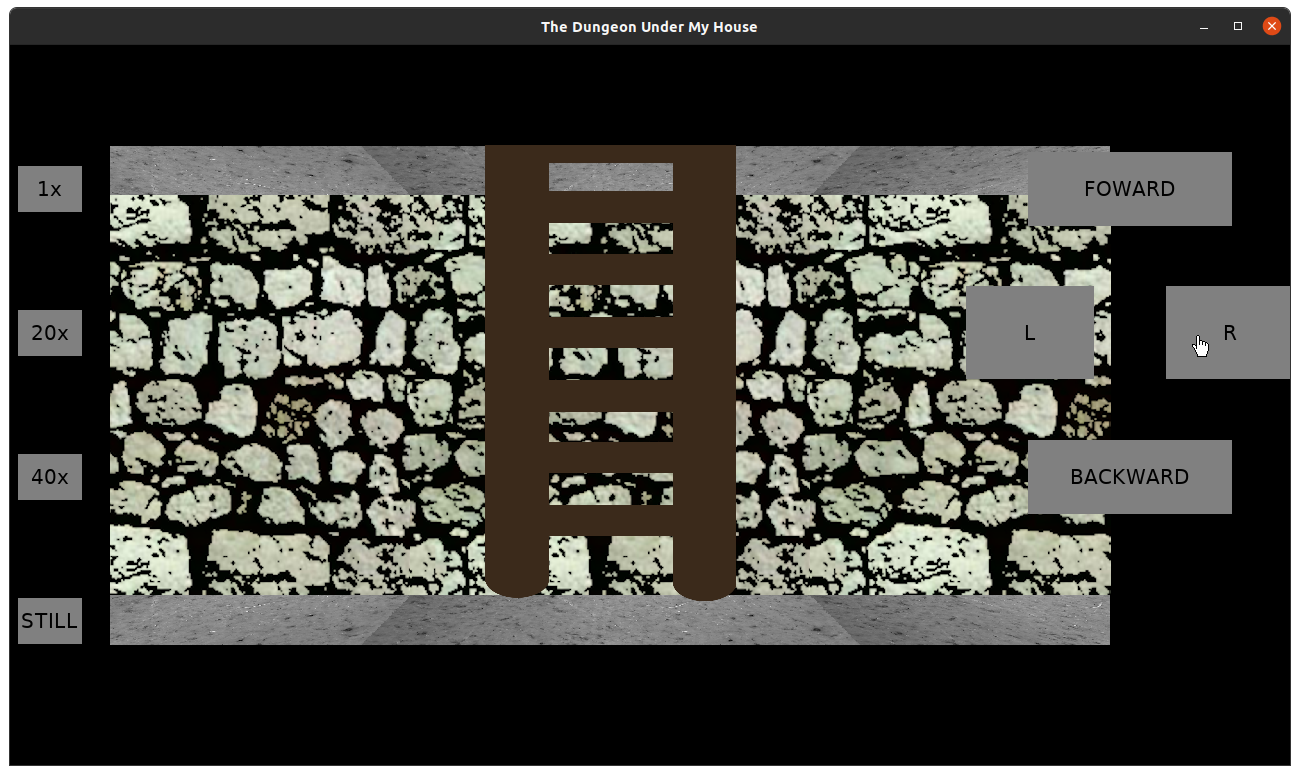
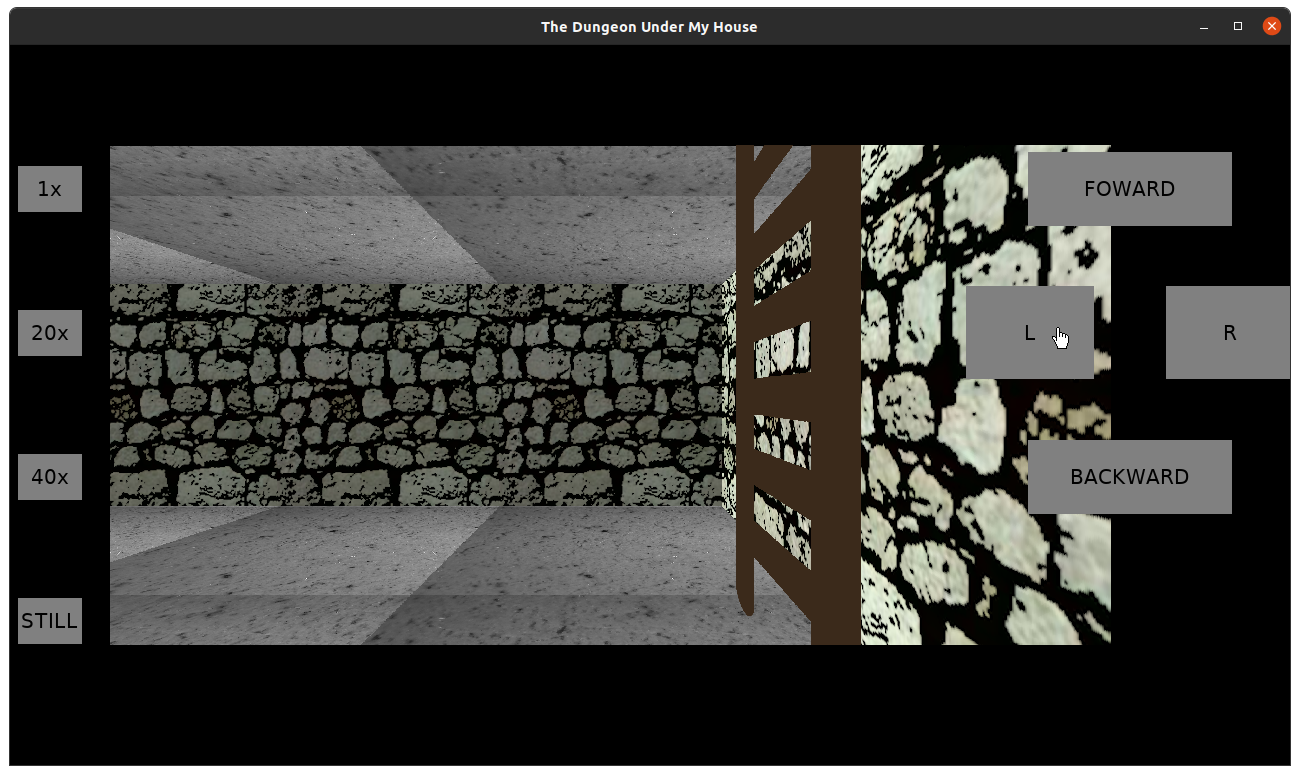
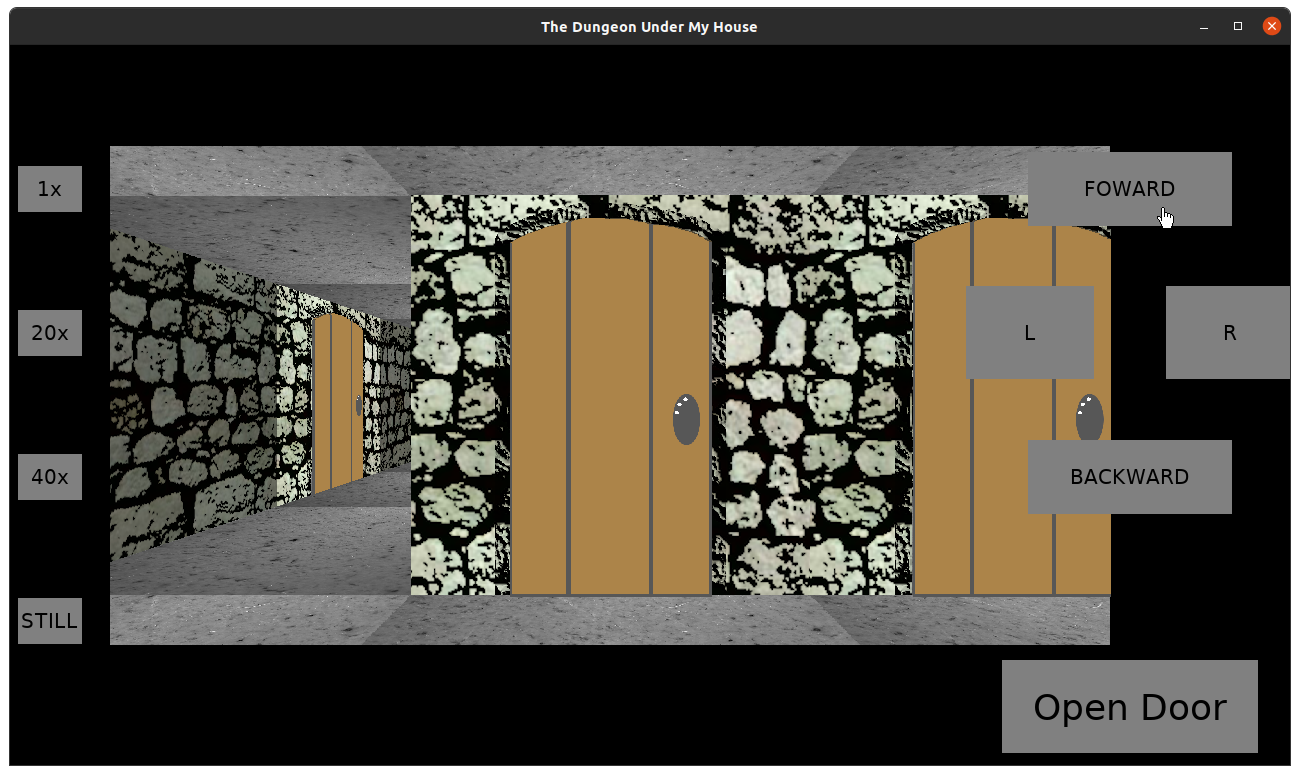
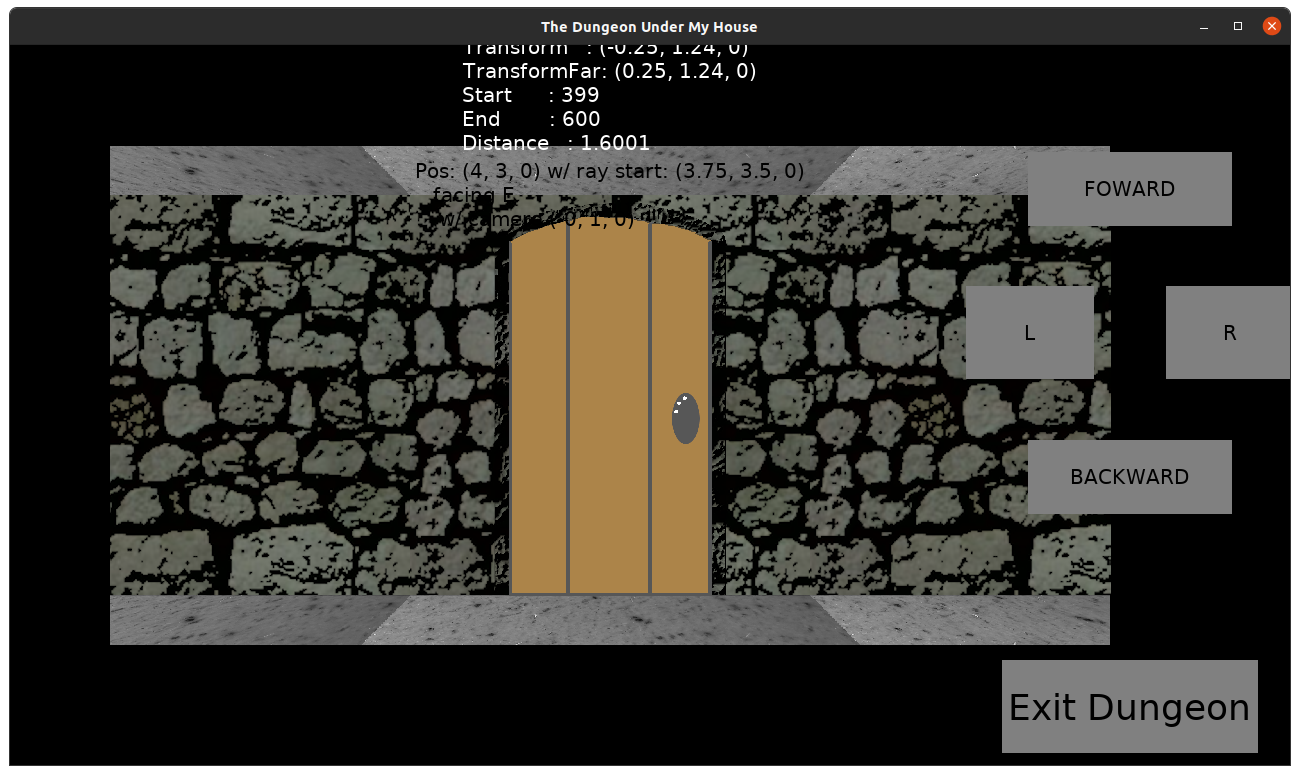
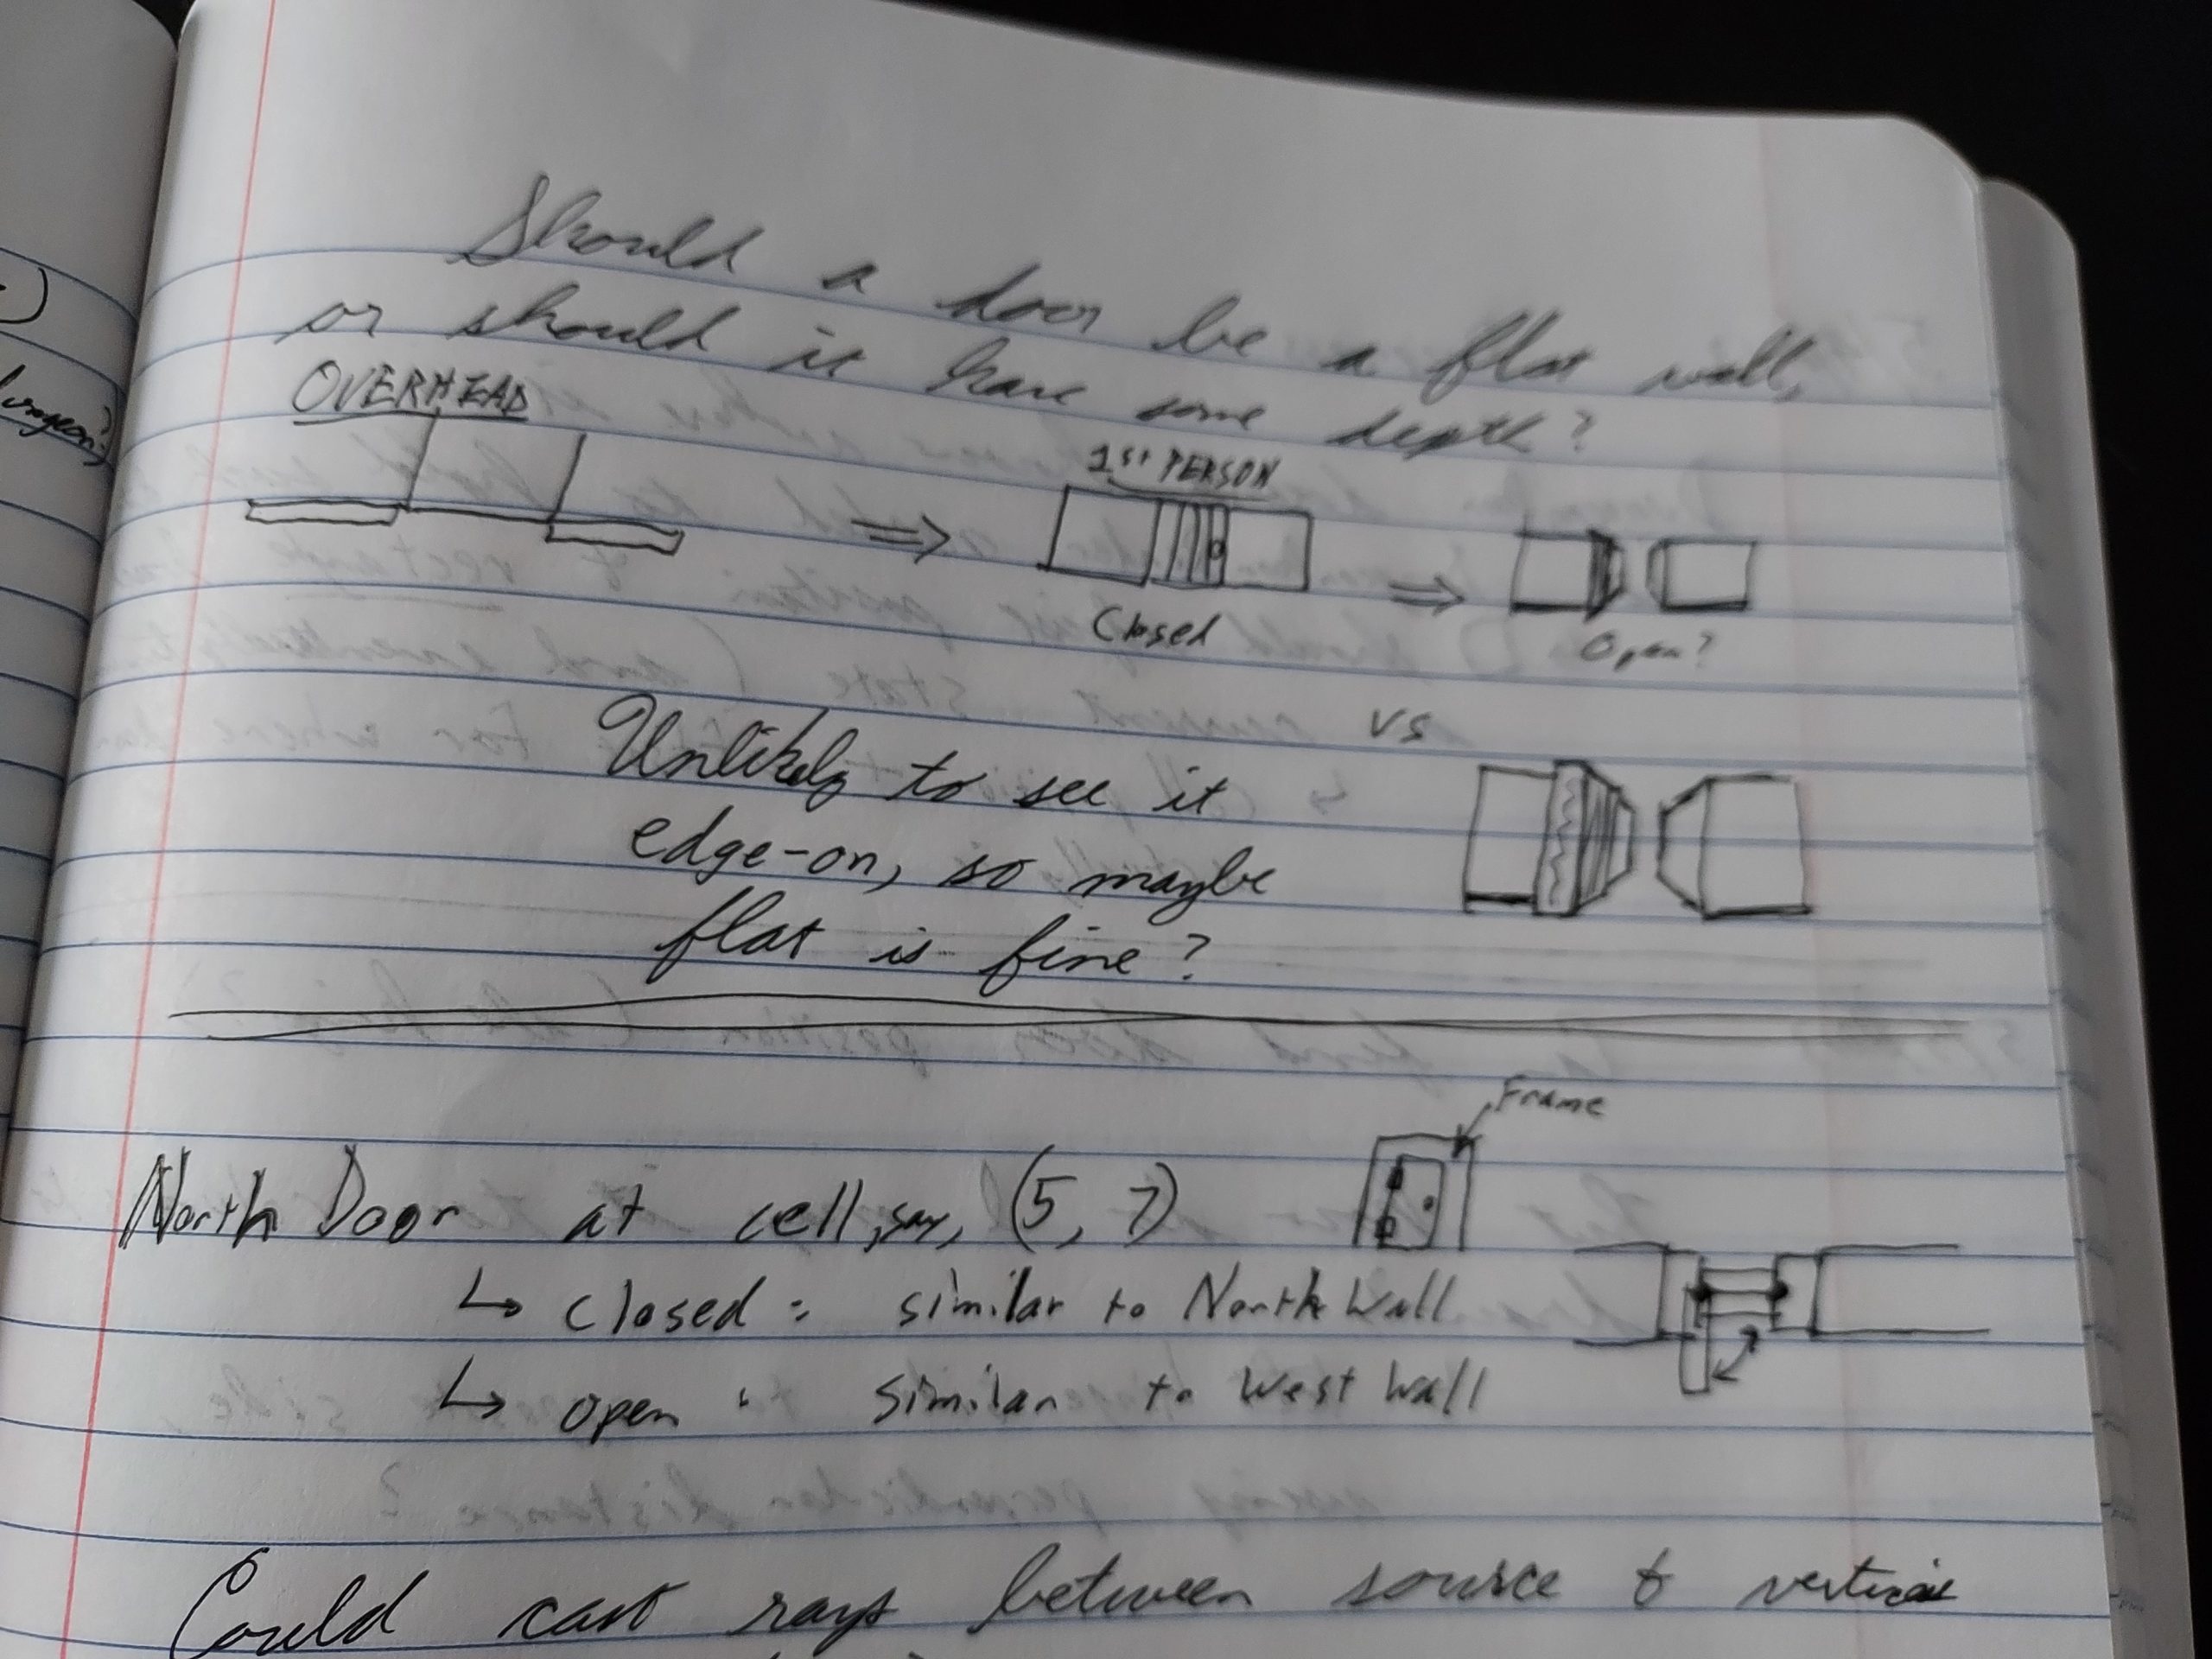
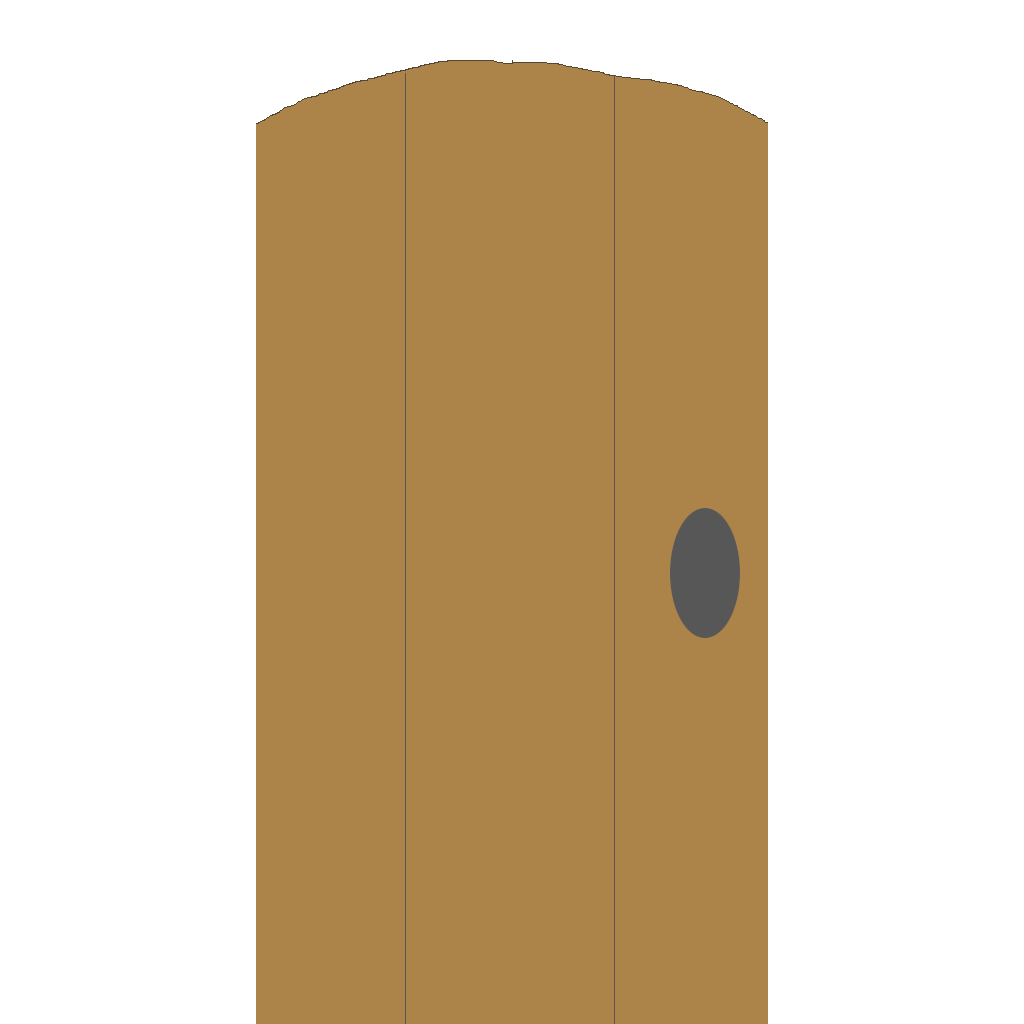
I now want to populate the dungeon with things, like doors, ladders/stairs, and items.

Thanks for reading!

Want to learn when I release The Dungeon Under My House, or about future Freshly Squeezed games I am creating? Sign up for the GBGames Curiosities newsletter, and download the full color Player’s Guides to my existing and future games for free!

Categories
Game Design Game Development Geek / Technical

Freshly Squeezed Progress Report: Starting the Raycasted Floor Work

Last week, I reported that I have a nicely animating set of walls that I can maneuver through.

I worked on the floor this past week.

Sprint 14: Pre-production and initialization

Planned and incomplete:

  • Move player in dungeon view

I had one of my least productive weeks according to my records, at least in terms of hours put into game development. One of the hazards of being a very, very part-time indie game developer is that there are going to be times when my business can’t take priority and my time needs to be dedicated elsewhere.

That said, I made slow and steady progress on rendering the floor. I wish I had more to show for it by now, but unfortunately I don’t.

My code is based on libSDL2, and for the most part I have been able to make games by loading textures from existing images. For raycasting the floor, I wanted to create a blank texture and populate it each frame with pixel data based on the angle the player’s party would be facing.

I quickly added the wrapper code for the relevant SDL2 functions, such as SDL_CreateTexture() and SDL_LockTexture().

And then, since I have never used SDL_LockTexture() and SDL_UnlockTexture() before, I spent time trying to understand it.

In fact, I originally was trying to use SDL_UpdateTexture(), but the documentation made it clear that I shouldn’t use in my use case:

This is a fairly slow function, intended for use with static textures that do not change often.

If the texture is intended to be updated often, it is preferred to create the texture as streaming and use the locking functions referenced below.

Now SDL_LockTexture()’s signature threw me off. I’m not a C programmer, so there are some C idioms that I am not used to.

int SDL_LockTexture(SDL_Texture * texture, const SDL_Rect * rect, void **pixels, int *pitch);

I’ve seen void pointers before, but a pointer to void pointers? Weird.

The docs say that it is the pointer to the locked pixels. It also says it is write-only access, and it says you can’t rely on those pixels pointing to old pixel data.

It took me a bit to wrap my head around what all this means, especially because there was no example provided in the docs, but also because I rarely use functions with arguments that get populated as a side-effect and so I didn’t recognize how this function was supposed to be used.

Basically if you treat the concept of pixel data as an array of data, then the way you would use this function is to pass in a void ** pointer, and the function will set it to point to some pixel data. You can then manipulate that data however you want (most likely with memset), and then you can call SDL_UnlockTexture() when you’re done.

So conceptually I get it, but I wanted to test-drive its integration into my codebase, and unfortunately I ran into problems getting my HardwareLayer to use the SDL wrapper for SDL_LockTexture() due to Google Mock’s SetArgPointee() not really working well with pointers to void pointers.

I got compiler errors initially as tried to figure out how I should be calling it and with what arguments in my unit test, but I ended the week with runtime seg faults when I ran my tests, mainly due to SetArgPointee() according to the stack trace.

I imagine that if I was working on this project full-time that this issue would have been solved within a day or two of concentrated effort. I assume I’ll figure it out this week.

For now, enjoy this rendering of the floor using an uninitialized texture, which I think is kind of neat and surprisingly less noisy than I thought it would be:

The Dungeon Under My House - in-dungeon floor with uninitialized data

Thanks for reading!

Want to learn when I release The Dungeon Under My House, or about future Freshly Squeezed games I am creating? Sign up for the GBGames Curiosities newsletter, and download the full color Player’s Guides to my existing and future games for free!

Categories
Game Design Game Development Geek / Technical

Freshly Squeezed Progress Report: Walking Through a Raycasted World

In last week’s report, I showed off some progress I made in rendering the walls of the sample dungeon I created.

I managed to fix a few issues and then produce something that looks fairly decent.

Sprint 13: Pre-production and initialization

Planned and incomplete:

  • Move player in dungeon view

I realized that I had a mistake in my code that used the wrong value, which was creating the weird effects I was seeing.

And suddenly, I had reasonable-looking walls!

The Dungeon Under My House - in-dungeon raycasting walls

Now, strangely some of the walls were still popping out of the view area, and there was that weird gap on the right side.

Addressing the issue of rendering outside of the view area required that I add a few lines of code to determine not only if the lines should be clipped to the top and bottom of the view area, but also determining what part of the texture I needed to draw. That is, if the top was clipped, then I would need to start drawing from the top of the view area using the correct part of the texture as the start of the line. Otherwise, it would look off.

I fixed the red gap when I discovered that I was figuring out where to draw each column using the textureWidth variable instead of the width of the target area.

The next big issue was that it still felt like you had your face to the wall. I wanted to set the player’s view back a bit so they could see a bit of the floor and ceiling.

The nice thing was that my code was already differentiating between the player’s party’s position and the start of the rays that are cast to find the walls. Still, I needed to make what feels like a few hacks to get things rendering properly.

Basically, I needed to set the player’s view back by a certain amount. I chose to move the player’s view backwards 0.75 units.

The problem is that the ray was already being offset from the player’s position (0.5, 0.5) to center them in a grid cell, and moving another 0.75 back moves the ray’s start into a different cell.

So I when it came to stopping the ray, I had to ignore any wall encountered in the first step to the next grid line, because otherwise the wall from the cell behind the player would fill the view area.

I also had to add something to limit the number of times it would try to find a wall. Anytime I exited the play area, it would lock everything up as it stepped forever toward walls that didn’t exist.

Weirdly, if the limit was what I thought a reasonable amount, then I would see artifacts, especially when turning.

Oh, that’s right. I added animation. Now when the player steps forward to turns to the side, I interpolate from the original position/orientation to the target one.

Anyway, turning would produce walls that looked like they were protruding out, so I had to create a relatively large maximum limit of grid cell stepping. Unfortunately, if you ever do step outside of the boundaries of the dungeon somehow, it slows the game down to a crawl, and that’s on my main development machine which is relatively powerful.

So that just makes it all the more important to ensure that the player can’t ever see outside of the defined boundaries of the dungeon.

By the end of the week, I had walls that looked pretty decent and animation that looks pretty decent.

The Dungeon Under My House - in-dungeon raycasting walls

I still need to add floors and ceilings, which I expect will be relatively quick, although it might require using a slightly different technique compared to rendering walls. With the walls, I can draw a rectangle using part of an image as a source. With the floor, I might need to go pixel by pixel horizontally as I determine which part of the source image needs to be rendered at each area of the screen.

For now, though, it’s nice to be able to navigate my test dungeon, complete with animation.

Thanks for reading!

Want to learn when I release The Dungeon Under My House, or about future Freshly Squeezed games I am creating? Sign up for the GBGames Curiosities newsletter, and download the full color Player’s Guides to my existing and future games for free!

Categories
Game Design Game Development Geek / Technical

Freshly Squeezed Progress Report: Raycasting Actual Walls

Last week I reported that I had less time to work on implementing raycasting, which meant less time to debug what I was doing wrong.

I knew I was similarly not going to have as much time to do development this past week, but I made some big progress.

Sprint 12: Pre-production and initialization

Planned and incomplete:

  • Move player in dungeon view

Fairly quickly after my last report, I discovered a few things about how I was implementing the raycasting incorrectly.

First, instead of arbitrarily assigning a “camera plane” and then rotating it and hoping that it stays in place relative to the player’s direction, I determine the camera plane based on the direction of the player.

And I had those vectors defined incorrectly.

Basically, if I treat North/Up as the default, then I want negative Y to mean forward, and positive X to mean to the right. East should similarly treat positive X as forward and positive Y as to the right. And so on.

I realized at one point that the values I was getting when I was casting rays were weird, and I had to draw everything out because it was getting hard to think about direction and positive/negative values.

Once I got those vectors right, then I had walls drawing, but only on half of the screen.

The Dungeon Under My House - in-dungeon raycasting but only half of the screen for some reason

The Dungeon Under My House - in-dungeon raycasting but only half of the screen for some reason

I added logs and realized a few issues with the code.

One, the player’s position is represented as whole values. That is, the player could be at position (2, 4), which would represent being in the corner of a cell in the grid that represents the dungeon layout.

So now I start the ray at (2.5, 4.5), the center of the cell.

Two, part of the algorithm was dividing by zero, which is why the left half of the screen was missing any rendered lines.

Then I made a change, but the side walls and the back walls were not lining up.

The Dungeon Under My House - in-dungeon raycasting but walls weren't lining up

The Dungeon Under My House - in-dungeon raycasting but walls weren't lining up

Unfortunately, while I was digging through logs and trying certain changes, I then reverted a change, and suddenly everything looked relatively right?

I wish I could say why.

I then tried to do a simple change to add the stone wall texture, but my simple change was too simple, and everything was distorted.

The Dungeon Under My House - in-dungeon raycasting but textures aren't right

The Dungeon Under My House - in-dungeon raycasting but textures aren't right

The Dungeon Under My House - in-dungeon raycasting but textures aren't right

And as you can see, the algorithm seems to be drawing the walls outside of the viewport.

I have since read through the existing algorithms and think I see how to address this issue.

I also want to make sure that the horizon line isn’t centered. Centered is a bit boring.

And currently if you are facing a wall in your grid cell, it fills the entire view area, and I want you to be able to see some floor in the cell you’re currently in.

But so far, I made good progress, and the neat thing is that I was able to maneuver through my test dungeon level, and after I get the wall textures right, I can focus on the floor and ceiling.

Thanks for reading!

Want to learn when I release The Dungeon Under My House, or about future Freshly Squeezed games I am creating? Sign up for the GBGames Curiosities newsletter, and download the full color Player’s Guides to my existing and future games for free!

Categories
Game Design Game Development Geek / Technical

Freshly Squeezed Progress Report: Raycasting, Vector Math, and Distractions

In last week’s report, I started work on figuring out how to implement a simple raycasting engine for The Dungeon Under My House, my second Freshly Squeezed Entertainment project.

I tried to continue the work this past week.

Sprint 11: Pre-production and initialization

Planned and incomplete:

  • Move player in dungeon view

The short version is that I once again spent much less time on game development than I would have liked and so no, it isn’t finished yet.

The long version is that I was unable to dedicate time to game development partly because my family needed to spend time on figuring out how to protect our trans daughter from Iowa Republicans who recently passed bills and got them signed into law that prevents her from getting the care she needs in our state.

Besides those pains, I’ve also been dealing with literal pain in my back and my leg that has made it difficult to do much of anything, including sleep.

Meanwhile, any effort I was able to expend was spent on trying to understand the example implementations of raycasting that I’ve found so I can create my own implementation.

Most examples you find are either academic in nature, and so bizarrely all of them tend to have terribly short, non-descriptive variable names and other issues, or they are written by someone who is mainly focused on explaining the concept and so isn’t trying to setup the code’s design for anything more robust.

So while I could just copy the code and see if it works, and then adjust accordingly, I prefer to make sure that I understand what I’m trying to do. Sometimes I can replace a data structure with another. For instance, I have a Point class that is basically meant to be an position represented by X, Y, and Z values, so there’s no reason to have separate floating point values for X and Y like in many examples because I could always use a Point.

Or rather than make a very long function with a bunch of random variables everywhere, I can isolate some of the calculations into functions.

And rather than assume that I’ll be rendering from the point of view of the player’s party, I could instead make it render from the point of view of an arbitrary location, which leaves the possibility of scripting scenes or following a different character or object.

But frankly, the lion’s share was finding out that I was setting up some camera vectors incorrectly, and so while I expected the rays would always hit a wall, somehow it was escaping out of the defined dungeon grid cells and and so my code was entering an infinite loop as a given ray was not able to hit a wall at all.

I stopped the infinite loop by ensuring that a request for a grid cell that wasn’t defined returned something that indicated its walls were considered “out of bounds” instead of no walls, so the rays would hit something, even if I don’t intend to render “out of bounds” walls.

But I was still figuring out why some of my rays were hitting the “out of bounds” walls instead of my actual walls when I got to the end of the week. At least I can say that half of them seem to hit actual walls, although I haven’t looked to see if those walls seem sensible.

I really hope I can make the time to get this work finished enough to render the walls. I can’t wait to maneuver through my dungeon.

And I really hope that my daughter can grow up and live a long and happy life.

Thanks for reading!

Want to learn when I release The Dungeon Under My House, or about future Freshly Squeezed games I am creating? Sign up for the GBGames Curiosities newsletter, and download the full color Player’s Guides to my existing and future games for free!

Categories
Game Design Game Development Geek / Technical

Freshly Squeezed Progress Report: Raycasting a Dungeon?

Last week, I reported that I was working slowly to build up the 2d-simulating-3d art and math to represent the dungeon for The Dungeon Under My House, my second Freshly Squeezed Entertainment project.

This past week I got a suggestion and decided to explore a different approach.

Meanwhile, there are mere hours left in my “reverse sale” for my leaf-raking business simulation strategy game Toytles: Leaf Raking. Soon it will revert to the regular price, so either get it now or get it later. Your choice, and thank you for your support either way. B-)

Sprint 10: Pre-production and initialization

Planned and incomplete:

  • Move player in dungeon view

Much like the previous week, I did not get to spend as much time on development as I would have liked. Between the Iowa legislature making life tougher for the most vulnerable, some home improvement projects, and my back hurting me potentially due to those home improvement projects, it’s been tough to make time to sit down.

A few weeks ago, one colleague suggested that I simply use an existing 3d-engine instead of trying to create a 2D tileset. Thanks for the suggestion, Ken, and I apologize that I will ignore this otherwise very sensible advice.

As I said last week about why I insist on ignoring this advice:

Because I’m stubborn, maybe. I wanted to try it, and now I’m in the middle of it.

I know 3D would make a lot of this work easier, but switching to 3D would mean needing to switch to an existing game engine, something I’m not ready to do because then it means abandoning my many years of code that I’ve built up. Maybe I’ll think about it if I am still trying to figure this dungeon rendering effort weeks from now.

But it’s fun to figure things out, and that’s part of the reason why I like doing it the hard way.

Well, in response to last week’s report, another colleague suggested that I look into making a simple raycaster.

Thanks, Joel Davis, aka joeld42.

I had originally looked up how to mimic the look and feel of 2D 1st person RPGs from the 80s and 90s, and I found Reddit posts and forum posts in which people basically said, “You COULD do it this very difficult and time-consuming way, OR you could use a 3D engine and fake the old look.”

And people would also throw in raycasting, much like how Wolfenstein 3D and Doom’s engines worked, but I didn’t pay much attention because I didn’t want to make a real-time 1st person game.

But Joel said “Doing it in 3d in your own engine, whether a raycaster, a simple SW renderer, or regular 3d with opengl or something, doesn’t need to be that hard, you can keep it simple” and followed up with “You should try it, it’s fun and super simple. I’d say it’s less work than the approach you describe in the blog post.”

He also sent a link to this neat tutorial and web demo: A First Person Engine in 265 Lines by Hunter Loftis

So I downloaded it, toyed with it, and changed some parameters and values to get a sense of how the code and math worked, and I also played with the demo, which impressed me even when I disabled the lightning and rain effects. It was fast and looked pretty good.

There are quite a few raycasting tutorials out there, some of which I read a long time ago, and some of which are new and I read this past week.

I particularly enjoyed Lode’s Computer Graphics Tutorial: Raycasting and the follow-up on rendering the floor and ceiling, which helped me triangulate an understanding of what Loftis was describing in the other tutorial linked above.

And I also loved reading about this voxel space demo.

What I liked was the idea that instead of needing to generate multiple images to represent a single wall or floor tile, I could have one image and let the raycasting engine handle making it look like it is being seen at an angle for me.

And what I especially liked was that the math and technique seemed straightforward enough to implement.

As I said above, I did not spend much time on development this week, but what I did do was prove to myself that I could modify my code to render the walls in vertical strips the way a raycaster would.

So here’s how my in-game hardcoded hallway demo looks when I have separate tiles for the back wall and the side walls:

The Dungeon Under My House - initial in-dungeon art

And here’s how it looked when I rendered the back wall and side walls using the same image but drawn with vertical slices:

The Dungeon Under My House - in-dungeon art using vertical stripes

Ignore the fact that I didn’t get the floor or ceilings in. I think you can hardly tell the difference between these two renderings. The second image isn’t raycasting. It’s hardcoded much like how the demo above is, in that I render the side walls until I hit the end of the hallway, then I draw a back wall.

Remember, though, that second screenshot shows me using only a single image for the wall, rather than separate images for the side walls which are a little clunky and awkward to create. I could easily throw in a different image and have a new wall tile that can be rendered in three ways without me needing to modify or create even more art.

Even if I don’t implement a raycaster, this technique of rendering vertical slices of an image looks good AND reduces my art-creation effort. It also means that my game download will be a lot smaller and take less time to load.

I could even get creative with both how it grabs portions of the source image and how it renders to the target location to perhaps create certain effects.

But I think I do want to implement the raycaster code. I want to be able to render walls seen from the sides, not just the direct hallway in front, and I want to be able to turn and have the code manage rotating in space with no extra effort.

And while I could use an existing engine and not need to implement any code to handle it at all, I don’t want to use an existing engine. I have my own code that I’ve been building up for years, and creating a raycaster using it seems like it will be quick, easy, and enjoyable enough. And being able to do things with my existing code is why I have existing code.

Thanks for reading!

Want to learn when I release The Dungeon Under My House, or about future Freshly Squeezed games I am creating? Sign up for the GBGames Curiosities newsletter, and download the full color Player’s Guides to my existing and future games for free!

Categories
Game Design Game Development Geek / Technical

Freshly Squeezed Progress Report: Dungeon Representation

In last week’s report, I talked about the math and art of drawing the dungeon areas for The Dungeon Under My House, my second Freshly Squeezed Entertainment project.

This past week I continued working on the dungeon representation.

Sprint 9: Pre-production and initialization

Planned and incomplete:

  • Move player in dungeon view

I was out of town and visiting with family, so I did not put in as much time as I could have, which meant not getting as much done as I was hoping to by the end of the week.

To create a simple dungeon map, I needed to finish creating the data structures to represent the dungeon. This work was the easy part.

I had a grid-based dungeon, so naturally grid cells would be the basic building block.

If I wanted to keep things simple, I could have had each cell represent either an empty block of hallway or a solid block of wall. Zero or one, and I’d be done. Maybe use different numbers to represent different types of walls or hallways.

But I wanted more flexibility. Each grid cell is made up of four walls, a ceiling, and a floor.

So instead of drawing the outside of a grid cell in the simple version, I would need to draw the insides of the grid cell.

I anticipate needing a companion tool to create the dungeon layout as this game develops, perhaps using something like Tiled, but for now, I just need to give myself a simple dungeon, so I hardcoded one.

Old games used 2D trying to simulate 3D because 3D wasn’t viable on the older computing power they were using. Today, the advice to make similar games is to use a 3D engine and try to replicate the 2D feel.

And this past week, I started to really get as sense of why that contemporary advice exists. Just to have a single dirt tile for the floor, I determined that there is no way to get around needing to create that same tile from different perspectives.

The Dungeon Under My House - floor tiles rendered to horizon

In this screenshot of my art mock-up in GIMP, the yellow dotted square can represent the player’s viewport. To create the left side floor tile, I had to extend the dimensions of the canvas left and right. Then, just to see how far it goes back to the horizon, I kept shrinking the new side tile by about two-thirds. There is a back wall that I placed as a representative for the player’s maximum visibility.

Many 1st person games show a dark dungeon with visibility extending only a few tiles ahead, which gives a great atmosphere but also has the practical benefit of limiting how much art needs to be created to represent it.

For me, I think I determined that I can scale the art in code and get the same effect, so I only need to draw the tiles that are in the nearest row. No need to create separate tiles farther away, because scaling will handle it for me.

But because I want areas of my game that might be well-lit and provide greater visibility, I need to create a lot more tiles that are seen from the side than I would if I followed the tradition, mainly because those tiles could be seen in the distance. So instead of maybe one or two tiles to the sides, it looks like I’ll need to create quite a few more.

And that’s just one tile! To break up the monotony, I will also want to create variations on that tile.

And I would still need the ceilings and the side-views of walls. Perhaps I can simplify the art needs by creating modular aspects of the floor, ceilings, and walls, so I can have one generic piece of art that gets covered by brick outlines, chunks of rock, smears of dirt, etc in different locations to give the appearance of a variety of art.

But I will work incrementally, and so for now I just want to render floor tiles. One tricky thing I needed to figure out was to figure out exactly which cells are being rendered in the first place. The player can be in an arbitrary location in the dungeon, and so “forward” is relative to the player’s orientation.

Basically, I would need to figure out which cells to render and where on the screen. A cell to the left of the player would need to render tiles that are in the correct perspective, which means knowing what perspective that cell should be in. Turning around would show that same tile in a different perspective, or not at all.

Again, 3D engines have solved these problems so that they are a non-issue, so why am I doing it this more difficult way?

Because I’m stubborn, maybe. I wanted to try it, and now I’m in the middle of it.

I know 3D would make a lot of this work easier, but switching to 3D would mean needing to switch to an existing game engine, something I’m not ready to do because then it means abandoning my many years of code that I’ve built up. Maybe I’ll think about it if I am still trying to figure this dungeon rendering effort weeks from now.

But it’s fun to figure things out, and that’s part of the reason why I like doing it the hard way.

Thanks for reading!

Want to learn when I release The Dungeon Under My House, or about future Freshly Squeezed games I am creating? Sign up for the GBGames Curiosities newsletter, and download the full color Player’s Guides to my existing and future games for free!

Categories
Game Design Game Development Geek / Technical

Freshly Squeezed Progress Report: Dungeon Art and Math

Last week, I reported that I was creating a house and basement, and I hinted at a location outside of the house in this Freshly Squeezed Entertainment project.

Since I officially announced that this project is called The Dungeon Under My House, I can now say that I’m building a dungeon. And yes, it will be under the house that I’ve created.

Sprint 8: Pre-production and initialization

Planned and complete:

  • Create dungeon view with ladder back to basement

Unplanned and incomplete:

  • Move player in dungeon view

The Dungeon Under My House is going to be a grid-based, 1st person role-playing game, and instead of working in 3D, I’m going to use 2D art simulating 3D much like games from the 80s and 90s.

Because I wanted to make things harder on myself apparently.

Unfortunately, I am not an artist by trade, and while my programmer art is decent enough for most of my purposes, I am already realizing that I have a lot more work than I initially thought.

In January, I made this sketch:

The Dungeon Under My House sketch

It was mainly to help me figure out what kind of art I would need to create.

Specifically, I wanted to have the ability to make each location in the grid look unique enough to be a mini-landmark. For instance, you might have a bunch of walls painted the same color in your home, but maybe the wall in your hallway has a pockmark, a nail hole, or even a drip of dried paint in a certain location that you would be able to recognize as belonging to that hallway’s wall.

Creating a single tile to be the floor wouldn’t get me there, and creating a handful of different tiles to add variety would only get me so far.

Instead, I want to create the floor out of a modular set of mini-tiles, so that I can mix and match. I could even render some of the mini-tiles at a slight angle to make them look like they are breaking up. Maybe it will work? I probably should do more mock-ups and tests.

But for now, I needed to render a single location: the spot right under your basement. It needs three walls, a floor, a ladder, and a ceiling. I’ll worry about mini-tiles in the future.

If you recall from a few weeks ago in Freshly Squeezed Progress Report: Laying Down the Groundwork, I was toying around with Gimp’s Uniform Transform Tool to see if I could get a good sense of how the art needs to be laid out to make it look like it is vanishing into the distance.

It looked…OK?

Using a perspective tool to see what the 9x9 grid of squares would look like as a floor

Well, now I needed to actually make something in game as opposed to mocked-up in an art program.

So I took a castle wall texture that I found on OpenGameArt, modified it slightly to give it a more sketched/cartoony look, and made a couple of skewed versions for the side walls. I made the ceiling a little shorter than the floor, mainly so that it wasn’t a boring perfectly centered horizon line.

And it looked fine except that things weren’t really lining up well when I coded something to render this art.

The Dungeon Under My House - initial in-dungeon art

It was really obvious when I started trying to render a long hallway as an experiment, and I could see gaps between the walls as well as the fact that the walls didn’t line up at the top and bottom.

The Dungeon Under My House - initial in-dungeon art

Basically, my math to figure out where to place the art wasn’t working, and it was breaking the illusion.

So I spent much of the last week figuring out the math for the placement of any particular wall segment based on the distance from the player’s viewpoint.

Skip ahead if you want to ignore the math.

The original wall art is 1024×1024. I created the side art at 256×1536. That is, the side wall is a quarter of the width and 1.5 times the height of the back wall.

With the back wall centered horizontally, that means that attaching the side walls on the left and right add another 50% of the width.

I want to be able to render the dungeon in an arbitrary viewport, something that could be potentially customized by the player. So I’m not hard-coding these dimensions, which is something I see in a lot of other games.

So, given an arbitrary viewport’s dimensions, I wanted the wall one tile away from you to be about 66% of the width and height of that viewport, and each time you see one more tile away it would be another 66% of the previous width and height.

The side walls would each take up about 16.67% of the viewport’s width, which totals up to about 33%. Intuitively, I had one-third for the side walls and two-thirds for the backwall, which should add up to three-thirds, or 100%, right?

And yet I was seeing vertical gaps where the tiles weren’t lining up horizontally. And it looked different depending on how the game’s window was shaped, since SDL2 was autoscaling much of what I was doing anyway. So sometimes there was a gap, and sometimes there wasn’t.

Was it rounding error? I’ve run into this kind of thing before in a previous project, when I discovered that the way I was rendering rectangular tiles for a game’s background meant that sometimes the rectangles had slightly different dimensions based on rounding errors. That is, a tile I expected to be 64×64 was sometimes 64×63. But I fixed that code years ago, and it wasn’t relevant here.

But the general concept seemed to be. 66% + 33% is actually only 99%, so maybe there was a 1% gap?

Eventually, I based the math on the actual relative dimensions of the art rather than the hypothetical numbers above. Plus, I used more precise numbers, like 0.666666667, which made things line up way better.

Plus, I found out that anti-aliasing introduced by the Uniform Transform Tool was producing slightly translucent pixels that meant my art itself had perceivable gaps, especially if I used a very bright color as a background.

So I remade some of the art and filled in all relevant translucent pixels, and it looked much better.

If you wanted to skip the math, you can continue reading here.

The Dungeon Under My House - initial in-dungeon art

There are still gaps, especially at certain distances, but I have plans to address it, especially as I render more than a single hallway of tiles.

For the ceiling and floor, I used a picture I took in 2015 of the side of a glass I had a strawberry smoothie in. I turned it grayscale, skewed it, and it looks like a dirt/stone floor enough for now.

Next up, I wanted to make it possible to move the player within the dungeon, and so I spent time creating a way to represent the dungeon layout in code and a way to create those grid cells. I’m still working on it, but the dungeon is slowly coming to life. It may look a bit monotonous now, but it’s still a life.

Thanks for reading!

Want to learn when I release The Dungeon Under My House, or about future Freshly Squeezed games I am creating? Sign up for the GBGames Curiosities newsletter, and download the full color Player’s Guides to my existing and future games for free!

Categories
Game Design Game Development Geek / Technical

Freshly Squeezed Progress Report: Your House View, the Basement, and Beyond

In last week’s report, I implemented a few character customization options and implemented basic saving and loading for my second Freshly Squeezed Entertainment project.

Since then I worked on a simple view of the player’s home.

Sprint 7: Pre-production and initialization

Planned and complete:

  • Show house layout

Unplanned and complete:

  • Create house view’s basement

Unplanned and incomplete:

  • Create _____ view with ladder back to basement

When it comes to planning my week, I decided that instead of choosing a bunch of features/tasks to work on, I would only pick one. If I finish it early, I can pull in more work.

One key part of the game is the player’s home. I want the house to be a place where the player can regroup, collect supplies, and have various characters interact, among other things.

But I also recognized that much of what I have planned really only makes sense as a way to support game play that doesn’t exist yet. So I wanted to get through this part quickly. I have some reference art for what I wanted the various rooms to look like, but for now, a simple color-coded box with a label seems to work well enough.

Simple room view

Then I rendered the rooms relative to each other so you can switch between the House View and an individual Room View. For now, entering and leaving a room is all you can do. It’s not much, but it is a building block to more interesting work later, and the game saves which room you were in, so I know that part works.

Simple house view

The basement is going to be an important location, if only because it is where to find the entrance to the main non-house area of the game. I managed to get much of the work here done, but because it reveals a bit too much too soon, I won’t say more now.

HOWEVER! I will be letting my newsletter subscribers know those details as I formally announce this game this week, so if you want to know before anyone else, please subscribe to the GBGames Curiosities newsletter by following the link below! Otherwise, you’ll have to wait for my next update.

Thanks for reading!

Want to learn when I release updates to Toytles: Leaf Raking, Toy Factory Fixer, or about future Freshly Squeezed games I am creating? Sign up for the GBGames Curiosities newsletter, and get the 19-page, full color PDF of the Toy Factory Fixer Player’s Guide for free!

Categories
Game Design Game Development Geek / Technical

Freshly Squeezed Progress Report: Player Character Customization and Persistence

Last week, I reported that I had started player customization for my second Freshly Squeezed Entertainment project by allowing the player to change their character’s name.

I continued the effort this week.

Sprint 6: Pre-production and initialization

Planned and complete:

  • Create save file
  • Create player character

Now that I can rename a character, I could save the game to persist that rename, which meant revisiting the save file work I had started. I changed the main menu to allow me to either start a new game with initialized default data or load an existing game so I can continue where I left off. More directly, it allowed me to test that saving and loading works while also giving me a way to reset and try again.

Freshly Squeezed Entertainment game #2's play menu screen

Next up was letting the player customize their character’s pronouns and their appearance.

Ultimately, I want the player to be able to put themselves into the game. I want more pronoun options, but for now and to get something quickly into the game, the player can choose between he/him/his, she/her/hers, and they/them/theirs. Scripts and dialogues will use those pronouns to know how to refer to you and your party members. I have to brush up on my grammar and language rules, specifically for possessive pronouns.

The most exciting part was getting to finally put some graphics into the game. I wanted the player character on the screen, especially when customizing, and so I experimented with one of my pencil and paper doodles, scanned it in, and created a digital form with highlights and shadows. Here’s a mock-up:

Player portrait demo

I like the hand-drawn look of it.

Creating a bunch of different face shapes and facial features for the player to choose from seemed a bit daunting, so I thought it might be easier if I made it very modular. I started with creating a handful of face shapes to choose from, as well as skin colors. Again, like with the pronouns, I want to provide more options, but this initial start lets me get a feel for how intuitive this selection process can be.

Face and skin color customization

Face and skin color customization

The simple facial features are just meant to make it clear that these are faces and not just weird shapes. I want to eventually put in eyes, ears, noses, mouths, hairstyles, and accessories, as well as bodies and clothing, so this customization feature will get revisited.

Even now, I have plans to replace these face shapes. I made them quickly to put together this menu to allow the player to choose between them, but I think I lost the hand-drawn look that I liked so much.

If you wanted to customize your character in a game, what would you want as an option?

Thanks for reading!

Want to learn when I release updates to Toytles: Leaf Raking, Toy Factory Fixer, or about future Freshly Squeezed games I am creating? Sign up for the GBGames Curiosities newsletter, and get the 19-page, full color PDF of the Toy Factory Fixer Player’s Guide for free!